


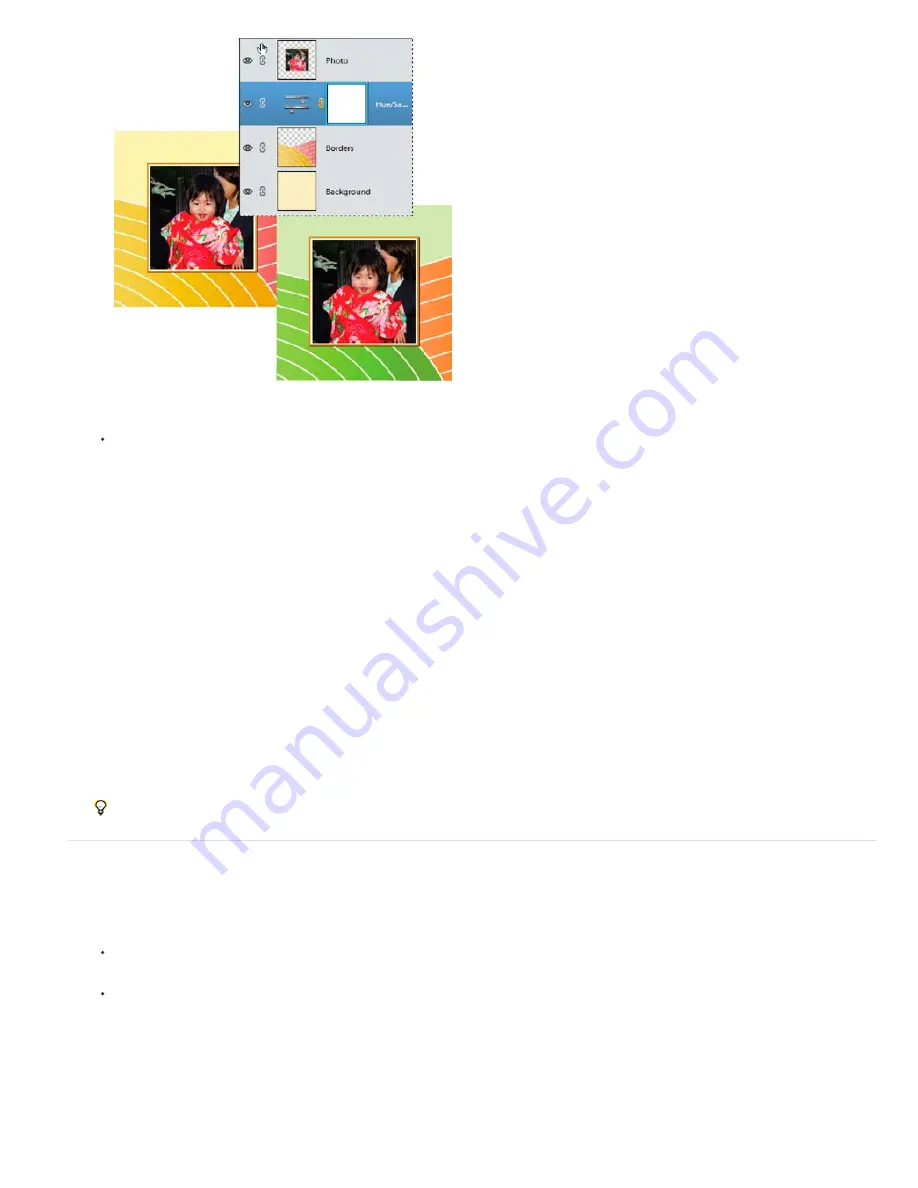
To the top
Original image, and image with Hue/Saturation adjustment applied. Only the layers under the adjustment layer are
affected.
To affect only one layer or several successive layers below the adjustment layer, choose Layer > New Adjustment
Layer > [adjustment type]. In the New Layer dialog box, select Use Previous Layer to Create Clipping Mask, and then
click OK.
Levels
Corrects tonal values in the image.
Brightness/Contrast
Lightens or darkens the image.
Hue/Saturation
Adjusts colors in the image.
Gradient Map
Maps pixels to the color in the selected gradient.
Photo Filter
Adjusts the color balance and color temperature of the image.
Invert
Produces a photo negative effect by creating a negative based on the brightness values of the image.
Threshold
Renders the image in monochrome with no gray, so that you can locate the lightest and darkest areas.
Posterize
Gives a flat, poster-like appearance to a photo by reducing the number of brightness values (levels) in the image,
thus reducing the number of colors.
4. In the dialog box, specify options and click OK.
Selecting Use Previous Layer to Create Clipping Mask in step 3, groups the adjustment layer with the layer immediately below
it and the effect is confined to the group.
5. To add more layers to the group, press Alt (Option in Mac OS) and position the pointer over the line dividing the bottom most
layer in the group from the layer below it. Click when the pointer changes to two overlapping circles.
Applying a correction using the Smart Brush tool or the Detail Smart Brush tool automatically creates an adjustment layer.
Create fill layers
1. In the Layers panel, select the layer above which the fill layer should be.
2. To confine the effects of the fill layer to a selected area, make a selection.
3. Do one of the following:
Click the Create New Fill or Adjustment Layer button in the Layers panel, and choose the fill type you want to create. (The
first three options listed in the panel are fill layers, the others are adjustment layers.)
Choose Layer > New Fill Layer > [fill type]. In the New Layer dialog box, click OK.
Solid Color
Creates a layer filled with a solid color chosen from the Color Picker.
Gradient
Creates a layer filled with a gradient. You can choose a predefined gradient from the Gradient menu. To edit the
gradient in the Gradient Editor, click the color gradient. You can drag within the image window to move the center of the
gradient.
You can also specify the shape of the gradient (Style) and the angle at which it is applied (Angle). Select Reverse to flip its
orientation, Dither to reduce banding, and Align With Layer to use the layer’s bounding box to calculate the gradient fill.
Содержание 29180155 - Photoshop Elements 4.0
Страница 1: ...ADOBE PHOTOSHOP ELEMENTS Help and tutorials...
Страница 2: ...Getting started tutorials...
Страница 6: ...What s new...
Страница 13: ...Workspace and workflows...
Страница 25: ...Legal Notices Online Privacy Policy...
Страница 53: ...Importing...
Страница 56: ...File management...
Страница 69: ...Image adjustments...
Страница 105: ...Legal Notices Online Privacy Policy...
Страница 112: ...Twitter and Facebook posts are not covered under the terms of Creative Commons Legal Notices Online Privacy Policy...
Страница 154: ...Legal Notices Online Privacy Policy...
Страница 159: ...Selecting...
Страница 175: ...Legal Notices Online Privacy Policy...
Страница 181: ...Color...
Страница 191: ...Twitter and Facebook posts are not covered under the terms of Creative Commons Legal Notices Online Privacy Policy...
Страница 213: ...More Help topics Legal Notices Online Privacy Policy...
Страница 220: ...Drawing and painting...
Страница 229: ...More Help topics Legal Notices Online Privacy Policy...
Страница 244: ...More Help topics Legal Notices Online Privacy Policy...
Страница 258: ...Effects and filters...
Страница 311: ...Legal Notices Online Privacy Policy...
Страница 325: ...Text and shapes...
Страница 340: ...More Help topics Legal Notices Online Privacy Policy...
Страница 341: ...Layers...
Страница 363: ...Printing and exporting...
Страница 366: ...Legal Notices Online Privacy Policy...
Страница 374: ...Photo projects...
Страница 392: ...Web graphics...


