


Chapter 19 Certificates
P-2602HWLNI User’s Guide
319
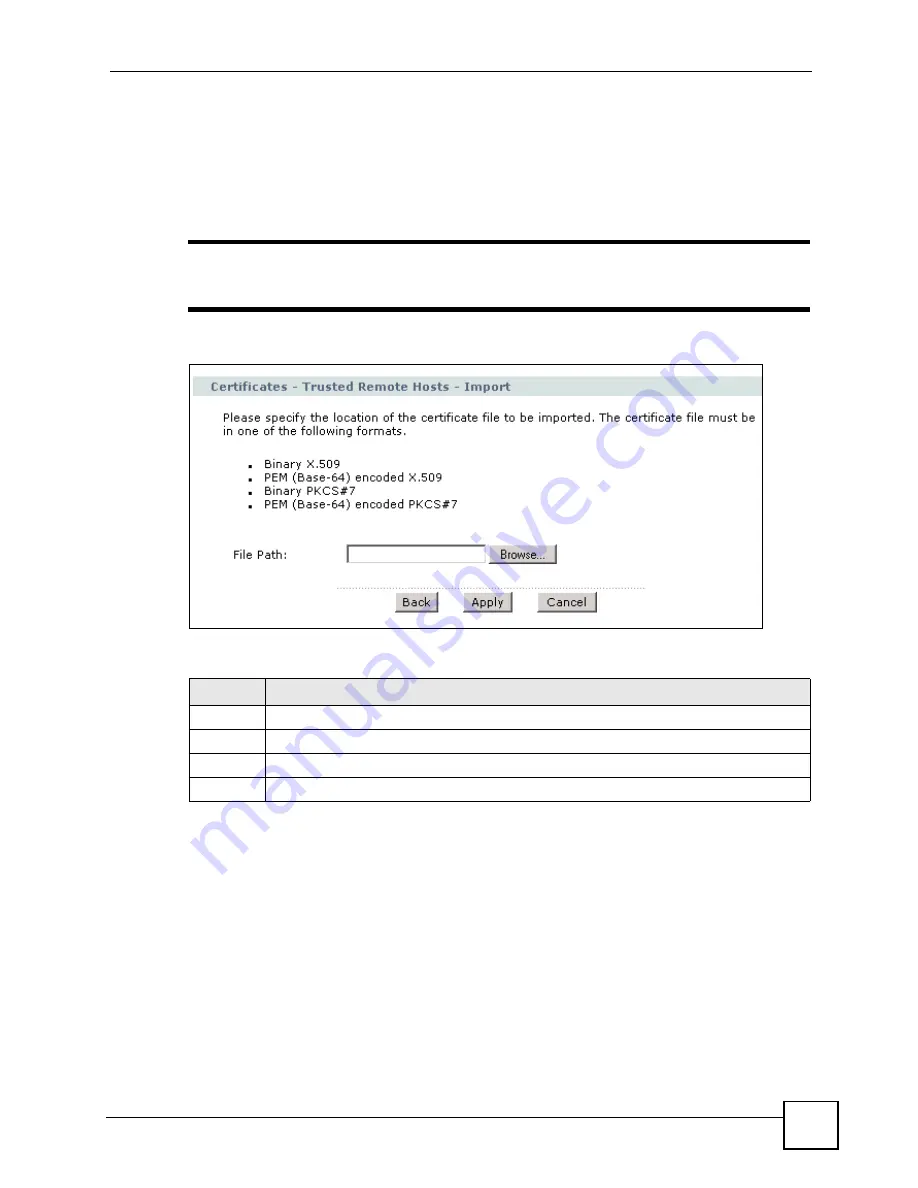
19.13 Trusted Remote Hosts Import
Click
Security
>
Certificates
>
Trusted Remote Hosts
to open the
Trusted Remote Hosts
screen and then click
Import
to open the
Trusted Remote Host Import
screen. Follow the
instructions in this screen to save a trusted host’s certificate to the ZyXEL Device.
"
The trusted remote host certificate must be a self-signed certificate; and you
must remove any spaces from its filename before you can import it.
Figure 180
Trusted Remote Host Import
The following table describes the labels in this screen.
19.14 Trusted Remote Host Certificate Details
Click
Security
>
Certificates
>
Trusted Remote Hosts
to open the
Trusted Remote Hosts
screen. Click the details icon
to open the
Trusted Remote Host Details
screen. Use this
screen to view in-depth information about the trusted remote host’s certificate and/or change
the certificate’s name.
Table 124
Trusted Remote Host Import
LABEL
DESCRIPTION
File Path
Type in the location of the file you want to upload in this field or click
Browse
to find it.
Browse Click
Browse
to find the certificate file you want to upload.
Apply
Click
Apply
to save the certificate on the ZyXEL Device.
Cancel
Click
Cancel
to quit and return to the
Trusted Remote Hosts
screen.
Summary of Contents for P-2602HWLNI
Page 2: ......
Page 7: ...Safety Warnings P 2602HWLNI User s Guide 7...
Page 8: ...Safety Warnings P 2602HWLNI User s Guide 8...
Page 24: ...Table of Contents P 2602HWLNI User s Guide 24...
Page 32: ...List of Figures P 2602HWLNI User s Guide 32...
Page 38: ...List of Tables P 2602HWLNI User s Guide 38...
Page 39: ...39 PART I Introduction Introducing the ZyXEL Device 41 Introducing the Web Configurator 49...
Page 40: ...40...
Page 60: ...Chapter 2 Introducing the Web Configurator P 2602HWLNI User s Guide 60...
Page 62: ...62...
Page 86: ...Chapter 5 Bandwidth Management Wizard P 2602HWLNI User s Guide 86...
Page 98: ...Chapter 6 Status Screens P 2602HWLNI User s Guide 98...
Page 100: ...100...
Page 154: ...Chapter 9 Wireless LAN P 2602HWLNI User s Guide 154...
Page 166: ...Chapter 10 Network Address Translation NAT Screens P 2602HWLNI User s Guide 166...
Page 167: ...167 PART IV VoIP Voice 169 VoIP Trunking 211 Phone Usage 227...
Page 168: ...168...
Page 226: ...Chapter 12 VoIP Trunking P 2602HWLNI User s Guide 226...
Page 230: ...Chapter 13 Phone Usage P 2602HWLNI User s Guide 230...
Page 232: ...232...
Page 264: ...Chapter 15 Firewall Configuration P 2602HWLNI User s Guide 264...
Page 268: ...Chapter 16 Content Filtering P 2602HWLNI User s Guide 268...
Page 274: ...Chapter 17 Introduction to IPSec P 2602HWLNI User s Guide 274...
Page 309: ...Chapter 19 Certificates P 2602HWLNI User s Guide 309 Figure 173 My Certificate Details...
Page 320: ...Chapter 19 Certificates P 2602HWLNI User s Guide 320 Figure 181 Trusted Remote Host Details...
Page 326: ...326...
Page 330: ...Chapter 20 Static Route P 2602HWLNI User s Guide 330...
Page 338: ...Chapter 21 Bandwidth Management P 2602HWLNI User s Guide 338...
Page 342: ...Chapter 22 Dynamic DNS Setup P 2602HWLNI User s Guide 342...
Page 360: ...Chapter 23 Remote Management Configuration P 2602HWLNI User s Guide 360...
Page 372: ...Chapter 24 Universal Plug and Play UPnP P 2602HWLNI User s Guide 372...
Page 374: ...374...
Page 380: ...Chapter 25 System P 2602HWLNI User s Guide 380...
Page 406: ...Chapter 28 Troubleshooting P 2602HWLNI User s Guide 406...
Page 422: ...Chapter 30 Diagnostic P 2602HWLNI User s Guide 422...
Page 432: ...Chapter 31 Product Specifications P 2602HWLNI User s Guide 432...
Page 434: ...434...
Page 446: ...Appendix A Setting up Your Computer s IP Address P 2602HWLNI User s Guide 446...
Page 482: ...Appendix F Legal Information P 2602HWLNI User s Guide 482...
Page 488: ...Appendix G Customer Support P 2602HWLNI User s Guide 488...