C-28
WorkCentre Pro 555/575
6.
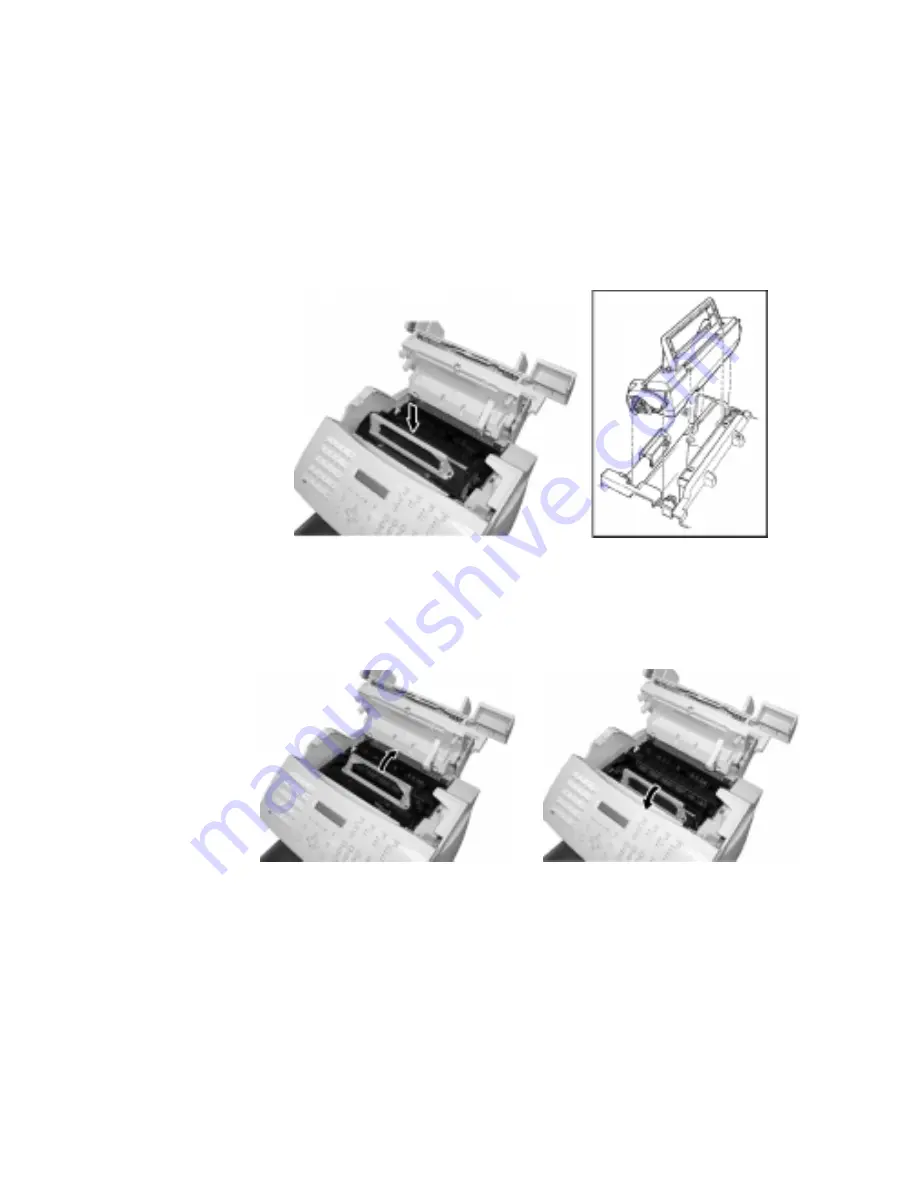
Holding onto the Toner Cartridge’s handle, lower it into the
machine. Make sure that the four pins (two on each side) fit into
the grooves inside the machine.
Color coordinated “2” labels have been affixed to the Toner
Cartridge and to the inside of the machine. Install the Toner
Cartridge by aligning these labels.
The cartridge will click into place when it is completely installed.
14
15
16
Summary of Contents for WorkCentre Pro 575
Page 1: ...XEROX WorkCentre Pro 555 575 Advanced Features Guide 708P84302...
Page 18: ...Introduction 1 6 WorkCentre Pro 555 575...
Page 22: ...Programming the Machine 2 4 WorkCentre Pro 555 575 Menu Flow Map...
Page 23: ...Programming the Machine WorkCentre Pro 555 575 2 5...
Page 24: ...Programming the Machine 2 6 WorkCentre Pro 555 575...
Page 92: ...Receiving Documents 3 16 WorkCentre Pro 555 575...
Page 104: ...Dialing Methods 4 12 WorkCentre Pro 555 575...
Page 144: ...Cancelling Jobs 6 6 WorkCentre Pro 555 575...
Page 158: ...Polling 7 14 WorkCentre Pro 555 575...
Page 178: ...Mailbox Communications 8 20 WorkCentre Pro 555 575...
Page 202: ...Reports 9 24 WorkCentre Pro 555 575...
Page 206: ...Copying Documents 10 4 WorkCentre Pro 555 575...
Page 244: ...Troubleshooting 12 12 WorkCentre Pro 555 575...
Page 255: ...WorkCentre Pro 555 575 A 11 10 Replace the Paper Tray Document Output Tray and Bypass Tray...
Page 256: ...A 12 WorkCentre Pro 555 575...
Page 294: ...C 30 WorkCentre Pro 555 575...
Page 298: ...D 4 WorkCentre Pro 555 575...


