WebEye E10/E104
WebEye E10/E104
User’s Guide
32
2. Configuring Administrator’s Condition at Homepage
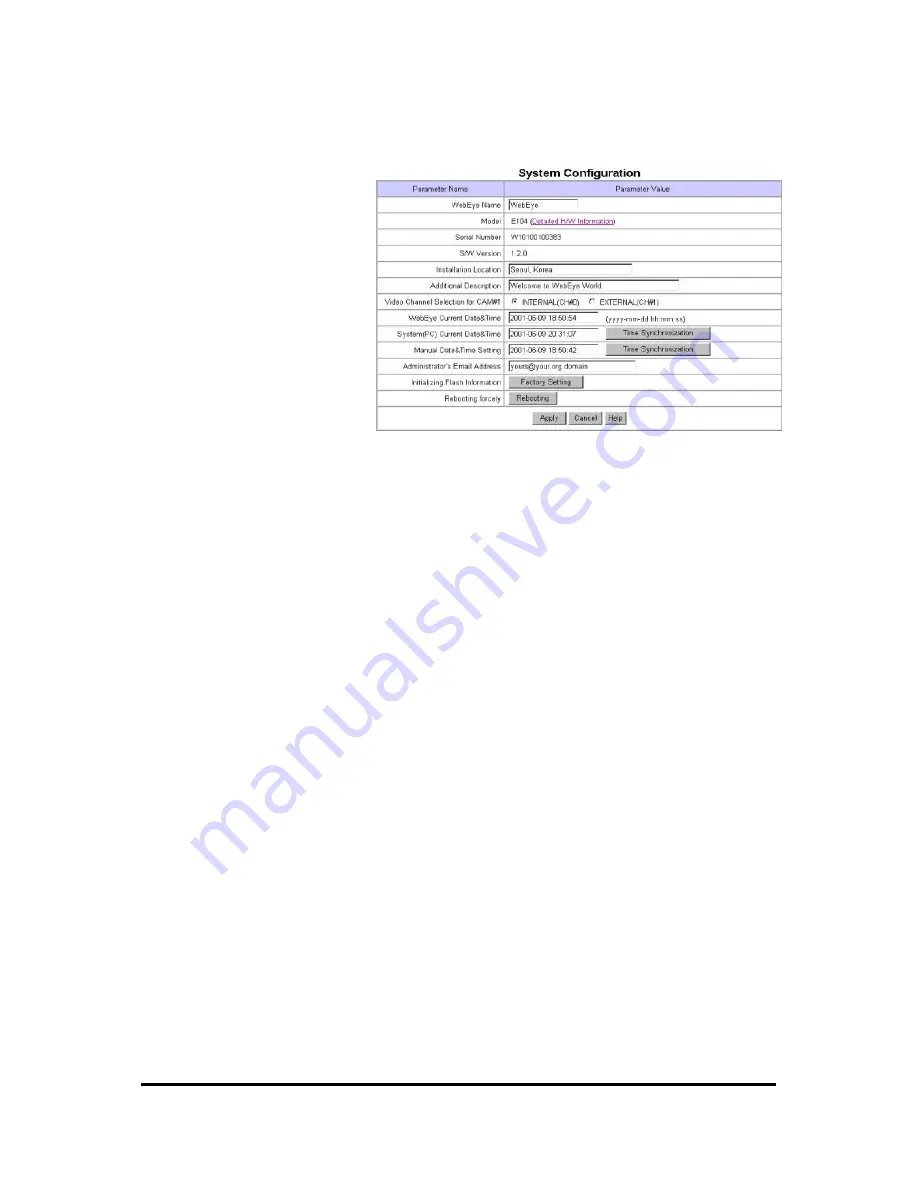
1) System Configuration
This page is to set name, date &
time, location, and description of
one’s WebEye. Model, serial
number and software version
appear automatically.
(1) WebEye Name
The name is to be used to register
the WebEye on a certain server, if
you use dynamic IP address.
Therefore it is very important to
set a proper name for user to find
the WebEye in the dynamic IP
registration list. (For detailed information, refer to ‘Dynamic IP Registration Service for ISDN,
xDSL User ’)
(2) Model
By clicking ‘Detailed H/W Information’, you may view detailed hardware information such as
maximum numbers of channel, serial port, digital input, digital output, etc. The model name is
marked automatically.
(3) Video Channel Selection for CAM#1
Administrator may decide if one uses external CCD camera connecting to the port of ‘Ch1’ in the
rear of WebEye E104 or uses self-contained CCD module of WebEye E104. Please keep in mind
that this menu is only for the first port in the rear of WebEye with name ‘ CH1’. With WebEye E10,
‘Video Channel Selection for CAM#1’ is not activated. Because ‘CH#0(Internal)’ is fixed to show
video from an inner CCD module and ‘CH#1(External)’ is fixed to show video from an external
CCD camera.
(4) Installation Location & Additional Description
The information is shown in the real time image viewer page as well as in a dynamic IP registration
list.
(5) Date & Time
There are three date & time menus. In ‘WebEye Current Date & Time’ panel, the date and time,
which is set in WebEye, appears. In ‘System (PC) Current Date & Time’ panel, the same date and
time as is set in user’s PC appears. And administrator may set one’s system(PC) ’s date and time into
WebEye by clicking ‘Time Synchronization’ button. In ‘Manual Date & Time’ panel, user may set
date and time. And administrator also synchronizes manually set date and time with ‘WebEye
Current Date & Time’ by clicking ‘Time Synchronization’ button.


