Test Prints
Once the Printhead/Wax system is primed, it is recommended that
some test printing be preformed. A test pattern is embedded in the
firmware that will fire all 31 nozzles. Product detect and Printhead
timing pulses are still required to perform a test print.
1. To perform a test print without using an encoder, set following
parameters to the values indicated.
•
WIDTH
20
•
BOLD
2
•
ENCODER N
•
DELAY
500
2. Set Switch #4 of SW2 of the CPU PCB to the DOWN position.
3. Select TE command on hand held terminal. Do not press
ENTER after inputting TE.
4. Pass a sample card past the Printhead after triggering the
photocell. Repeat process until you have a feel for the proper
speed to pass the sample card.
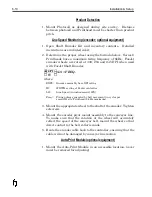
5. Test pattern print will look similar to figure 6-8.
6. Once you have determined that all nozzles are firing properly,
reset parameters and switches to proper application
configuration.
7. Monitor print operations until WAX LOW is detected, then
follow Wax Refill procedures outlined in Service section.
6-20
Installation & Setup
Figure 6-8
Summary of Contents for 6100
Page 8: ...This page intentionally left blank...
Page 18: ...2 8 Application Design This page intentionally left blank...
Page 21: ...Dimensions Controller Application Design 2 11...
Page 22: ...Integrated Printhead Wax System 2 12 Application Design...
Page 55: ...Command Definitions 5 21...
Page 56: ...5 22 Command Definitions This page intentionally left blank...
Page 70: ...6 14 Installation Setup Figure 6 6...
Page 87: ...7 8 Service Figure 7 1...
Page 89: ...7 10 Service Figure 7 2...
Page 95: ...7 16 Service Figure 7 3...
Page 97: ...7 18 Service This page intentionally left blank...
Page 115: ...8 18 Removal Replacement Procedures Figure 8 7...
Page 125: ...8 28 Removal Replacement Procedures This page intentionally left blank...


