Waters Xevo TQ MS Operator And  Maintenance Manual Download Page 64

4-16

Maintenance Procedures


Required materials

Chemical-resistant, powder-free gloves

To empty the nitrogen exhaust trap bottle

1. In the Instrument Console, click Stop Flow 

 to stop the LC flow.

2. Pull the source enclosure release (located at the bottom, right-hand side) 

outwards, and swing open the enclosure.

3. Unscrew and remove the nitrogen exhaust trap bottle from the cap and 

associated fittings.

4. Dispose of the waste liquid in accordance with local environmental 

regulations.

5. Fit and tighten the nitrogen exhaust trap bottle to the cap.

6. Secure the nitrogen exhaust trap bottle in the upright position.

7. Close the source enclosure.

Tip:

 An automatic leak test will now be performed.

8. In the Instrument Console, click Start Flow 

 to start the LC flow.
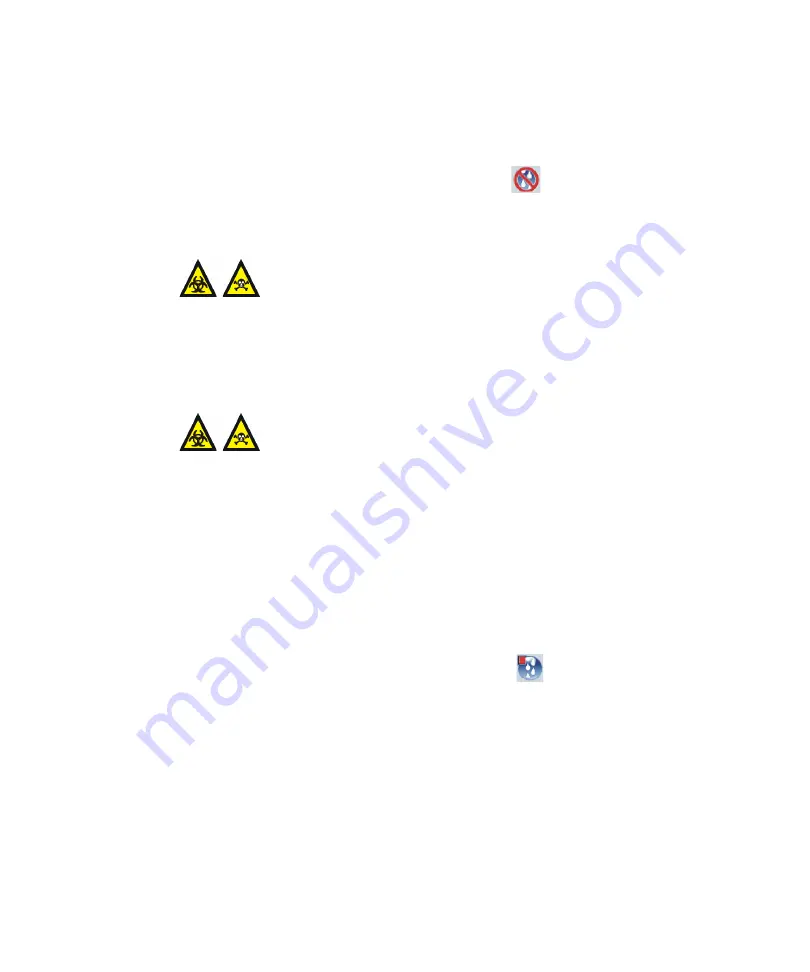
Warning: 

The waste liquid in the nitrogen exhaust trap 

bottle comprises ACQUITY UPLC solvents and analytes. 

Always wear chemical-resistant, powder-free gloves while 

handling the nitrogen exhaust trap bottle.

Warning: 

The waste liquid can be contaminated with 

biohazardous and/or toxic materials. Dispose of it according 

to local environmental regulations.

Summary of Contents for Xevo TQ MS

Page 1: ...Waters Xevo TQ MS Operator s Overview and Maintenance Guide IVD Revision A Copyright Waters Corporation 2010 All rights reserved...

Page 2: ...n be liable for incidental or consequential damages in connection with or arising from its use Trademarks ACQUITY ACQUITY UPLC Connections Insight UltraPerformance LC and Waters are registered tradema...

Page 3: ...p methods follow the Protocol for the Adoption of Analytical Methods in the Clinical Chemistry Laboratory American Journal of Medical Technology 44 1 pages 30 37 1978 This protocol addresses good oper...

Page 4: ...solvent if the nitrogen supply fails Warning To confirm the integrity of the source exhaust system renew the source O rings at intervals not exceeding one year To avoid chemical degradation of the sou...

Page 5: ...hazard Xevo TQ MS high temperature hazard Warning To avoid burn injuries do not touch the source ion block assembly with your hand when operating or servicing the instrument TP03127 TQ MS TQ MS Source...

Page 6: ...vel of residual contamination permissible Management must also prescribe the method of decontamination to be used and the appropriate protection for personnel undertaking the decontamination process Y...

Page 7: ...used for general in vitro diagnostic applications However only professionally trained and qualified laboratory personnel can use the instrument for those purposes Symbol Definition Manufacturer Author...

Page 8: ...fall within an acceptable range and evaluate precision from day to day and run to run Data collected when QC samples are out of range might not be valid Do not report these data until you are certain...

Page 9: ...tentionally generated and or used conductively coupled radio frequency energy that is necessary for the internal functioning of the equipment Class A products are suitable for use in commercial that i...

Page 10: ...x...

Page 11: ...ty control viii EC authorized representative information ix ISM classification ix ISM Classification ISM Group 1 Class A ix 1 Waters Xevo TQ MS Overview 1 1 Waters Xevo TQ MS 1 2 ACQUITY Xevo TQ MS UP...

Page 12: ...ng the mass spectrometer 2 2 Verifying the instrument s state of readiness 2 4 Monitoring the mass spectrometer LEDs 2 4 Tuning and calibration information 2 4 Running the mass spectrometer at high fl...

Page 13: ...ust trap bottle 4 15 Inspecting the Varian roughing pump oil level 4 17 Adding oil to the Varian roughing pump 4 18 Replacing the Varian roughing pump oil and oil mist filter 4 20 Emptying the roughin...

Page 14: ...exapole assembly 4 55 Fitting the hexapole assembly PEEK ion block support and ion block assembly to the source assembly 4 57 Replacing the ESI probe tip and gasket 4 59 Removing the ESI probe tip and...

Page 15: ...g and vacuum connections C 2 Connecting the Varian oil filled roughing pump C 3 Making the electrical connections to the Varian oil filled roughing pump C 7 Connecting the Edwards oil free roughing pu...

Page 16: ...vi Table of Contents Connecting to the electricity source C 28 D Plumbing the IntelliStart Fluidics system D 1 Preventing contamination D 2 Plumbing schematic D 2 Pipe specifications D 3 Index Index 1...

Page 17: ...controls and connections for gas and plumbing Contents Topic Page Waters Xevo TQ MS 1 2 Ionization techniques and source probes 1 6 IntelliStart Fluidics system 1 7 Ion optics 1 9 MS operating modes...

Page 18: ...rospray ionization ESI source For mass spectrometer specifications see the Waters Xevo TQ MS Site Preparation Guide Waters Xevo TQ MS IntelliStart technology IntelliStart technology monitors LC MS MS...

Page 19: ...e Help for further details on IntelliStart technology ACQUITY Xevo TQ MS UPLC MS systems The Waters Xevo TQ MS is compatible with the ACQUITY UPLC systems if you are not using an ACQUITY UPLC system r...

Page 20: ...ters Alliance 2795 separations module Waters 2998 PDA detector Waters 2487 UV detector Waters 1525 binary gradient pump 2777 autosampler Spark Holland Symbiosis Sample organizer optional Solvent tray...

Page 21: ...and mass calibrate the mass spectrometer Running samples Monitoring the run Acquiring data Processing data Reviewing data Printing data See the MassLynx 4 1 user documentation and online Help for more...

Page 22: ...to the eluent as it emerges from a nebulizer The droplets that compose the resultant aerosol undergo a reduction in size solvent evaporation As solvent continues to evaporate the charge density increa...

Page 23: ...mL for instrument setup and calibration Use low volume vials 1 5 mL to infuse smaller volumes See Installing the reservoir bottles on page 2 5 Tip The reservoirs can also deliver sample through direct...

Page 24: ...xtinguish the LEDs for light sensitive samples Recommendation Use reservoir A for the calibrant solution reservoir B for tuning compounds and reservoir C for analyte optimization solution System opera...

Page 25: ...to charge ratio m z 4 The mass separated ions pass into the collision cell T Wave ScanWave where they undergo collision induced dissociation CID or pass to the second quadrupole Any fragment ions can...

Page 26: ...ing SIR mode for quantitation when you cannot find a suitable fragment ion to perform a more specific multiple reaction monitoring MRM analysis See MS MS operating modes on page 1 11 Note In SIR and M...

Page 27: ...erating mode MS1 Collision cell MS2 Product daughter ion spectrum Static at precursor mass Pass all masses Scanning Precursor parent ion spectrum Scanning Static at product mass MRM Static at precurso...

Page 28: ...roduct ion mode Typical applications You typically use product ion mode for the following applications Method development for MRM screening studies Identifying product ions for use in MRM transitions...

Page 29: ...elective MS MS equivalent of SIR Because both MS1 and MS2 are static greater dwell time on the ions of interest is possible and so the sensitivity achieved is better compared with scanning mode MS MS...

Page 30: ...s to see whether that precursor loses a fragment of a certain mass If it does the loss registers at the detector In constant neutral loss mode the spectrum shows the masses of all precursors that actu...

Page 31: ...tects about 1 5 mL of accumulated leaked liquid in its surrounding reservoir At the same time the Instrument Console displays an error message alerting you that a leak has developed See Waters ACQUITY...

Page 32: ...vices Mass spectrometer rear panel TP03118 Auxiliary 10MB 100MB Activity External Connections 2 10 1 External Connections 1 10 1 LA N EPC Com Port Video Output Service Bus 1 2 3 4 5 6 7 8 9 10 Event I...

Page 33: ...start and shut down the mass spectrometer Contents Topic Page Starting the mass spectrometer 2 2 Preparing the IntelliStart Fluidics system 2 5 Rebooting the mass spectrometer 2 8 Leaving the mass spe...

Page 34: ...mass spectrometer 1 On the rear panel ensure the nitrogen supply is connected to the instrument s nitrogen inlet connection see the figure on page 1 16 Requirement The nitrogen must be dry and oil fre...

Page 35: ...and the mass spectrometer s Operate LED remain off 6 Start the MassLynx software and monitor the Instrument Console for messages and LED indications 7 Click IntelliStart in the MassLynx main window s...

Page 36: ...o the top left hand side of the mass spectrometer s front panel indicates when the mass spectrometer is powered on or powered off Operate LED The Operate LED on the right hand side of the power LED in...

Page 37: ...e liquid waste line on page C 19 Installing the reservoir bottles Use standard reservoir bottles 30 mL for instrument setup and calibration Use the Low volume Adaptor Kit included to infuse smaller vo...

Page 38: ...e the reservoir bottle caps 2 Screw the reservoir bottles onto the mass spectrometer as shown below Warning The reservoir bottles can be contaminated with biohazardous and or toxic materials Always we...

Page 39: ...place a solution bottle purge the infusion pump with the solution that you are going to use next See the mass spectrometer s online Help for details Tip Depending on the solutions used the instrument...

Page 40: ...ese conditions applies The MassLynx software fails to initialize Immediately following a software upgrade To reboot the mass spectrometer 1 Open the mass spectrometer s front left hand door 2 Insert a...

Page 41: ...the mass spectrometer in Standby mode see the online Help for details Emergency shutdown of the mass spectrometer To shut down the mass spectrometer in an emergency 1 Operate the power button on the f...

Page 42: ...2 10 Preparing the Mass Spectrometer for Operation...

Page 43: ...3 1 3 Preparing the ESI Source This chapter describes how to prepare the mass spectrometer for use Contents Topic Page ESI mode 3 2...

Page 44: ...ng the instrument for working on the source on page 4 7 2 Remove the protective sleeve if fitted from the ESI probe tip Warning The LC system connections ESI probe and source can be contaminated with...

Page 45: ...efully slide the ESI probe into the hole in the probe adjuster assembly ensuring that the probe location dowel aligns with the location hole of the probe adjuster assembly TP03129 Location hole of the...

Page 46: ...to the ESI probe Recommendation To reduce peak broadening use 0 004 inch ID tubing for sample flow rates 1 2 mL min use 0 005 inch ID tubing for sample flow rates 1 2 mL min Caution To avoid nitrogen...

Page 47: ...probe Doing so minimizes delays and dispersion Tubing connection between the diverter valve and the ESI probe Tip The other plumbing connections are omitted for clarity 8 Close the access door Cautio...

Page 48: ...w the probe locking ring 5 Carefully remove the ESI probe from the probe adjuster assembly 6 If available fit the protective sleeve to the ESI probe tip Warning The LC system connections ESI probe and...

Page 49: ...urce enclosure 4 8 Operating the source isolation valve 4 11 Removing O rings and seals 4 14 Cleaning the instrument case 4 15 Emptying the nitrogen exhaust trap bottle 4 15 Inspecting the Varian roug...

Page 50: ...4 2 Maintenance Procedures Replacing the source assembly seals 4 75 Replacing the air filter 4 79 Contents Continued Topic Page...

Page 51: ...p oil and oil mist filter Annually See page 4 20 Clean the source components When they are visibly fouled the background or high peak contaminants are unacceptably high or sensitivity decreases to una...

Page 52: ...ails see the Waters Quality Parts Locator on the Waters Web site s Services Support page Replace the oil free scroll pump seals Annually See Edwards document XDS35i Instruction Manual A730 01 880 Repl...

Page 53: ...quest to Waters customer support As an option Remote Desktop is a real time collaboration tool a service that controls two way connection with the ACQUITY UPLC system by enabling the Connections INSIG...

Page 54: ...solvents used see the Material Safety Data Sheets for the solvents in use Warning To avoid electric shock do not remove the instrument s panels There are no user serviceable items inside the instrume...

Page 55: ...e Instrument Console click Stop Flow to stop the LC flow or if column flow is required divert the LC flow to waste as follows a In the Instrument Console system tree expand Xevo TQ MS Detector Interac...

Page 56: ...I probe on page 3 6 3 Slide open the instrument s source interface door see the figure on page 1 4 4 Disconnect the probe adjuster and options cables from the instrument s connectors 5 Pull the source...

Page 57: ...e instrument Required material Chemical resistant powder free gloves To fit the source enclosure 1 Using both hands fit the source enclosure to the two supporting studs on the source adaptor housing W...

Page 58: ...10 Maintenance Procedures 2 Close the source enclosure 3 Connect the probe adjuster and options cables as required to the instrument s connectors 4 Slide closed the instrument s source interface door...

Page 59: ...4 7 2 Pull the source enclosure release located at the bottom right hand side outwards and swing open the enclosure Warning The source components can be contaminated with biohazardous and or toxic mat...

Page 60: ...4 12 Maintenance Procedures 3 Close the source isolation valve by moving its handle counterclockwise to the vertical position Isolation valve handle in closed position...

Page 61: ...zontal position 2 Close the source enclosure Warning The source components can be contaminated with biohazardous and or toxic materials Always wear chemical resistant powder free gloves while performi...

Page 62: ...f tool 1 to impale the O ring or seal 2 Pull the O ring or seal from its groove if necessary use tool 2 as an aid 3 Dispose of the O ring or seal in accordance with local environmental regulations Cau...

Page 63: ...rap bottle Inspect the nitrogen exhaust trap bottle in the instrument s exhaust line daily and empty it before it is more than approximately 10 full Nitrogen exhaust trap bottle Caution Do not use abr...

Page 64: ...environmental regulations 5 Fit and tighten the nitrogen exhaust trap bottle to the cap 6 Secure the nitrogen exhaust trap bottle in the upright position 7 Close the source enclosure Tip An automatic...

Page 65: ...level at weekly intervals with the pump running the oil level is typically at approximately 30 to 60 of the maximum oil level This corresponds to approximately the maximum oil level when the pump is...

Page 66: ...l level is found to be low you must add oil to the roughing pump See Inspecting the Varian roughing pump oil level on page 4 17 Varian roughing pump Required materials Chemical resistant powder free g...

Page 67: ...ps After you add oil to the pump the following situations can occur The oil level drops slightly during the first month of operation The oil changes color darkens over time When the pump approaches op...

Page 68: ...ectrometer s online Help for details 2 Allow the roughing pump to cool 3 Place the container for capturing the used oil under the pump s drain plug see the figure on page 4 18 4 Unscrew and remove the...

Page 69: ...w oil mist filter To replace the oil mist filter 1 Use the 3 mm Allen wrench to remove the 4 screws securing the oil mist canister cover to the oil mist canister Warning The roughing pump oil can be c...

Page 70: ...y when installing it in the canister 6 Ensure that the O ring on the oil mist canister cover is correctly seated 7 Center the spring on top of the oil mist filter 8 Fit the spring over the collar on t...

Page 71: ...sed torque does not improve the plug seal it only makes the plug difficult to remove later 3 Using the funnel pour 1 L of Varian GP45 oil into the oil filler aperture Tip The oil level may be above th...

Page 72: ...operation The oil changes color darkens over time After running the pump for 12 to 48 hours a few drops of oil sometimes appear near the filler plug Excess oil around the lip of the filler plug flows...

Page 73: ...on page 4 26 If cleaning the sample cone and cone gas nozzles fails to increase signal sensitivity also clean the extraction cone See Cleaning the extraction cone on page 4 35 If cleaning the extracti...

Page 74: ...se the source isolation valve before starting a maintenance procedure on page 4 11 Warning The source components can be contaminated with biohazardous and or toxic materials Always wear chemical resis...

Page 75: ...oving the handle from the vertical to the horizontal position 3 Slide the sampling cone assembly out of the ion block assembly Caution Do not open the isolation valve at any time when the sampling con...

Page 76: ...tool To disassemble the sampling cone assembly 1 On the combined 2 5 mm Allen wrench and cone extraction tool slide the collar to the end of the tool 2 Insert the collar in the sample cone Warning The...

Page 77: ...t the tool and collar to remove the sample cone from the cone gas nozzle 4 Remove the O ring from the sample cone Caution The sample cone is fragile Never place it on its tip always place it on its fl...

Page 78: ...Appropriately sized glass vessels in which to completely immerse components when cleaning Use only glassware not previously cleaned with surfactants HPLC grade or better methanol HPLC grade or better...

Page 79: ...sonic bath for 20 minutes b Remove any residual water from the extraction cone by immersing it in a glass vessel containing methanol and then placing the vessel in the ultrasonic bath for 10 minutes 5...

Page 80: ...obtain a new one before reassembling the sampling cone assembly Assembling the sampling cone assembly Required materials Chemical resistant powder free gloves To assemble the sampling cone assembly 1...

Page 81: ...Ensure that the source isolation valve is in the closed position see To close the source isolation valve before starting a maintenance procedure on page 4 11 Warning The source components can be conta...

Page 82: ...on block assembly 3 Grasp the cone gas nozzle handle and use it to rotate the sampling cone assembly 90 degrees moving the handle downward from the horizontal to the vertical position 4 Open the sourc...

Page 83: ...the ion block assembly 1 Vent and shut down the mass spectrometer see the mass spectrometer s online Help for details 2 Close the source isolation valve see To close the source isolation valve before...

Page 84: ...Allen wrench and cone extraction tool to unscrew the 4 captive ion block assembly securing screws 4 Remove the ion block assembly from the PEEK ion block support TP03130 Ion block assembly securing sc...

Page 85: ...ined 2 5 mm Allen wrench and cone extraction tool to loosen the captive screws securing the 2 PEEK extraction cone retainer clips and then rotate the retainer clips clear of the extraction cone Warnin...

Page 86: ...y sized glass vessel in which to completely immerse the extraction cone when cleaning Use only glassware not previously cleaned with surfactants HPLC grade or better methanol HPLC grade or better wate...

Page 87: ...ion do as follows a Rinse the extraction cone by immersing it in a glass vessel containing water and then placing the vessel in the ultrasonic bath for 20 minutes b Dry the components by immersing the...

Page 88: ...on cone to the ion block Required materials Chemical resistant powder free gloves Combined 2 5 mm Allen wrench and cone extraction tool To fit the extraction cone to the ion block 1 Fit the extraction...

Page 89: ...he combined 2 5 mm Allen wrench and cone extraction tool to fit and then slowly tighten the 4 ion block assembly securing screws sequentially and in small increments 3 Open the source isolation valve...

Page 90: ...ction tool O ring removal kit Needle nose pliers To disassemble the ion block assembly 1 Remove the ion block assembly from the source assembly see Removing the ion block assembly from the source asse...

Page 91: ...ned 2 5 mm Allen wrench and cone extraction tool to loosen the 2 ion block cover plate captive securing screws 6 Remove the ion block cover plate Caution To ensure correct operation of the ion block a...

Page 92: ...ing see Removing O rings and seals on page 4 14 9 If the isolation valve O ring shows signs of deterioration or damage dispose of it in accordance with local environmental regulations Warning The isol...

Page 93: ...e ion block 12 Holding the PEEK ion block gently use the needle nose pliers to gently grasp the heat shrink tubing on the heater cartridge assembly and carefully slide it and the PEEK terminal block o...

Page 94: ...carefully remove the cone gas O ring from the ion block 15 If the cover seal or cone gas O ring shows signs of deterioration or damage dispose of it in accordance with local environmental regulations...

Page 95: ...lock blanking plug and associated seal 17 If the blanking plug seal shows signs of deterioration or damage dispose of it in accordance with local environmental regulations Warning The blanking plug se...

Page 96: ...cone retainer clips 19 Remove the extraction cone from the ion block Caution Take great care not to damage the extraction cone aperture when removing the extraction cone from the ion block The extrac...

Page 97: ...stant powder free gloves Appropriately sized glass vessels in which to completely immerse components when cleaning Use only glassware not previously cleaned with surfactants HPLC grade or better metha...

Page 98: ...lacing the vessels in the ultrasonic bath for 10 minutes 4 Carefully remove the components from the vessels and blow dry them using inert oil free gas 5 Inspect each component for persisting contamina...

Page 99: ...e 3 Fit the extraction cone to the ion block 4 Fit the 2 PEEK extraction cone retainer clips to the ion block 5 Use the combined 2 5 mm Allen wrench and cone extraction tool to tighten the captive scr...

Page 100: ...anol water applied to a lint free cloth to carefully clean the grooves 12 Fit the cover seal to the ion block ensuring that it is correctly seated Fit a new seal if the old one has been disposed of 13...

Page 101: ...y Clean the source hexapole assembly if cleaning the ion block isolation valve and extraction cone fails to increase signal sensitivity Removing the ion block assembly ion block support and hexapole f...

Page 102: ...ully remove all the O rings from the PEEK ion block support see Removing O rings and seals on page 4 14 5 If any of the O rings show signs of deterioration or damage dispose of them in accordance with...

Page 103: ...ing HPLC grade or better methanol Ultrasonic bath Source of oil free inert gas for example nitrogen for drying air drying optional HPLC grade or better 1 1 methanol water Wash bottle containing HPLC g...

Page 104: ...ntil the hexapole assembly is immersed completely 5 Place the vessel in the ultrasonic bath for 30 minutes 6 Carefully remove the hexapole assembly from the vessel and blow dry it using inert oil free...

Page 105: ...seals and O rings To fit the hexapole assembly and PEEK ion block support to the source 1 Carefully fit the source hexapole assembly into the adaptor housing aligning the notches in the differential a...

Page 106: ...ock support to the instrument s housing 5 Use the 3 mm Allen wrench to fit and tighten the 4 PEEK ion block support securing screws Tip Look through the PEEK ion block support as you tighten the secur...

Page 107: ...gloves 7 mm wrench 10 mm wrench To remove the ESI probe tip and gasket 1 Remove the ESI probe from the source see Removing the ESI probe on page 3 6 Warning The probe and source components can be con...

Page 108: ...Procedures 2 Use the 10 mm wrench to remove the probe tip Tip If the probe tip is difficult to remove use the 7 mm wrench in conjunction with the 10 mm wrench Probe tip 10 mm wrench Probe tip 7 mm wre...

Page 109: ...4 If the probe tip and metal gasket are damaged dispose of them in accordance with local environmental regulations Warning The probe tip and metal gasket can be contaminated with biohazardous and or t...

Page 110: ...e 10 mm wrench to tighten the probe tip 4 Use the nebulizer adjuster knob to adjust the capillary so that it protrudes by approximately 0 5 mm from the end of the probe 5 Fit the ESI probe to the sour...

Page 111: ...extraction tool 7 mm wrench 8 mm wrench 10 mm wrench Needle nose pliers To remove the existing capillary 1 Remove the probe from the source see Removing the ESI probe on page 3 6 Warning The probe an...

Page 112: ...5 mm Allen wrench and cone extraction tool to remove the 3 probe end cover retaining screws 3 Remove the end cover from the probe assembly 4 Unscrew and remove the nebulizer adjuster knob End cover re...

Page 113: ...mple capillary 4 65 5 Use the 10 mm wrench to remove the probe tip Tip If the probe tip is difficult to remove use the 7 mm wrench in conjunction with the 10 mm wrench Probe tip 10 mm wrench Probe tip...

Page 114: ...coupling assembly and capillary from the probe 8 Unscrew and remove the knurled collar from the UNF coupling 9 Remove the knurled collar and conductive sleeve from the capillary Metal gasket PEEK uni...

Page 115: ...ing 14 Dispose of the capillary PTFE liner sleeve and ferrule in accordance with local environmental regulations Installing the new capillary Required materials Chemical resistant powder free gloves C...

Page 116: ...obe inlet connector and screw the connector finger tight into the PEEK union Rationale Doing so ensures a minimum dead volume when fitting the capillary 3 Fit the UNF coupling to the new capillary War...

Page 117: ...apillary 10 Tighten the knurled collar to the UNF coupling 11 Perform a leak test by attaching the free end of the PEEK tubing to an LC pump and pumping 50 50 acetonitrile water through it at 1 mL min...

Page 118: ...y 19 Use the combined 2 5 mm Allen wrench and cone extraction tool to fit and tighten the 3 probe end cover retaining screws 20 Fit the metal gasket to the probe tip 21 Fit the probe tip over the capi...

Page 119: ...wrench and cone extraction tool Ion block source heater To replace the ion block source heater 1 Remove the ion block assembly from the instrument see Removing the ion block assembly from the source a...

Page 120: ...s 3 Use the combined 2 5 mm Allen wrench and cone extraction tool to loosen the 2 captive screws securing the ion block cover plate 4 Remove the ion block cover plate Ion block cover plate securing sc...

Page 121: ...nch and cone extraction tool to remove the 2 screws securing the heater wires to the PEEK terminal block 6 Use the needle nose pliers to carefully swing the ring terminal tags out of the terminal bloc...

Page 122: ...xtraction tool to fit and tighten the 2 screws securing the heater wires to the PEEK terminal block 12 Fit the ion block cover plate to the ion block assembly and then use the combined 2 5 mm Allen wr...

Page 123: ...tion gas seal Source enclosure seal Source enclosure nebulizer gas seal Source enclosure desolvation gas seal Source enclosure pressure test gas seal Removing the probe adjuster assembly probe and sou...

Page 124: ...from the probe adjuster assembly Probe seal Nebulizer gas seal See Removing O rings and seals on page 4 14 3 Use the O ring removal kit to carefully remove the following seals from the source enclosur...

Page 125: ...probe adjuster assembly probe seals Required materials Chemical resistant powder free gloves Wash bottle containing HPLC grade or better 1 1 methanol water New seals Warning The seals can be contamin...

Page 126: ...ew seals to the source enclosure Nebulizer gas seal Desolvation gas seal Auxiliary gas seal Requirement These seals have a special cross section fit them in the groove as shown 4 Fit the following new...

Page 127: ...r filter You must replace the air filter annually Required materials Needle nose pliers New filter To replace the air filter 1 Open the access door to the fluidics pump 2 Unscrew the captive thumbscre...

Page 128: ...he its slot in the instrument Tip If necessary use the needle nose files to grasp the filter 5 Dispose of the filter 6 Fit the new filter into the instrument 7 Fit the filter cover to the instrument 8...

Page 129: ...Replacing the air filter 4 81...

Page 130: ...4 82 Maintenance Procedures...

Page 131: ...des also include the hazard symbols with accompanying text statements describing the hazards and telling you how to avoid them This appendix presents all the safety symbols and statements that apply t...

Page 132: ...electric shocks ultraviolet radiation exposures and others When the following symbols appear in a manual s narratives or procedures their accompanying text identifies the specific risk and explains ho...

Page 133: ...ing Risk of explosion Warning Risk of eye injury Warning Pressurized nonmetallic or polymer tubing can burst Observe these precautions when working around such tubing Wear eye protection Extinguish al...

Page 134: ...Ensure that the nitrogen supply pressure never falls below 690 kPa 6 9 bar 100 psi during an analysis in which flammable solvents are used Also ensure a gas fail connection is connected to the LC syst...

Page 135: ...nisms and other biological materials To avoid infection with these agents assume that all biological fluids are infectious observe Good Laboratory Practices and consult your organization s biohazard s...

Page 136: ...ler le droit de l utilisateur exploiter l quipement Achtung Jedwede nderungen oder Modifikationen an dem Ger t ohne die ausdr ckliche Genehmigung der f r die ordnungsgem e Funktionst chtigkeit verantw...

Page 137: ...e trouvant proximit de l instrument Evitez d utiliser des tubes s v rement d form s ou endommag s Evitez d utiliser des tubes non m talliques avec du t trahydrofurane THF ou de l acide sulfurique ou n...

Page 138: ...iamenti nei tubi non metallici riducendo notevolmente la pressione di rottura dei tubi stessi Advertencia se recomienda precauci n cuando se trabaje con tubos de pol mero sometidos a presi n El usuari...

Page 139: ...Warnings that apply to all Waters instruments A 9 Nonmetallic Tetrahydrofuran THF Methylene chloride Dimethyl sulfoxide THF...

Page 140: ...tueuses Vorsicht Der Benutzer wird darauf aufmerksam gemacht dass bei unsachgem er Verwenddung des Ger tes die eingebauten Sicherheitseinrichtungen unter Umst nden nicht ordnungsgem funktionieren Atte...

Page 141: ...ls These can appear in instrument user manuals and on the instrument s front or rear panels Electrical power on Electrical power off Standby Direct current Alternating current Protective conductor ter...

Page 142: ...visories Handling symbols These handling symbols and their associated text can appear on labels affixed to the outer packaging of Waters instrument and component shipments Keep upright Keep dry Fragil...

Page 143: ...arning To confirm the integrity of the source exhaust system you must address any safety issues raised by the contents of this Appendix Contents Topic Page Preventing contamination B 2 Items exposed t...

Page 144: ...about the most common ingredients used to prepare mobile phases Items exposed to solvent Item Material Autotune reservoirs High density polyethylene Gas exhaust port Stainless steel Ion block assembl...

Page 145: ...etonitrile Formic acid 0 1 Acetic acid 0 1 Trifluoroacetic acid 0 1 Ammonium acetate 10 mM Ammonium formate 10 mM These solvents are not expected to cause any problems with the materials identified in...

Page 146: ...B 4 Materials of Construction and Compliant Solvents...

Page 147: ...d cleaning flushing and packaging procedures See Troubleshooting with Connections Insight on page 4 5 Contents Topic Page Mass spectrometer external wiring and vacuum connections C 2 Connecting the Va...

Page 148: ...LA N EPC Com Port Video Output Service Bus 1 2 3 4 5 6 7 8 9 10 Event In 1 ExternalConnections1 Not used CE Interlock OUT Event In 2 Not used IN IN Com N C N O Com N C N O 1 2 3 4 5 6 7 8 9 10 Analog...

Page 149: ...l resistant powder free gloves 7 mm nut driver Sharp knife Elbow included in the Waters Rotary Pump Kit NW25 tee included in the installation kit NW25 center rings included in the installation kit NW2...

Page 150: ...wear chemical resistant powder free gloves when performing this procedure Caution To ensure correct operation of the roughing pump install it within 1 degree of horizontal Locate the roughing pump is...

Page 151: ...5 clamp using the 7 mm nut driver to install the clamp 5 Attach the flanged end of a length of 1 inch ID vacuum hose to the remaining open port on the NW25 tee using an NW25 center ring and then secur...

Page 152: ...ng the Varian roughing pump oil level on page 4 17 and if needed Adding oil to the Varian roughing pump on page 4 18 13 Make the electrical connections to the roughing pump Caution To avoid gas leaks...

Page 153: ...ump connector on the mass spectrometer s rear panel TP03159 TP03118 Auxiliary 10MB 100MB Activity External Connections 2 10 1 External Connections 1 10 1 LA N EPC Com Port Video Output Service Bus 1 2...

Page 154: ...quired materials Chemical resistant powder free gloves 7 mm nut driver Sharp knife Elbow included in the Waters Rotary Pump Kit NW25 tee included in the installation kit NW25 center rings included in...

Page 155: ...r chemical resistant powder free gloves when performing this procedure Caution To ensure correct operation of the roughing pump install it within 1 degree of horizontal Locate the roughing pump is loc...

Page 156: ...p using the 7 mm nut driver to install the clamp 5 Attach the flanged end of a length of 1 inch ID vacuum hose to the remaining open port on the NW25 tee using an NW25 center ring and then secure the...

Page 157: ...electrical connections for the Edwards oil free roughing pump on page C 12 Caution To avoid gas leaks use the sharp knife to cut the PVC exhaust tubing squarely that is perpendicular to its horizontal...

Page 158: ...on the mass spectrometer s rear panel TP03118 Auxiliary 10MB 100MB Activity TP03165 External Connections 2 10 1 External Connections 1 10 1 LA N EPC Com Port Video Output Service Bus 1 2 3 4 5 6 7 8...

Page 159: ...nlet and vacuum connectors 2 Attach a nitrogen regulator not provided to the nitrogen supply TP03118 Auxiliary 10MB 100MB Activity External Connections 2 10 1 External Connections 1 10 1 LA N EPC Com...

Page 160: ...Connect the free end of the 6 mm PTFE tubing to the nitrogen regulator Requirement The nitrogen must be dry and oil free with a purity of at least 95 4 Set the nitrogen regulator to 600 to 690 kPa 6...

Page 161: ...collision cell gas supply 1 Use the 1 8 inch Swagelok nut and ferrule to connect the 1 8 inch stainless steel tube to the collision cell gas inlet on the rear of the mass spectrometer see the figure...

Page 162: ...t system The laboratory exhaust system must provide a minimum vacuum of 0 20 kPa 2 mbar 0 03 psi below atmospheric pressure negative pressure The exhaust connections can be contaminated with biohazard...

Page 163: ...4 Connect the free end of the tubing to the pilot valve port on the nitrogen exhaust trap bottle 5 Cut a length of 12 mm tubing long enough to connect the instrument to the nitrogen exhaust trap bottl...

Page 164: ...the free end of the tubing to the exhaust vent 11 Use snoop or equivalent leak detector liquid to ensure that there are no leaks at the instrument exhaust and laboratory exhaust system line connectio...

Page 165: ...over the barbed fitting of the drain located at the bottom left hand side of the mass spectrometer Warning The waste line and connection can be contaminated with biologically hazardous materials Alway...

Page 166: ...ve the surface of the waste solvent Positioning of drain tube Warning To prevent leakage of biologically hazardous materials do not crimp or bend drain line A crimp or bend can impede flow to the wast...

Page 167: ...the monitor to the PC 2 Connect one end of the shielded network cable to the appropriate port on the rear panel of the mass spectrometer 3 Connect the other end of the shielded network cable to the po...

Page 168: ...on the mass spectrometer s rear panel these connectors hold the screw terminals for input output signals The connectors are keyed so that they can receive a signal cable inserted only one way Warning...

Page 169: ...Output System Activity Service Bus 1 2 3 4 5 6 7 8 9 10 Event In 1 ExternalConnections1 Not used CE Interlock OUT Event In 2 Not used IN IN Com N C N O Com N C N O 1 2 3 4 5 6 7 8 9 10 Analogue Out Ex...

Page 170: ...9 CE Interlock Out normally closed N C 30 V d c 100 mA 10 CE Interlock Out normally open N O 30 V d c 100 mA External connections 2 Pin Function Rating 1 Analog Out instrument driven electrical output...

Page 171: ...log chart output functionality The output voltage range is 0 to 2 V The resolution of the voltage output is 12 bits Gas Fail Interlock Out Used to stop the solvent flow if the nitrogen gas supply fail...

Page 172: ...rument 2 Attach the positive and negative leads of the signal cable to the connector 3 Slide the clamp with the bend facing down into the protective shield 4 Insert the clamp and shield with the bend...

Page 173: ...to the connection cover and position the clamp over the cable leads and tighten the clamp into place with the second self tapping screw 6 Place the second connection cover over the first cover and sna...

Page 174: ...an uninterruptible power supply UPS for optimum long term input voltage stability 1 Connect the female end of the power cord to the receptacle on the rear panel of the mass spectrometer 2 Connect the...

Page 175: ...in the IntelliStart Fluidics system Warning The IntelliStart Fluidics components can be contaminated with biohazardous and or toxic materials Always wear chemical resistant powder free gloves while w...

Page 176: ...contamination refer to Controlling Contamination in LC MS Systems part number 715001307 You can find this document on http www waters com click Services and Support Support Plumbing schematic 2 1 7 6...

Page 177: ...ns ED Color Length and Quantity for the IntelliStart Fluidics pipes Replacement pipe specifications Connection ID inches ED inches Color Length mm Quantity Select to divert 0 005 1 16 Red 200 1 Vial 0...

Page 178: ...D 4 Plumbing the IntelliStart Fluidics system...

Page 179: ...ll gas supply connecting C 15 T Wave ScanWave 1 9 combined 2 5 mm Allen wrench and cone extraction tool 4 28 compliant solvents B 1 cone gas nozzle cleaning 4 30 connecting collision cell gas supply C...

Page 180: ...tart pump access door 1 4 reservoirs 1 3 G gas fail interlock connection C 25 guidelines calibration viii instrument vii quality control viii H handling symbols A 12 handling waste liquid 4 16 hazards...

Page 181: ...edures 4 1 safety 4 6 schedule 4 3 mass spectrometer calibrating 2 4 case cleaning 4 15 emergency shutdown 2 9 external connections C 1 external wiring C 2 flow rates 2 5 guidelines vii ion optics 1 9...

Page 182: ...emoval kit 4 14 removing 4 14 P parent ion mode 1 13 plan maintenance 4 3 power LED 2 4 power supply connecting to C 21 precursor ion mode 1 13 preventing contamination B 2 probe ESI 3 2 installing 3...

Page 183: ...4 75 hazard iv solvents exposure of components to B 2 used in mobile phases B 3 source assembly seals replacing 4 75 enclosure release 1 4 heater replacing 4 71 isolation valve closing 4 11 opening 4...

Page 184: ...Index 6 W warning symbols A 2 A 6 waste line connecting C 19 liquid handling 4 16 wiring external C 2 workstation connecting C 21...

Reviews: