Doc. P/N: WSP-009-005
Version: V1.5
Issue Date: October 2013
www.wassp.com
Page 61 of 73
Installation Manual
Note: Recording raw data using the data recorder
at this point will provide evidence of the systems
performance immediately after commissioning.
This can help identify the source of failures later
in the life of the system.
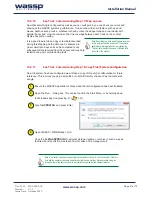
Now the system has been configured we will take a copy of this ship’s configuration for future
reference. This involves copying a small file onto a USB memory stick such as the technician
dongle.
Ensure the WASSP Application is Closed and that all configuration has been finalised.
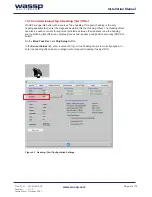
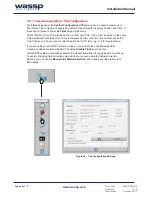
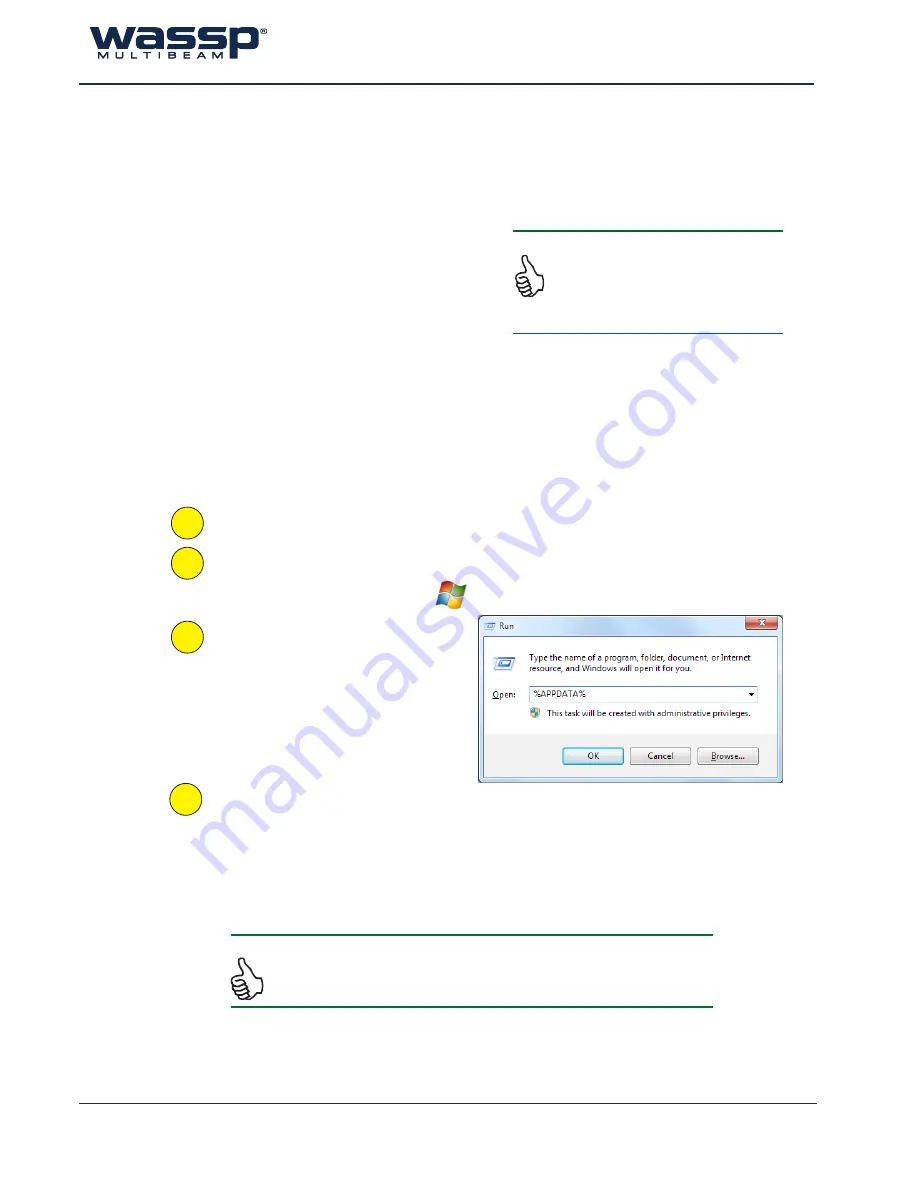
Open the ‘Run...’ dialog box. This can be found in the Start Menu, or by holding down
the Windows Key and pressing ‘R’ (
+ R)
Type
%APPDATA%
and press Enter
Open WASSP > WMBMarine > GUI
Copy the file
WASSPPRO.INI
to external storage (rename or archive in such a way as
to note what ship this file was taken from for ease of file management).
Note: No mention has been made of training the operator on how to use their system. If there is
time and the operator can spare some time during the sea trial they may appreciate being run
through a few of the basics on how to get started to supplement the operator manual.
1
2
3
4
10.2.10
Sea Trial - Commissioning Step 17: Map an area
Now that everything is configured as well as you can configure it, you can check your work and
showcase the WASSP system’s performance. Find an area with some feature such as sand
waves, depth variance, rocks - whatever is handy. Have the skipper map an area, ideally with
parallel tracks and ‘mow the lawns’ so that the coverage between each track on the contour
display has some overlap.
It is a good idea to take a copy of raw data recorded
during this Mapping as the data can be analysed in
closer detail at a desk and can be compared to any
subsequent data received from the vessel and may help
isolation of a post commissioning fault.
10.2.11
Sea Trial - Commissioning Step 18: Copy Final System Configuration

