
Doc. P/N:
WSP-009-005
Version: V1.5
Issue Date:
October 2013
www.wassp.com
Page 44 of 73
Installation Manual
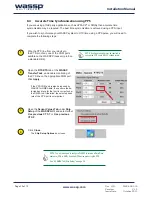
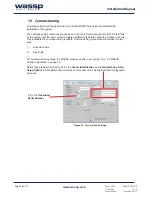
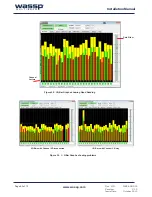
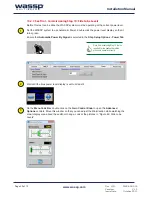
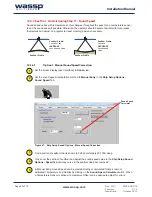
10.1.4 Commissioning Step 4: Array Geometry
Depending on the depth in the dock it may be necessary to start the sea-trial
before this test can be completed fully but overt problems should be able to be
seen even with only 1m of water beneath the transducer.
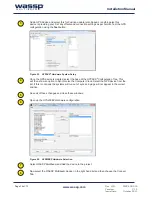
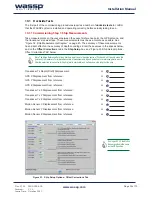
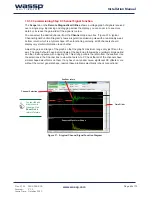
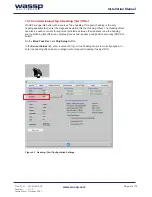
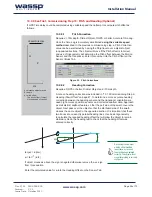
The transducer number should have been entered in the Ship Setup form by
this stage. If you are unsure of your transducer number, try ‘1’ or ‘200’. These
two numbers will give different responses, as they relate to two different series
of transducer builds, and inputting the incorrect value will result in a strange
mirror effect (see “Figure 38. Sonar View with Transducer Number set to
correct and incorrect values” below).
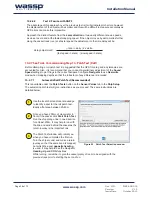
Note: In very shallow
water it may help to
increase the minimisation
to 5000 as this will
suppress problems
caused by too much
power which could
confuse this process.
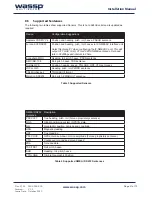
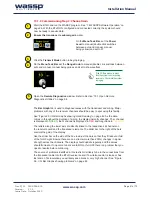
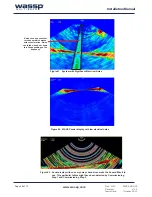
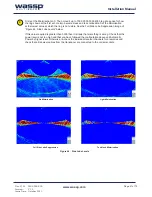
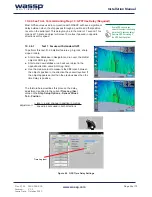
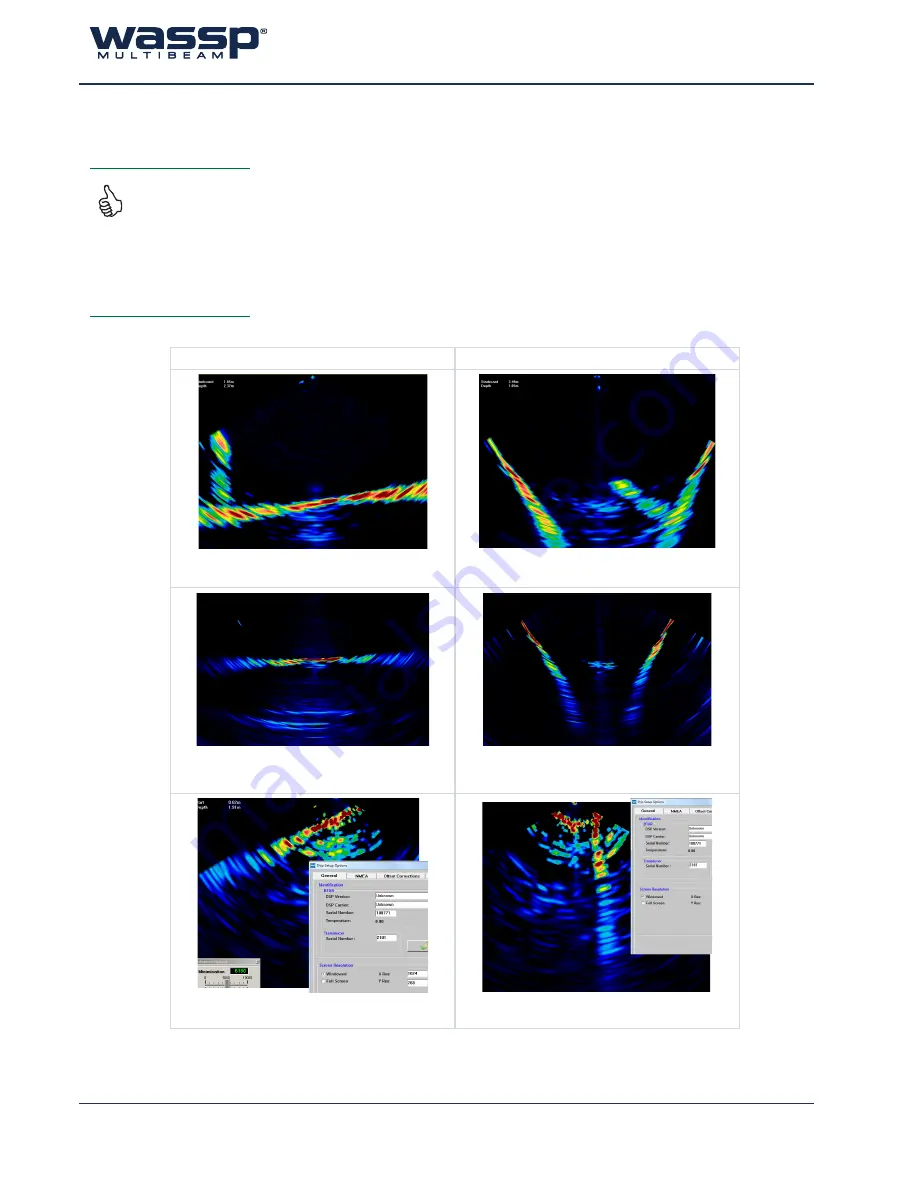
Figure 38. Sonar View with Transducer Number set to correct and incorrect values
Correct Transducer Number
Incorrect Transducer Number
8 metres deep sloped seafloor with pier pole
adjacent to the transducer.
Incorrect transducer number makes the seafloor
and pole very hard to interpret
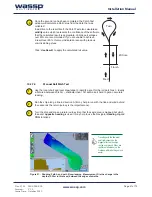
Almost flat seafloor with transducer numbers
correct and incorrect.
With incorrect transducer number the flat seafloor
becomes impossibly deep chasm that always
follows the ship.
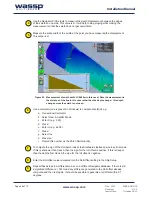
Very shallow <1m below transducer. Slope getting
deeper off to port side.
Incorrect transducer number makes the slope
look like a sea wall with a ring.


