7.
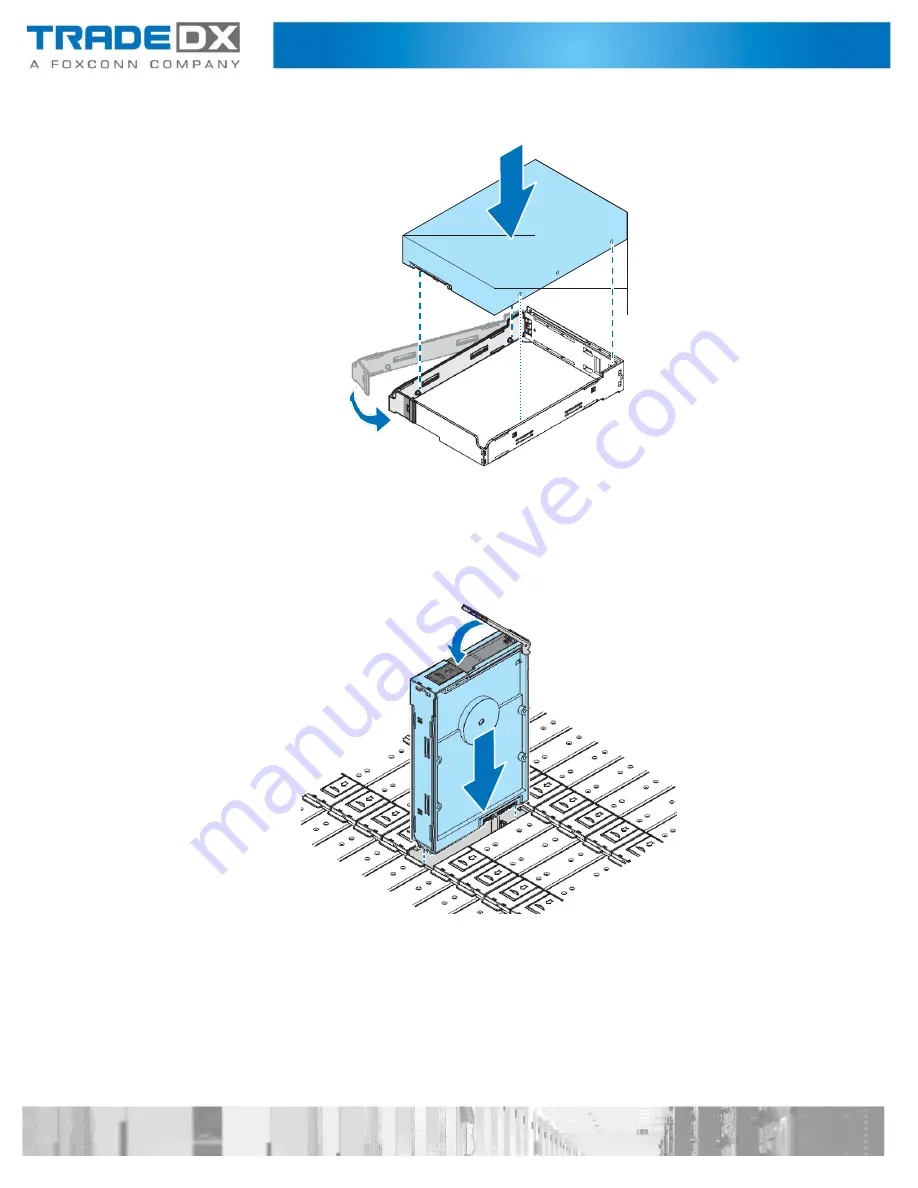
Align the marks on an HDD with the pins on the HDD carrier.
8.
Close the latch to secure an HDD.
9.
Align an HDD assembly with the connector on the HDD backplane.
10.
Install an HDD assembly.
11.
Gently press down on both ends of an HDD assembly to ensure it is seated in
the HDD backplane.
12.
Push the handle closed.
13.
Close an HDD drawer. See
“Closing an HDD Drawer” on page 14.
Summary of Contents for SSR-4N108L
Page 1: ...JBOD SSR 4N108L User Manual ...
Page 16: ...System Architecture ...
Page 61: ...Signal Cable Routing ...


