


5
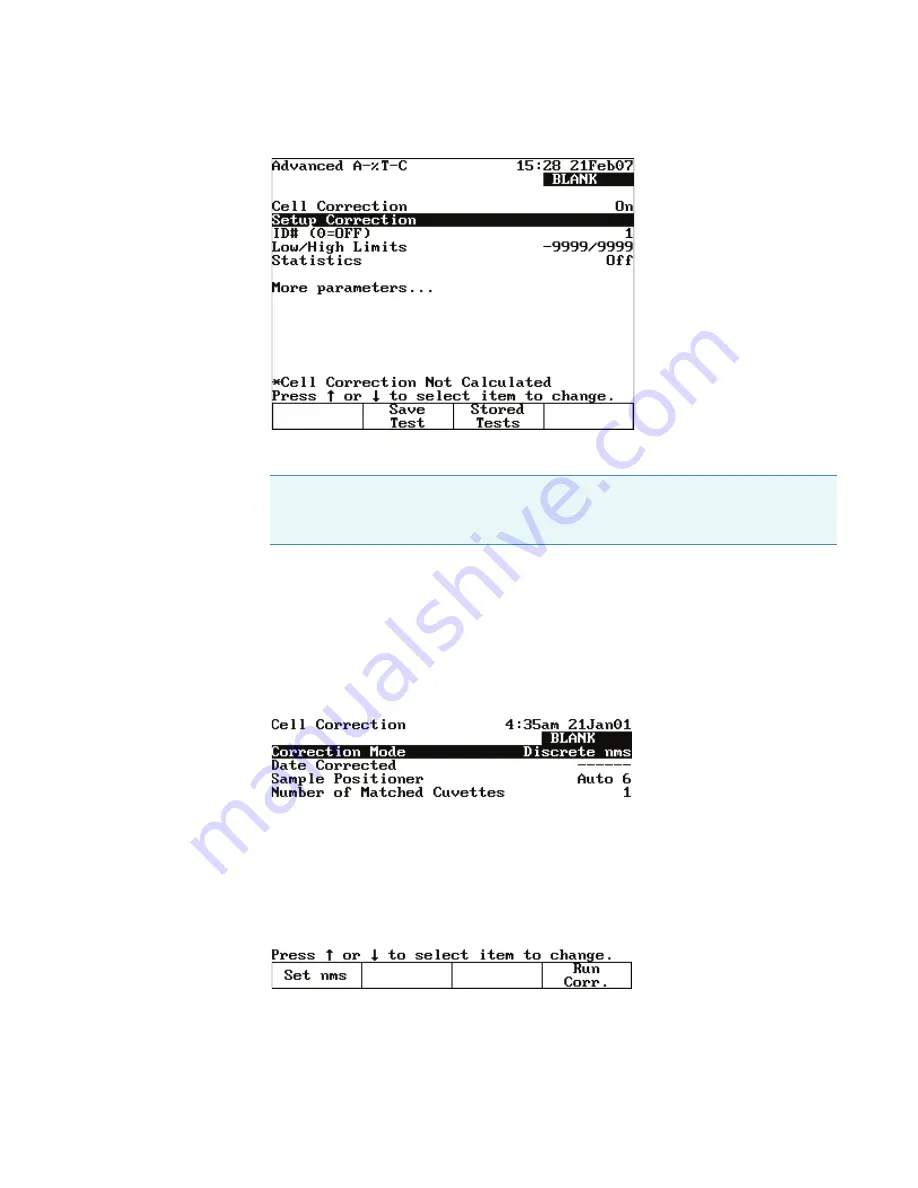
Cell Correction
Cell Correction
28
GENESYS 10S Vis User Guide
Thermo Scientific
3. Highlight
Cell Correction
and press
Enter
.
Cell Correction is now activated, as indicated by the word
On
.
4. Highlight
Setup Correction
and press
Enter
.
5. Highlight
Correction Mode
and press
Enter
to set the mode to either:
Scan – Cell Correction is run on a blank and one sample cell for the range of wavelengths
you specify in Scanning mode.
Discrete nms – Cell Correction is run on a blank and up to five sample cells for up to 31
user-specified, discrete wavelengths.
6. If you selected Scan mode in the preceding step, specify the
Start Wavelength
and the
Stop Wavelength
values.
7. Press
Run Corr.
to start Cell Correction.
Note
When Cell Correction is activated, additional parameter lines are added to the
screen above the Cell Correction line. If the Cell Correction line is no longer visible,
highlight
More Parameters
and press
Enter
.
Summary of Contents for GENESYS 10S Vis
Page 1: ...GENESYS 10S Vis User Guide 269 251700 Revision A October 2009 ...
Page 8: ...Preface viii GENESYS 10S Vis User Guide Thermo Scientific ...
Page 32: ...3 Accessories External Printers 24 GENESYS 10S Vis User Guide Thermo Scientific ...
Page 44: ...6 Managing Stored Tests Deleting a Test 36 GENESYS 10S Vis User Guide Thermo Scientific ...
Page 50: ...9 Calculator Function 42 GENESYS 10S Vis User Guide Thermo Scientific ...
Page 82: ...16 Absorbance Ratio Measuring Samples 74 GENESYS 10S Vis User Guide Thermo Scientific ...
Page 90: ...18 3 Point Net Taking Measurements 82 GENESYS 10S Vis User Guide Thermo Scientific ...
Page 124: ...22 Maintenance Replacing the Tungsten Lamp 116 GENESYS 10S Vis User Guide Thermo Scientific ...
Page 134: ...23 Parameters 126 GENESYS 10S Vis User Guide Thermo Scientific ...


