


2
Setting Up the Instrument
Entering Parameter Values
8
GENESYS 10S Vis User Guide
Thermo Scientific
Alternatively, you can press
Enter
to display the Entry window with the value range and then
type the complete entry and press
Enter
.
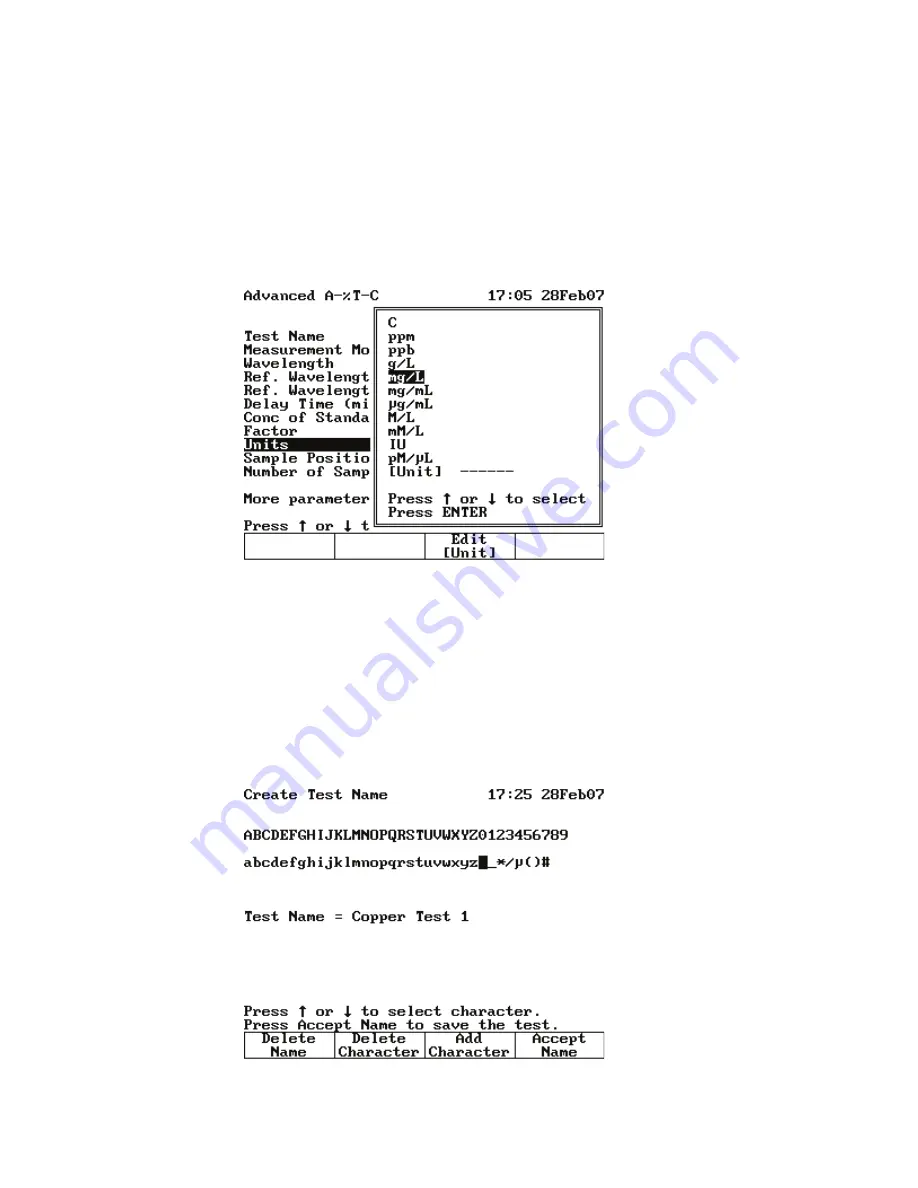
Menu Selection
With the parameter (Units, or Sample Positioner) highlighted, press
Enter
to display the
selection list. Highlight the appropriate item and press
Enter
.
On/Off Toggle
With the parameter (e.g., AutoPrint) highlighted, press
Enter
to toggle to the opposite value.
Alphanumeric Entry
With the parameter (e.g., Test Name) highlighted, press
Enter
. The Name Entry screen
appears. Highlight the desired character and press
Add Character
. When you are finished,
press
Accept Name
.
Summary of Contents for GENESYS 10S Vis
Page 1: ...GENESYS 10S Vis User Guide 269 251700 Revision A October 2009 ...
Page 8: ...Preface viii GENESYS 10S Vis User Guide Thermo Scientific ...
Page 32: ...3 Accessories External Printers 24 GENESYS 10S Vis User Guide Thermo Scientific ...
Page 44: ...6 Managing Stored Tests Deleting a Test 36 GENESYS 10S Vis User Guide Thermo Scientific ...
Page 50: ...9 Calculator Function 42 GENESYS 10S Vis User Guide Thermo Scientific ...
Page 82: ...16 Absorbance Ratio Measuring Samples 74 GENESYS 10S Vis User Guide Thermo Scientific ...
Page 90: ...18 3 Point Net Taking Measurements 82 GENESYS 10S Vis User Guide Thermo Scientific ...
Page 124: ...22 Maintenance Replacing the Tungsten Lamp 116 GENESYS 10S Vis User Guide Thermo Scientific ...
Page 134: ...23 Parameters 126 GENESYS 10S Vis User Guide Thermo Scientific ...


