6
Maintenance
Servicing the Proportioning Valves
Thermo Scientific
Accela Pump Hardware Manual
77
5. Using a 4 mm L-hex wrench, tighten the clamping screws on the right side of the drive
arm mechanisms.
6. Using a 2.5 mm balldriver, replace the drive arm cover and tighten the screws.
7. Attach the actuating coils to their respective proportioning valves.
8. Attach the solvent lines to their respective proportioning valves.
9. Connect the crossover tubing to the pressure sensor assembly and the left side of the
LDA. Using an 8 mm open-ended wrench, tighten the fittings.
10. Connect the LDA outlet to the dynamic mixer inlet. Using a 1/4 in. open-ended wrench,
tighten the high-pressure fittings.
11. To ensure that your pump is functioning properly, turn on the solvent flow, check for
leaks, and perform the pump pulsation and proportioning tests described in
Chapter 5,
“Diagnostics.”
Servicing the Proportioning Valves
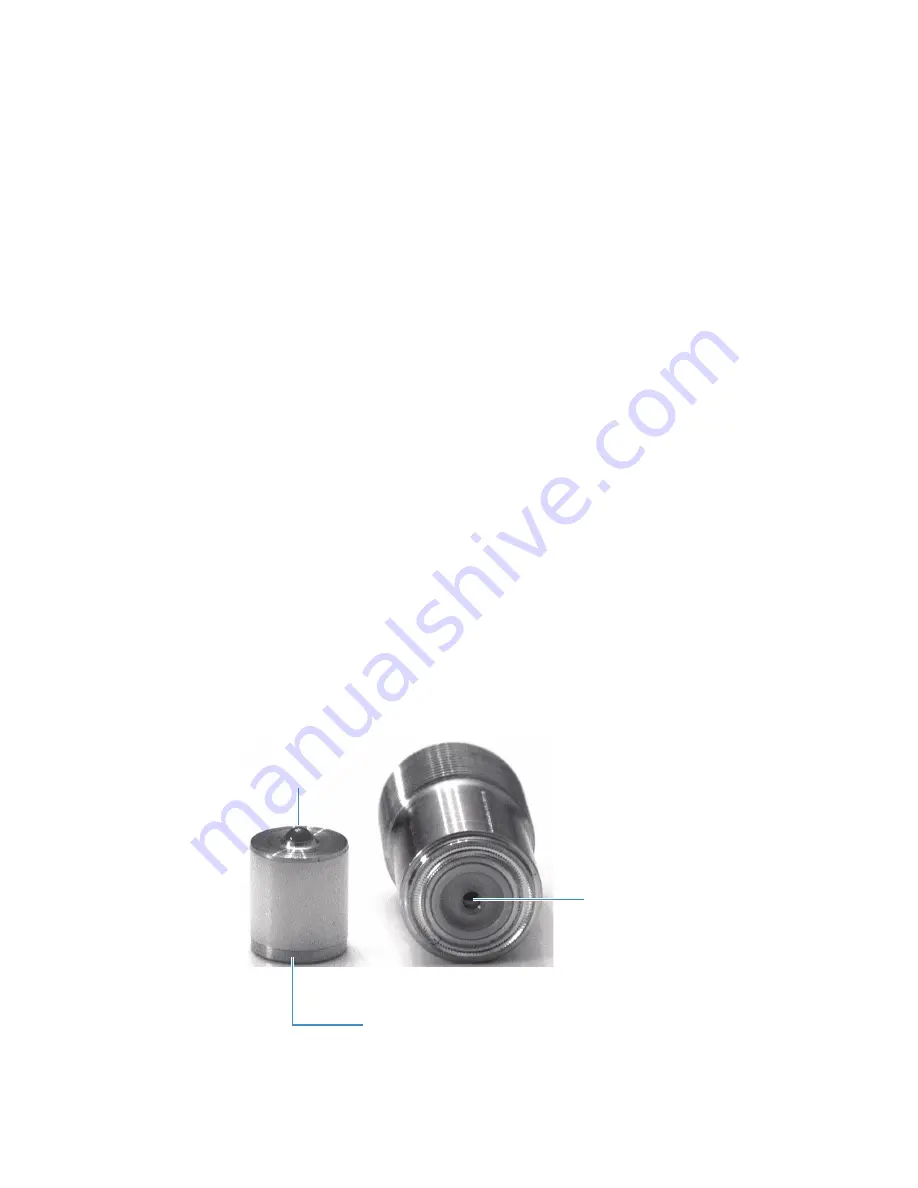
Each proportioning valve of the Accela Pump contains an electromechanically actuated ball
and seat valve. The ruby ball portion of the valve sits on one end of a magnetic piston that
floats within the body of the valve. The sapphire seat where the ball rests is located on the
back of the valve face (see
Figure 65
).
The ruby ball normally rests against the sapphire seat, shutting off the solvent flow. Electrical
pulses from the coils surrounding the valve cause the magnetic piston to glide back and forth
within the body of the valve, allowing solvent to flow through the valve and into the inlet
module.
Figure 65.
Ruby ball and sapphire seat of the proportioning valve
Sapphire seat
Ruby ball
Magnetic piston


