60
StorEdge S1 AC100 and DC100 Installation and Maintenance Manual • March 2002
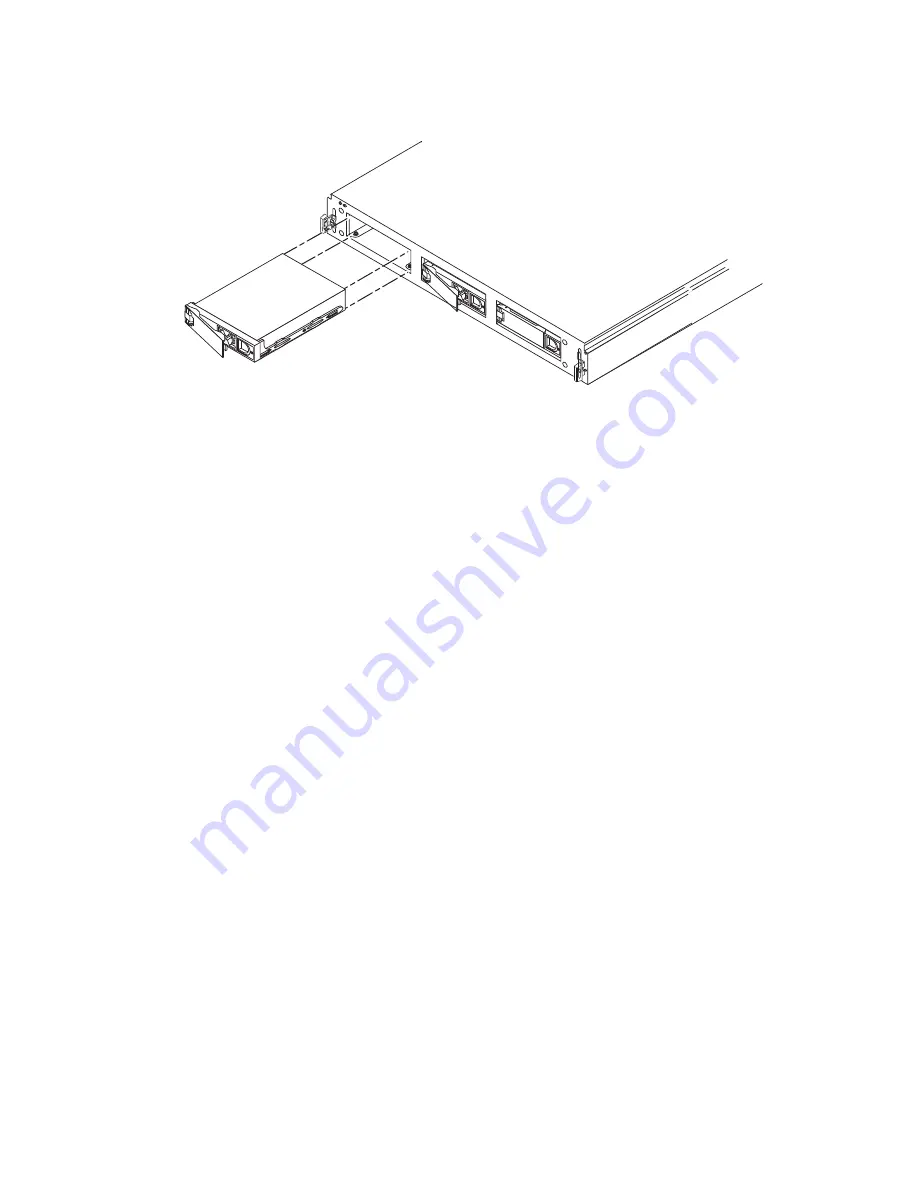
FIGURE 4-2
Adding a Disk Drive
6. Slide the new drive into the vacant slot.
7. Apply equal pressure to both sides of the front of the drive, and firmly push it
until the locking handle engages.
The drive should now be flush with the enclosure front.
8. Close the locking handle fully.
When the drive is firmly installed, it spins up automatically.
9. Determine the SCSI ID of the drive you added.
See “To Check the Binary SCSI ID LED Display” on page 69.
10. Replace the front bezel.
Performing the Software Configuration
Procedures
When adding a disk drive, you must create a new device entry for the drive in the
/devices
,
/dev/dsk
, and
/dev/rdsk
hierarchies. The new drive is assigned a
unique name associated with the slot into which it was installed.
▼
To Create a New Solaris Device Entry
The naming convention for disks attached to a host adapter is
c
w
t
x
d
y
s
z, where:
w corresponds to the controller in your system
x corresponds to the SCSI target of the disk
y is the logical unit for the disk drive (always 0)
z is the slice (or partition) on the disk
Summary of Contents for StorEdge S1 AC100
Page 8: ...viii StorEdge S1 AC100 and DC100 Installation and Maintenance Manual March 2002...
Page 22: ...xxii StorEdge S1 AC100 and DC100 Installation and Maintenance Manual March 2002...
Page 30: ...xxx StorEdge S1 AC100 and DC100 Installation and Maintenance Manual March 2002...
Page 32: ...xxxii StorEdge S1 AC100 and DC100 Installation and Maintenance Manual March 2002...
Page 52: ...16 StorEdge S1 AC100 and DC100 Installation and Maintenance Manual March 2002...
Page 64: ...28 StorEdge S1 AC100 and DC100 Installation and Maintenance Manual March 2002...
Page 92: ...56 StorEdge S1 AC100 and DC100 Installation and Maintenance Manual March 2002...
Page 116: ...80 StorEdge S1 AC100 and DC100 Installation and Maintenance Manual March 2002...
Page 128: ...Index 92 StorEdge S1 AC100 and DC100 Installation and Maintenance Manual March 2002...


