


U.2.29
Date Code 20020501
User’s Guide
SEL-421/SEL-421-1 Relay
Installation
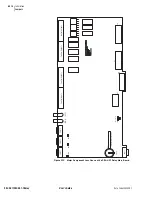
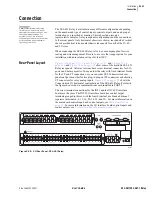
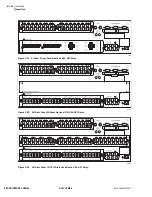
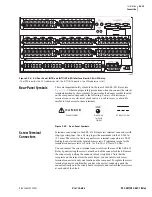
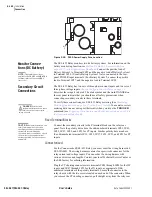
Front-Panel Labels
Copy the template files from the SEL-421/SEL-421-1 Relay
Product Literature CD (in the first Explorer window) to the
Templates folder on your computer (in the second Explorer
window).
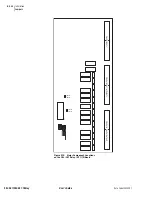
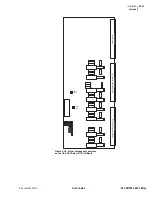
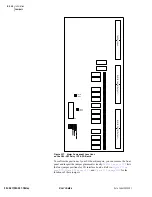
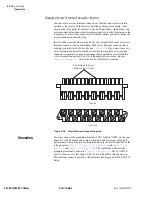
Step 2. In Microsoft Word use the File > New menu to access the
421_Horizontal.dot or 421_Vertical.dot files from your storage
drive. Choose the template file that matches the layout you
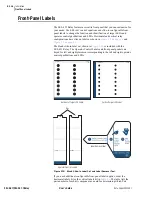
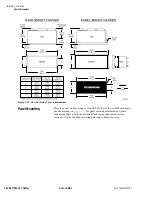
want to use (see
). Double-click on
the template file you have chosen to open a copy of that file.
Make sure you can see table gridlines. Toggle the Table > Hide
Gridlines menu item to see the template gridlines.
Step 3. Save the document with a new file name.
Step 4. Edit the template document placing LED and pushbutton labels
in appropriate positions on the blank Customer Label Template.
Fill in the fields (use the tab and arrow keys, or the mouse to
move from field to field). Field space is limited; only text
displayed on the screen prints on the label. Save the file often
to preserve your work in progress.
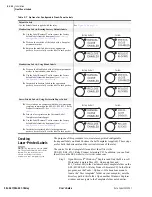
Use the identification fields at the top of the Target LED Label
and in four positions between pushbutton labels to mark the
relay that corresponds with the label set.
NOTE:
If you want to adjust the font
size, use the procedure in
to
Unprotect the document.
Step 5. Complete all necessary entries and save the file.
Step 6. Create test sheets for a test print. Print test sheets from Adobe
®
Acrobat
®
or Acrobat Reader
®
(the Reader is included on the
SEL-421/SEL-421-1 Relay Product Literature CD).
Use the Acrobat File > Open menu to access the Customer
Label Template folder on the SEL-421/SEL-421-1 Relay
Product Literature CD. Open the test sheet file that corresponds
to your relay (either 421_Horizontal_TestSheet.pdf or
421_Vertical_TestSheet.pdf). When printing, be sure that “Fit
to Page” is not checked.
NOTE:
If your printer has duplex
capability, be sure to set the printer to
print single sided.
Step 7. Print on the test sheet. Position the test sheet properly in the
printer. Print the labels from Microsoft Word to the printer.
Step 8. Examine the printed test sheet (the identification fields are
good indicators of printed text alignment on the test sheet).
Printer drivers differ greatly resulting in label position
discrepancies from the positioning shown on your screen.
Make minor adjustments as necessary to print in the proper
location on the test sheet. To make these adjustments, change
margin settings as follows:
NOTE:
DO NOT “Protect” the
document afterwards, because the
Protect function automatically deletes
your labels contained in field data.
➤
Use the Tools > Unprotect Document to unlock/unprotect
the document
➤
Use the File > Page Setup menu to adjust the top or left
margins as needed to correct the alignment
➤
Do a test print on the test sheets
➤
Examine the label position
When the printed label alignment is correct, save the document.
Summary of Contents for SEL-421
Page 8: ...This page intentionally left blank ...
Page 30: ...This page intentionally left blank ...
Page 110: ...This page intentionally left blank ...
Page 204: ...This page intentionally left blank ...
Page 284: ...This page intentionally left blank ...


