209
4.1.4.6 Schedule
4.1.4.6.1 Schedule Record
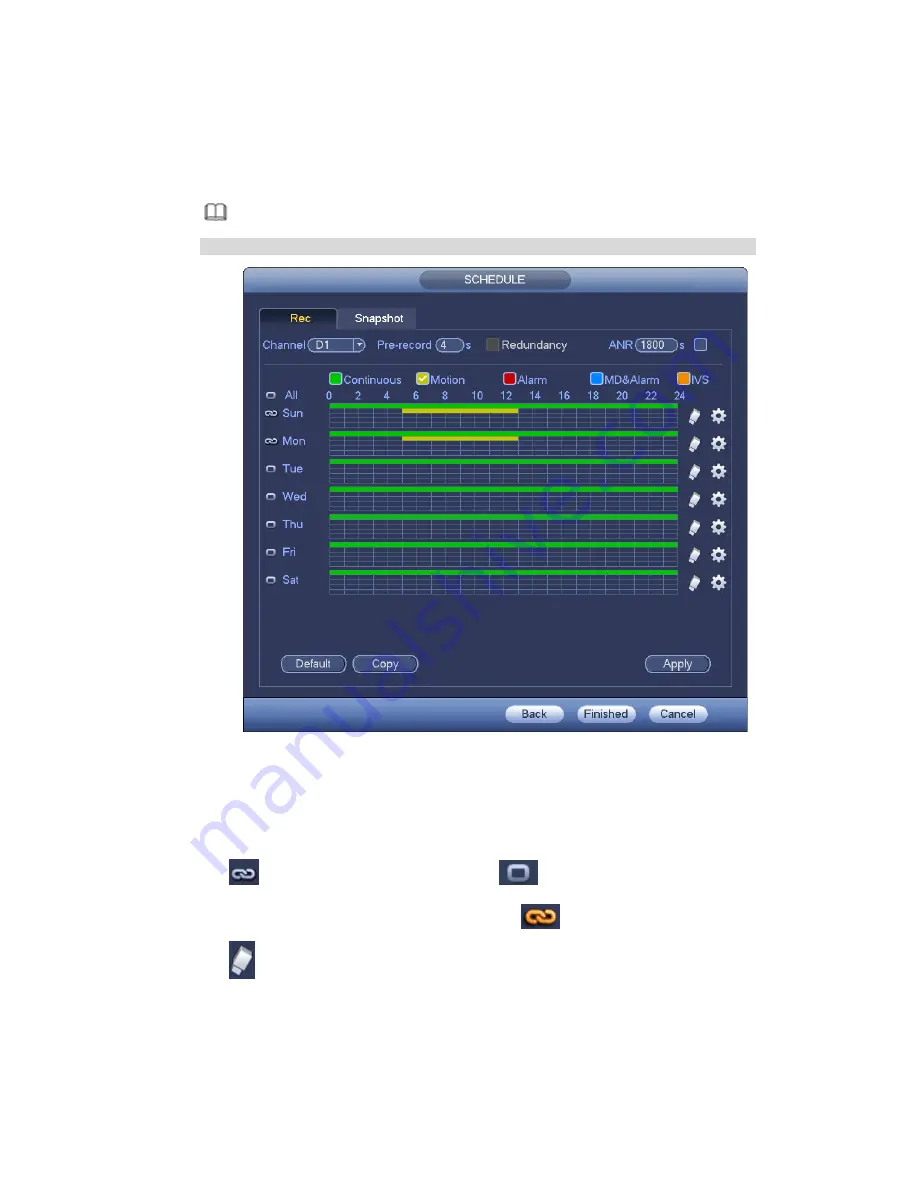
All channels are record continuously by default. You can set customized record period and record type.
Step 1 Click Next button.
Enter schedule interface. See Figure 4-31.
Note
From main menu->Setting->Schedule->Record, you can go to the record interface.
Figure 4-31
Step 2 Set parameters.
Channel: Please select the channel number first. You can select “all” if you want to set for
the whole channels.
: Sync connection icon. Select icon
of several dates, all checked items can be
edited or together. Now the icon is shown as
.
: Click it to delete a record type from one period.
Record Type: Please check the box to select corresponding record type. There are five
types: Regular/MD (motion detect)/Alarm/MD&Alarm/IVS.
Week day: There are eight options: ranges from Saturday to Sunday and all.
Holiday: It is to set holiday setup. Please note you need to go to the General interface (Main
Menu->Setting->System->General) to add holiday first. Otherwise you cannot see this item.
Summary of Contents for NVR-ELE4ME-WS
Page 33: ...163 Figure 3 3 3 5 4 Compact 1U Series Please refer to Figure 3 4 for connection sample...
Page 51: ...181 Figure 3 24...
Page 63: ...193 Figure 4 14 Figure 4 15 Step 2 Set network camera login password WARNING...
Page 71: ...201 Figure 4 24 Step 2 Click device display edit interface See Figure 4 25...
Page 148: ...278 Figure 4 114 Figure 4 115...
Page 159: ...289 Figure 4 126 Figure 4 127...
Page 161: ...291 Figure 4 129 Click draw button to draw the zone See Figure 4 130...
Page 165: ...295 Figure 4 133 Click Draw button to draw a zone See Figure 4 134 Figure 4 134...
Page 170: ...300 Figure 4 139 Click draw button to draw the zone See Figure 4 140...
Page 183: ...313 Figure 4 151 Figure 4 152...
Page 184: ...314 Figure 4 153 Figure 4 154...
Page 250: ...380 Figure 4 236...
Page 294: ...424 Figure 5 60 Figure 5 61...
Page 295: ...425 Figure 5 62 Figure 5 63...
Page 319: ...449 Figure 5 97 Figure 5 98...
Page 322: ...452 Figure 5 101 Figure 5 102...


