200
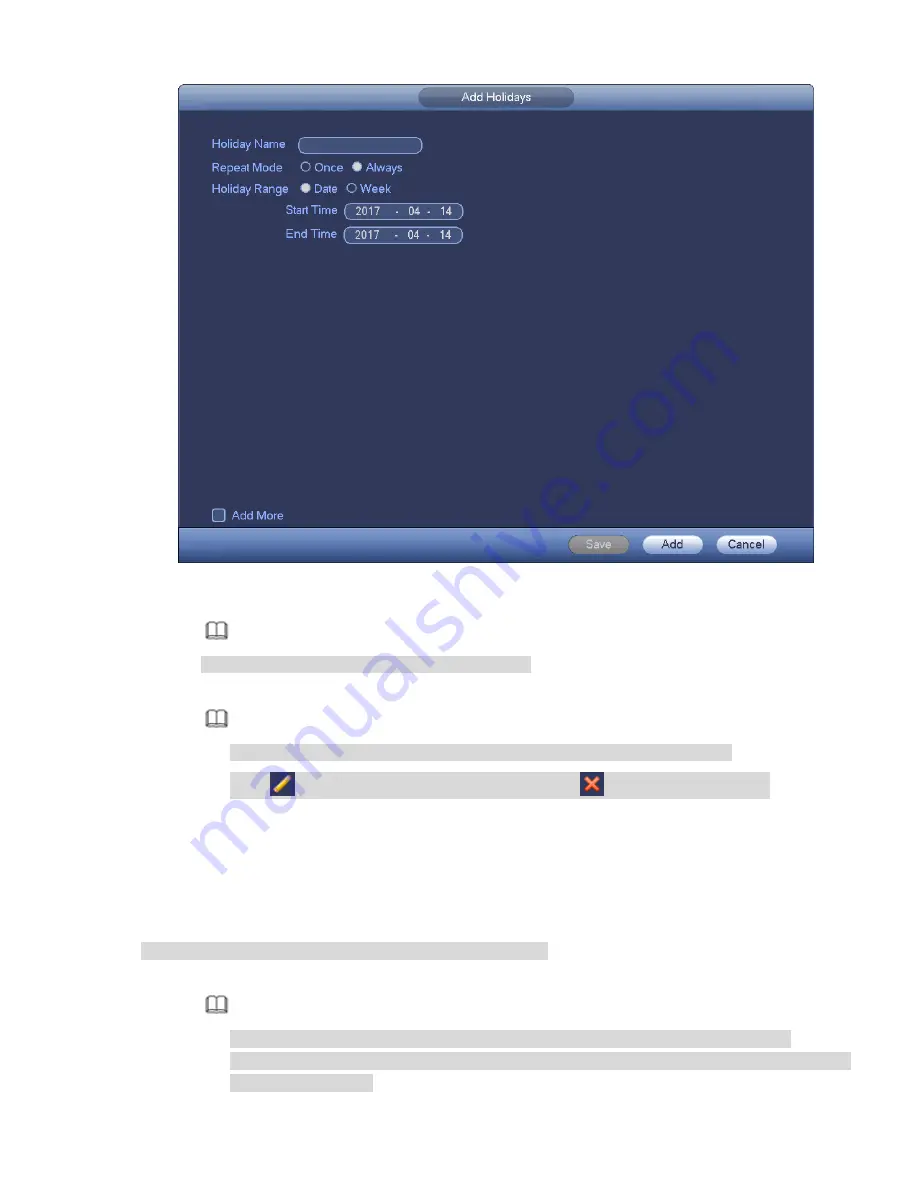
Figure 4-23
Step 3 Set holiday name, repeat mode and holiday mode.
Note
Click Add more to add new holiday information.
Step 4 Click Add button, you can add current holiday to the list.
Note
Click the dropdown list of the state; you can enable/disable holiday date.
Click
to change the holiday information. Click
to delete current date.
Step 5 Click Apply button to save settings.
4.1.4.3 Basic Network Settings
Set device IP address, DNS information so that the device can connect to other devices.
Preparation
Make sure the device has properly connected to the network.
Step 1 Click Next button, device goes to TCP/IP interface. See Figure 4-24.
Note
From Main menu->Setting->Network->TCP/IP, you can go to the TCP/IP interface.
Different series products have different Ethernet adapter amount and type. Please refer to
the actual product.
Summary of Contents for NVR-ELE4ME-WS
Page 33: ...163 Figure 3 3 3 5 4 Compact 1U Series Please refer to Figure 3 4 for connection sample...
Page 51: ...181 Figure 3 24...
Page 63: ...193 Figure 4 14 Figure 4 15 Step 2 Set network camera login password WARNING...
Page 71: ...201 Figure 4 24 Step 2 Click device display edit interface See Figure 4 25...
Page 148: ...278 Figure 4 114 Figure 4 115...
Page 159: ...289 Figure 4 126 Figure 4 127...
Page 161: ...291 Figure 4 129 Click draw button to draw the zone See Figure 4 130...
Page 165: ...295 Figure 4 133 Click Draw button to draw a zone See Figure 4 134 Figure 4 134...
Page 170: ...300 Figure 4 139 Click draw button to draw the zone See Figure 4 140...
Page 183: ...313 Figure 4 151 Figure 4 152...
Page 184: ...314 Figure 4 153 Figure 4 154...
Page 250: ...380 Figure 4 236...
Page 294: ...424 Figure 5 60 Figure 5 61...
Page 295: ...425 Figure 5 62 Figure 5 63...
Page 319: ...449 Figure 5 97 Figure 5 98...
Page 322: ...452 Figure 5 101 Figure 5 102...


