388
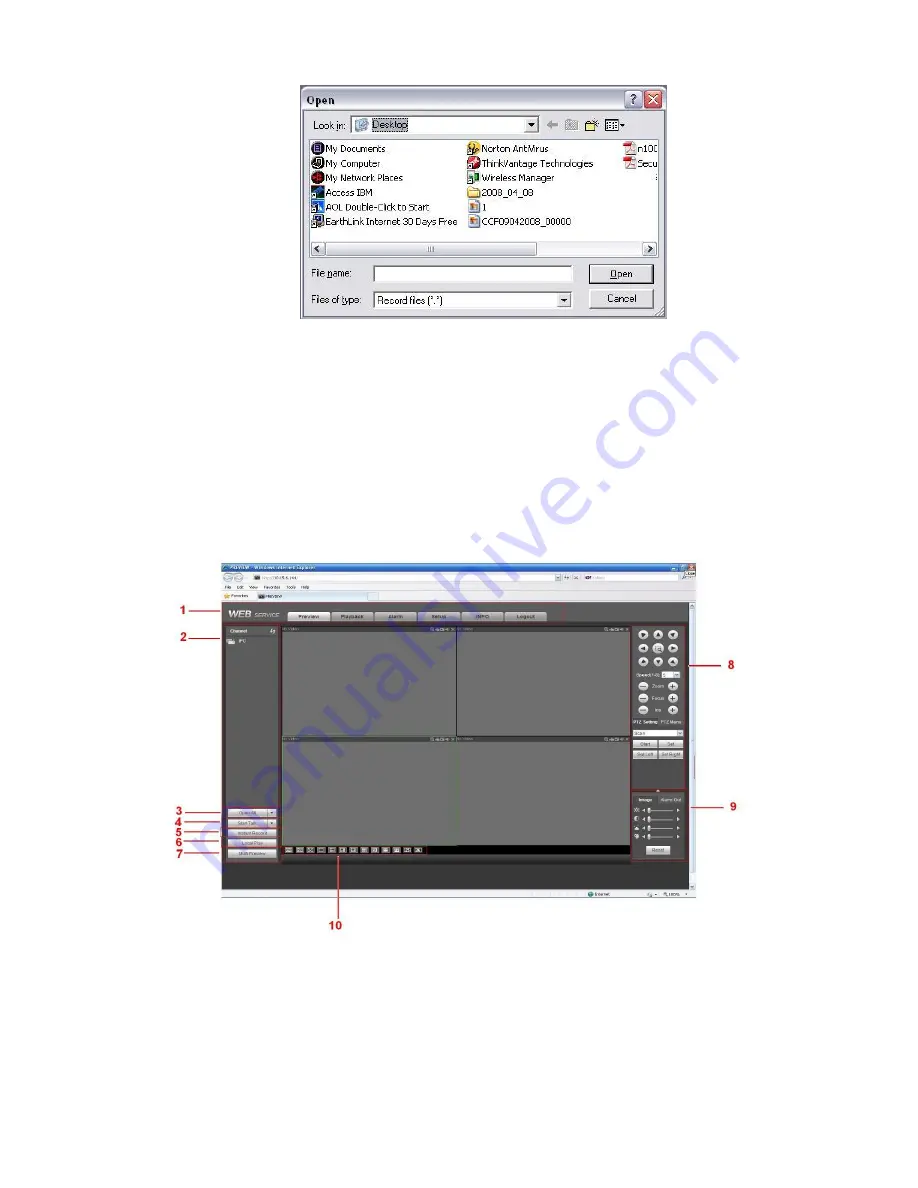
Figure 5-12
Section 7: Zero-channel encoding. Please refer to chapter 5.8 for detailed information.
Section 8: PTZ operation panel. Please refer to chapter 5.6 for detailed information.
Section 9: Image setup and alarm setup. Please refer to chapter 5.7 for detailed information.
Section 10: From the left to the right ,you can see video quality/fluency/ full
screen/1-window/4-window/6-window/8-window/9-window/13-window/16-window/20-window/25-win
dow/36-window.. You can set video fluency and real-time feature priority.
Figure 5-13
5.5 Real-time Monitor
In section 2, left click the channel name you want to view, you can see the corresponding video in current
window.
On the top left corner, you can view device IP(172.11.10.11), channel number(1), network monitor bit
Summary of Contents for NVR-ELE4ME-WS
Page 33: ...163 Figure 3 3 3 5 4 Compact 1U Series Please refer to Figure 3 4 for connection sample...
Page 51: ...181 Figure 3 24...
Page 63: ...193 Figure 4 14 Figure 4 15 Step 2 Set network camera login password WARNING...
Page 71: ...201 Figure 4 24 Step 2 Click device display edit interface See Figure 4 25...
Page 148: ...278 Figure 4 114 Figure 4 115...
Page 159: ...289 Figure 4 126 Figure 4 127...
Page 161: ...291 Figure 4 129 Click draw button to draw the zone See Figure 4 130...
Page 165: ...295 Figure 4 133 Click Draw button to draw a zone See Figure 4 134 Figure 4 134...
Page 170: ...300 Figure 4 139 Click draw button to draw the zone See Figure 4 140...
Page 183: ...313 Figure 4 151 Figure 4 152...
Page 184: ...314 Figure 4 153 Figure 4 154...
Page 250: ...380 Figure 4 236...
Page 294: ...424 Figure 5 60 Figure 5 61...
Page 295: ...425 Figure 5 62 Figure 5 63...
Page 319: ...449 Figure 5 97 Figure 5 98...
Page 322: ...452 Figure 5 101 Figure 5 102...


