SVMi-20i User Guide
© SAMSUNG Electronics Co., Ltd.
47
3.
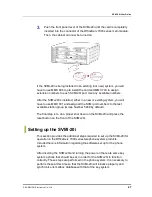
Push the front panel lever of the SVMi-20i until the card is completely
inserted into the connector of the OfficeServ 7000 series main module.
Then, the cabinet can now be turned on.
If the SVMi-20i is being installed in an existing (not new) system, you will
have to use MMC 806 to pre install the card and MMC 740 to assign
extension numbers to each SVMi-20i port. Use any available numbers.
After the SVMi-20i is installed, either in a new or existing system, you will
have to use MMC 601 and assign all the SVMi port numbers to the last
available station group (Group Number 5049 by default).
The final step is to do a proper shut down on the SVMi-20i and press the
reset button on the front of the SVMi-20i.
Setting up the SVMi-20i
This section provides the additional steps required to set up the SVMi-20i for
operation in the OfficeServ 7000 series telephone system products.
Included here is information regarding the software set up for the phone
system.
After inserting the SVMi-20i and turning the power on there are some key
system options that should be set, in order for the SVMi-20i to function
correctly. These steps are performed in the phone system. It is necessary to
perform these at this time so that the SVMi-20i will initialize properly and
synchronize its mailbox database with that of the key system.
Summary of Contents for SVMi-20i
Page 1: ...Ver 2600 00DMMRGAN 3 0 SVMi 20i User Guide ...
Page 6: ...Error Style not defined 6 SAMSUNG Electronics Co Ltd This page is intentionally left blank ...
Page 10: ...TABLE OF CONTENTS 10 SAMSUNG Electronics Co Ltd This page is intentionally left blank ...
Page 68: ...Error Style not defined 68 SAMSUNG Electronics Co Ltd This page is intentionally left blank ...
Page 244: ...Error Style not defined 244 SAMSUNG Electronics Co Ltd This page is intentionally left blank ...


