When Printer is Not Functioning Properly
Paper is not fed from the selected tray.
When you are using a Windows operating system, the printer driver settings override those set using the
control panel. Set the desired input tray using the printer driver.
See the printer driver Help.
It takes too much time to turn on the printer.
If the printer is turned off while it is still accessing the hard disk (for example: during file deletion), the printer
will require more time to power-up the next time it is turned on. To avoid this time delay, do not turn the
power off while it is in operation.
It takes too much time to resume printing.
• Large or complex data takes long time for the printer to process. If the Data In indicator is blinking,
the data is being processed. Just wait until it resumes.
• If OHP transparencies is in use, printing takes more time to start.
• The printer was in the Energy Saver mode. To resume from the Energy Saver mode, the printer has to
warm up, and this takes time until printing starts. To disable the Energy Saver mode, select [Off] for
[Energy Saver] in the [System] menu.
• Changing the paper feed direction may sometimes reduce the time to resume printing.
It takes too much time to complete the print job.
• Photographs and other data intensive pages take a long time for the printer to process, so simply wait
when printing such data.
Changing the settings with printer driver may help to speed up printing.
See the printer driver Help.
• Large or complex data takes long time for the printer to process. If the Data In indicator is blinking,
the data is being processed. Just wait until it resumes.
• If "Waiting..." appears on the display, the printer is now warming up. Wait for a while.
Network configurations you have made do not become effective.
Print a configuration page and check the network settings.
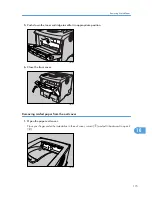
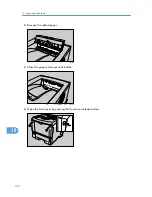
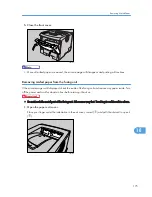
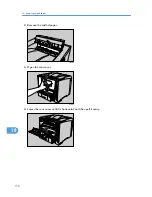
The control panel error message stays on after removing the misfed paper.
Open the front cover of the printer and then close it.
See p.167 "Removing Misfed Paper".
Other Printing Problems
161
9
Summary of Contents for LP131n
Page 6: ...Options 192 INDEX 197 4 ...
Page 18: ...1 Guide to the Printer 16 1 ...
Page 48: ...2 Installing Options 46 2 ...
Page 53: ... p 37 Attaching Gigabit Ethernet Board Type A USB Connection 51 3 ...
Page 76: ...4 Configuration 74 4 ...
Page 130: ...6 Replacing Consumables and Maintenance Kit 128 6 ...
Page 140: ...7 Cleaning the Printer 138 7 ...
Page 198: ...11 Appendix 196 11 ...
Page 201: ...MEMO 199 ...
Page 202: ...MEMO 200 GB GB EN USA G176 ...
Page 203: ...Copyright 2006 ...


