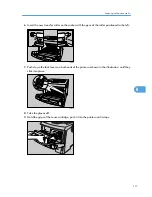
10.
Position the rear cover horizontally and align it with the grooves in the printer's interior.
AUB316S
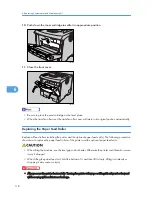
11.
Close the rear cover.
AUB317S
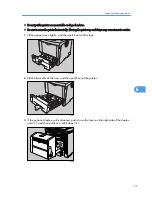
12.
When the optional duplex unit was removed, push in the duplex unit along the rails in the
back of the printer.
AUB226S
6. Replacing Consumables and Maintenance Kit
126
6
Summary of Contents for LP131n
Page 6: ...Options 192 INDEX 197 4 ...
Page 18: ...1 Guide to the Printer 16 1 ...
Page 48: ...2 Installing Options 46 2 ...
Page 53: ... p 37 Attaching Gigabit Ethernet Board Type A USB Connection 51 3 ...
Page 76: ...4 Configuration 74 4 ...
Page 130: ...6 Replacing Consumables and Maintenance Kit 128 6 ...
Page 140: ...7 Cleaning the Printer 138 7 ...
Page 198: ...11 Appendix 196 11 ...
Page 201: ...MEMO 199 ...
Page 202: ...MEMO 200 GB GB EN USA G176 ...
Page 203: ...Copyright 2006 ...


