3. AIS OPERATION
3-7
3.6.1
How to select the number and interval of the past position
You may select the number of past points to display per plotting interval as follows.
1. Open [MAIN MENU], click [TT
.
AIS].
2. Click [PAST POSN].
3. Click [INTERVAL].
4. Click the plot interval desired (0.5 min to 6 min). Click [OFF] to erase all past po-
sition points and deactivate the past position display.
5. Click [POINTS].
6. Click the number of dots to display, 5 or 10.
7. Click outside the menu window to close the menu.
3.7
Lost Target
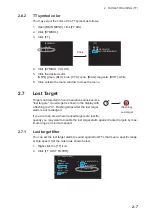
When AIS data is not received from a target within 3-5 report intervals (see Note 2),
the target symbol changes to the lost target symbol (flashing). No audio or visual alarm
is given for a lost target.
Note:
The AIS data transmission interval depends on target’s speed. For example, the
data is transmitted every 10 seconds on ship speed of 0 to 14 knots and every two
seconds on the ship speed of more than 23 knots. For details see the operator’s man-
ual of the AIS transponder.
3.7.1
Lost target filter
If there are a lot of AIS targets in your area, the lost target alarm may sound frequently.
In this case you may wish to have the alarm ignore lost targets whose range, speed,
class or length are below the threshold value you specify.
1. Right-click the [AIS] icon to show [AIS TARGET MENU].
2. Click [AIS LOST FILTER].
[PAST
POSN]
1 BACK
2 INTERVAL
OFF/0.5min/1min/2min/
3min/6min
3 POINTS
5/10
Activated target
Lost target


