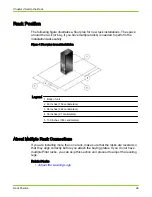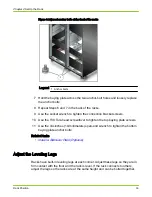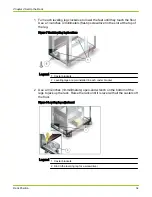
Note: If you connect racks in a bay it is more important that the racks be at
the same height than level so that you can bolt them together.
About Rack Stability
After you move the rack to its final position and adjust the legs, you must stabilize
it to keep it from shifting when you install the components.
You can use any combination of the following actions to stabilize the rack:
● Attach anti-tip brackets and secure them to the floor.
● Attach a stabilizer plate and secure it to the floor.
● Install a seismic stabilization system.
Important! If the rack will be part of a bay of racks, attach the rack to the bay
before you install stabilizer plates or some other seismic stabilization system.
Related tasks
•
•
Install a Stabilizer Plate (Optional)
About Anti-Tip Brackets
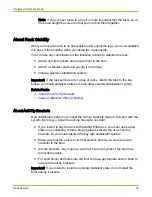
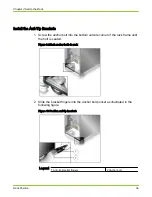
One stabilization option is to install the anti-tip brackets that are included with the
system. Before you install the anti-tip brackets, consider:
● If you intend to bay the rack with another Pillar rack, you must use baying
plates on connecting corners. Baying plates prevent the use of anti-tip
brackets so you must stabilize the bay with stabilization plates.
● Make sure that the rack is in its final position before you secure anti-tip
brackets to the floor.
● Anti-tip brackets may require a sub-floor tie-down system if the floor has
removable panels.
● For solid floors, drill holes into the floor and use appropriate anchor bolts to
secure the anti-tip brackets.
Important! If you intend to install an optional stabilizer plate, do not install the
front anti-tip brackets.
Chapter 2 Set Up the Rack
Rack Position
35

