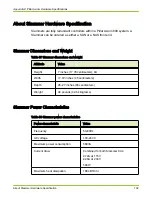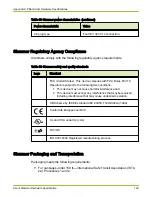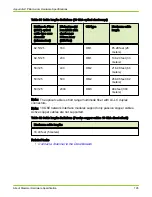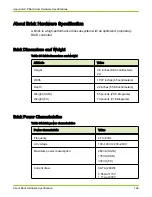
● Verify the placement limits for Bricks and Slammers on the rack due to
power requirements and cable lengths.
● Verify that the placement of the Brick within the new or existing Brick string
follows all cabling guidelines.
● Before the Bricks arrive, decide where you will install each Brick and PDU.
Add Bricks above the Slammers until they reach the top rack unit, and then
start at the top of the next rack and work down. Place the PDUs at the
bottom of the rack.
● Install new PDUs.
Related references
•
Cabling Practices for the Pillar Axiom 600 System
Related tasks
•
Add a New Brick Storage Enclosure
Complete the Slammer Pre-Installation Checklist
Prior to adding new Slammers to a pre-existing Pillar Axiom 600 system,
complete the tasks outlined in the pre-installation checklist.
● Inventory the Slammer and installation components to make sure you have
the correct cables and mounting hardware.
● When ordering cables, check the model type of existing Slammers and
Bricks and identify compatibility issues.
● Before beginning the installation, check the status of the system to ensure
that it is in the correct status, as follows:
○ All Fibre Channel status LEDs on Slammer and Brick ports with
connectors inserted are steady green, not amber or flashing green. To
determine which LEDs reflect the status of a port, refer to the
Service
Guide.
○ The System Status icon in the GUI is green for all components. The
System Status icon is on the left most position of the GUI status bar
and indicates the system status of all hardware components. For more
information, refer to the
Administrator’s Guide.
○ No background tasks are running. Click Tasks on the status bar to
open the Tasks overview page.
○ There are no outstanding system alerts. Click on the System Alerts
icon on the status bar to open the System Alerts overview page and to
Appendix D Expansion of a Pillar Axiom 600 System Configuration
About Expanding a Pillar Axiom 600 Configuration
205


