Chapter 4
Settings — [LIGHTING] menu
ENGLISH - 61
2) Press
qw
.
f
The
[PATTERN]
individual adjustment screen is displayed.
3) Press
qw
to select from [USER1] to [USER5].
4) Press the <ENTER> button.
f
The
[PATTERN]
detailed adjustment screen is displayed.
5) Press
as
to select from [SPOT LIGHT1] to [SPOT LIGHT3].
6) Press
qw
to select [ON], and press the <ENTER> button.
f
The
[SPOT LIGHT1]
to
[SPOT LIGHT3]
detailed adjustment screen is displayed.
[POSITION]
Set the display position of the spotlight.
[SIZE]
Set the display size of the spotlight.
Note
f
Only the selected spotlight appears even when [LIGHTING] is set to [ON].
f
After adjusting the position of the spotlight in [POSITION], the display position of the menu will change.
7) Press
as
to select [POSITION] or [SIZE], and press the <ENTER> button.
f
The
[POSITION]
or
[SIZE]
individual adjustment screen is displayed.
8) Press
asqw
to make adjustment.
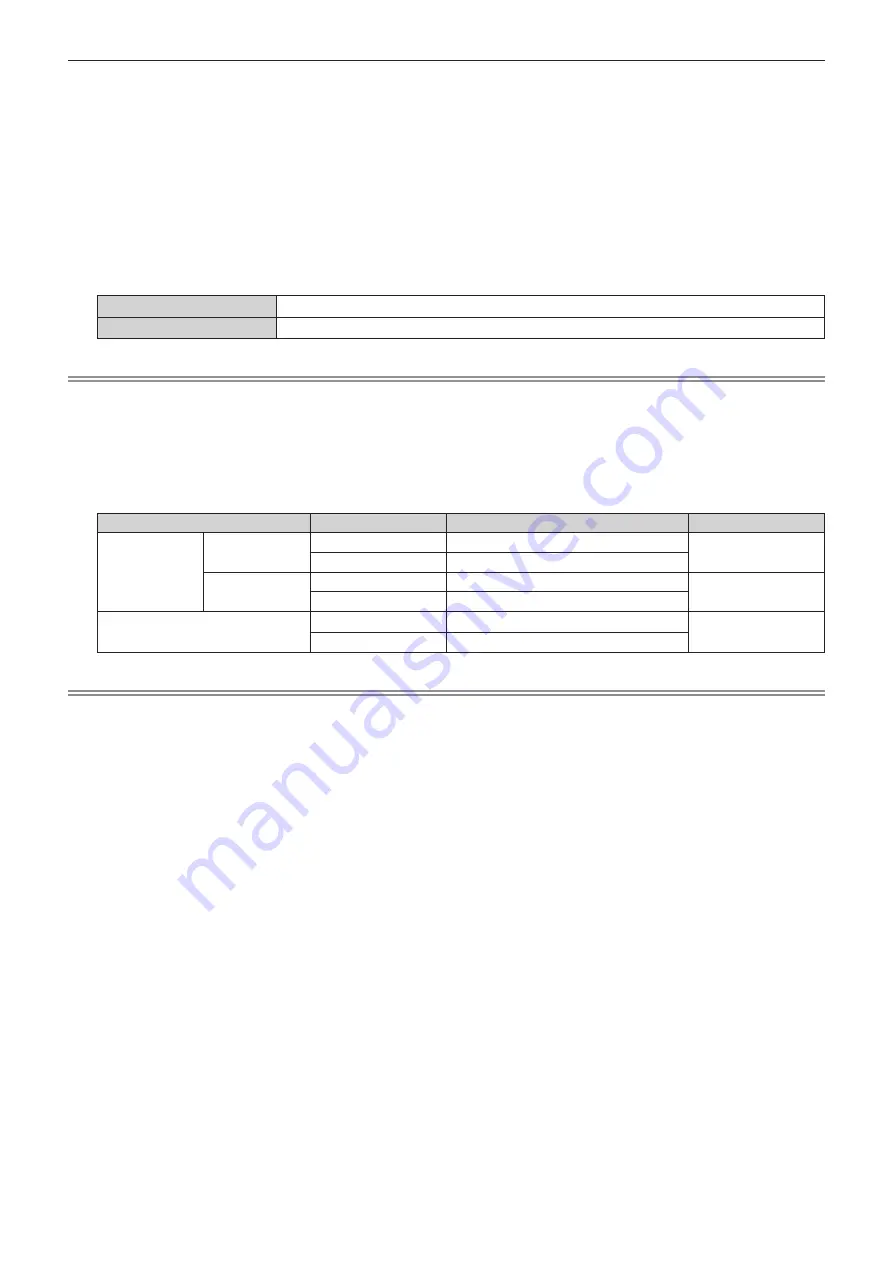
Item
Operation
Adjustment
Range of adjustment
[POSITION]
[X]
Press
w
.
The spotlight moves right.
-20 - +20
Press
q
.
The spotlight moves left.
[Y]
Press
a
.
The spotlight moves up.
-13 - +13
Press
s
.
The spotlight moves down.
[SIZE]
Press
w
.
The spotlight becomes bigger.
[MIN] - [MAX]
(7 levels)
Press
q
.
The spotlight becomes smaller.
Note
f
After setting [PROJECTION METHOD] and [VERTICAL FLIP], make adjustment in the [POSITION] individual adjustment screen to move
the spotlight up, down, left or right (as indicated in the above table) to get a proper view of text on the projected image.
f
When [BACK GROUND] is set to [THROUGH], the moving interval and size of the spotlight differ depending on the resolution of the input
signal. (The spotlight size is smaller under a higher resolution and bigger under a lower resolution.)
f
The shape of the spotlight changes based on the setting of [ASPECT] in [SETUP] menu.


