Tools Mode
67
Self Diagnostics
The Self Diagnostics test allows you to prompt the DP-C106 to assess the
hardware status.
Use the following procedure to begin the self-diagnostics test:
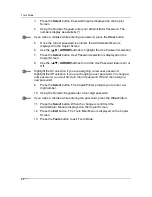
1. Press
the
Tools
button to display the Tools Main Menu on the Copier
Screen.
2.
Using the ( )
ARROW
buttons highlight the Admin menu selection.
3. Press
the
Select
button. Password Input is displayed on the Copier
Screen.
4.
Using the Numeric Keypad, enter your Administrator Password. The
numbers display as asterisks (*).
If you make a mistake while entering a password, press the
Clear
button.
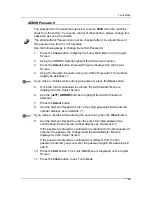
5.
Once the correct password is entered, the Administrator Menu is
displayed on the Copier Screen.
6.
Use the ( )
ARROW
buttons to highlight the Self Diag feature.
7. Press
the
Select
button. Diagnostics selection displays on the Copier
Screen.
8.
Use the ( )
ARROW
buttons
to highlight Self Diag selection.
9. Press
the
Start
button. The DP-C106 automatically begins the
Diagnostics test.
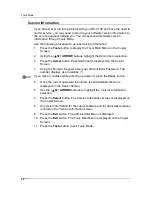
10. When the Copier/Printer has completed the diagnostics test, one of the
following will happen:
•
The Copier Screen
will display a message saying that the copier
has passed the diagnostics test.
•
The Copier Screen
will display an error code indicating that the
copier did not pass the diagnostics test. If this should happen, call
for service
immediately.
For information on calling for service, go to the Problem Solving chapter.
11. Press
the
Exit
button. The Administrator Menu
is displayed.
12. Press
the
Exit
button. The Tools Main Menu is displayed on the Copier
Screen.
13. Press
the
Tools
button to exit Tools Mode.
Summary of Contents for DA-DU26C
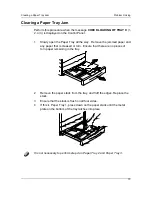
Page 83: ...Clearing Paper Jams Problem Solving 71 ADF Jam Clearance Area Lift to open the Left hand ADF ...
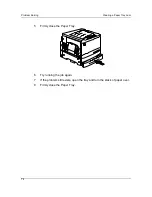
Page 84: ...Problem Solving Clearing Paper Jams 72 This page is intentionally left blank ...
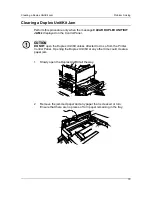
Page 88: ...Problem Solving Clearing a Duplex Unit Kit Jam 76 3 Firmly close the Duplex Unit Kit ...
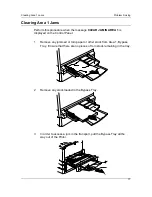
Page 92: ...Problem Solving Clearing Area 1 Jams 80 This page is intentionally left blank ...
Page 94: ...Problem Solving Clearing Area 2 Jams 82 This page is intentionally left blank ...
Page 96: ...Problem Solving Clearing Area 3 Jams 84 This page is intentionally left blank ...
Page 98: ...Problem Solving Clearing Area 4 Jams 86 This page is intentionally left blank ...
Page 116: ...Problem Solving Printer Error Messages 104 This page is intentionally left blank ...
Page 118: ...Problem Solving Printer Error Codes 106 This page is intentionally left blank ...
Page 120: ...Problem Solving Scanner Error Codes 108 This page is intentionally left blank ...
Page 158: ...Maintenance Replacing the Print Copy Cartridge 146 This page is intentionally left blank ...
Page 165: ......

