54
Main Mode: Thumbnail Screen
Visit our website for more information to see the bonding
devices from which location data can be acquired
(
➝
“Website URL” page 9).
http://panasonic.biz/sav/
4.
Press the [EXIT] button to close the metadata confir-
mation screen.
Deleting the metadata settings
The metadata saved in the unit can be deleted to initialize the
settings with the “REC META DATA” - “INITIALIZE” (
➝
page
101) menu item.
1
Use the cursor buttons to align the cursor with “SLOT
n” (“n” is the number of the P2 card slot with the P2
card you want to format inserted) in the “FORMAT”
(
➝
page 93) menu item and press the [SET] button.
Note:
• Selecting “SD CARD” will format the SD memory card insert-
ed in the SD memory card slot.
• If a CPS password is set for the microP2 memory card, a
confirmation message for selecting “CPS(ENCRYPT)” (en-
crypted format) or “NORMAL” (normal format) appears
when you select the slot. If you select “CPS(ENCRYPT),” the
microP2 memory card will be encrypted.
2
Select “YES” in the confirmation message and press
the [SET] button.
Formatting begins.
Note:
• To cancel formatting, select “NO” and press the [SET] but-
ton.
• Be sure to check the data before formatting since data erased
by formatting cannot be recovered.
3
When the confirmation message appears, select
“OK” (press the [SET] button).
Note:
To format a P2 card or SD memory card in another P2 card
slot, repeat steps 1 to 3.
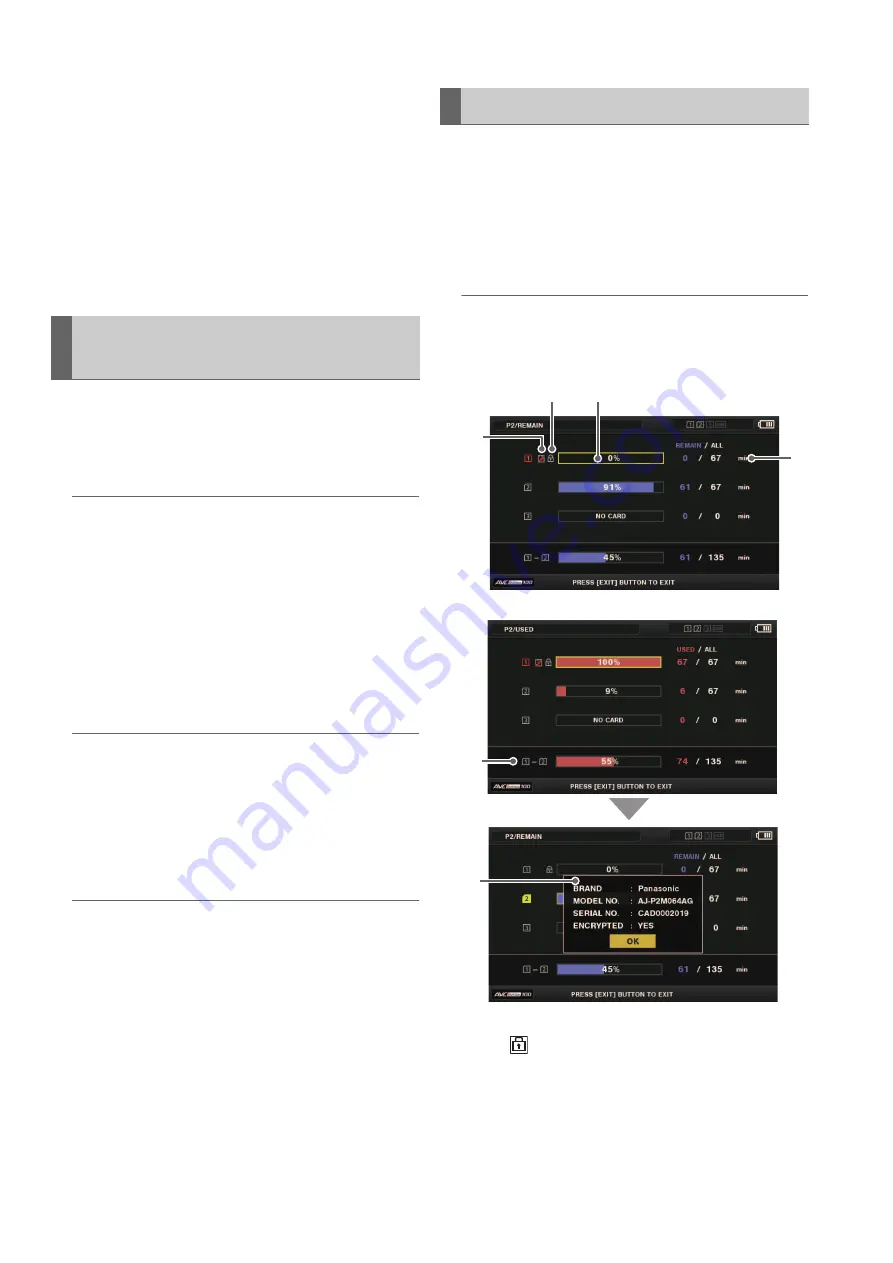
The P2 card slot status, P2 card usage status, and other card
information can be displayed and checked on the screen.
1
Use the cursor buttons to align the cursor with the
“CARD STATUS” (
➝
page 92) menu item and press
the [SET] button.
The P2 card status appears.
Note:
You can switch the display between the remaining free space
and used space in the “REMAIN SETUP” (
➝
page 92) menu
item.
1)
Write protected mark
The
mark is displayed when a P2 card is write pro-
tected.
Formatting P2 Cards and SD Memory
Cards
Checking the Card Status
3)
2)
1)
6)
4)
5)
OR


