31
Adding and Deleting MC Units
Section 4-2
4-2
Adding and Deleting MC Units
Adding MC Units to
Projects
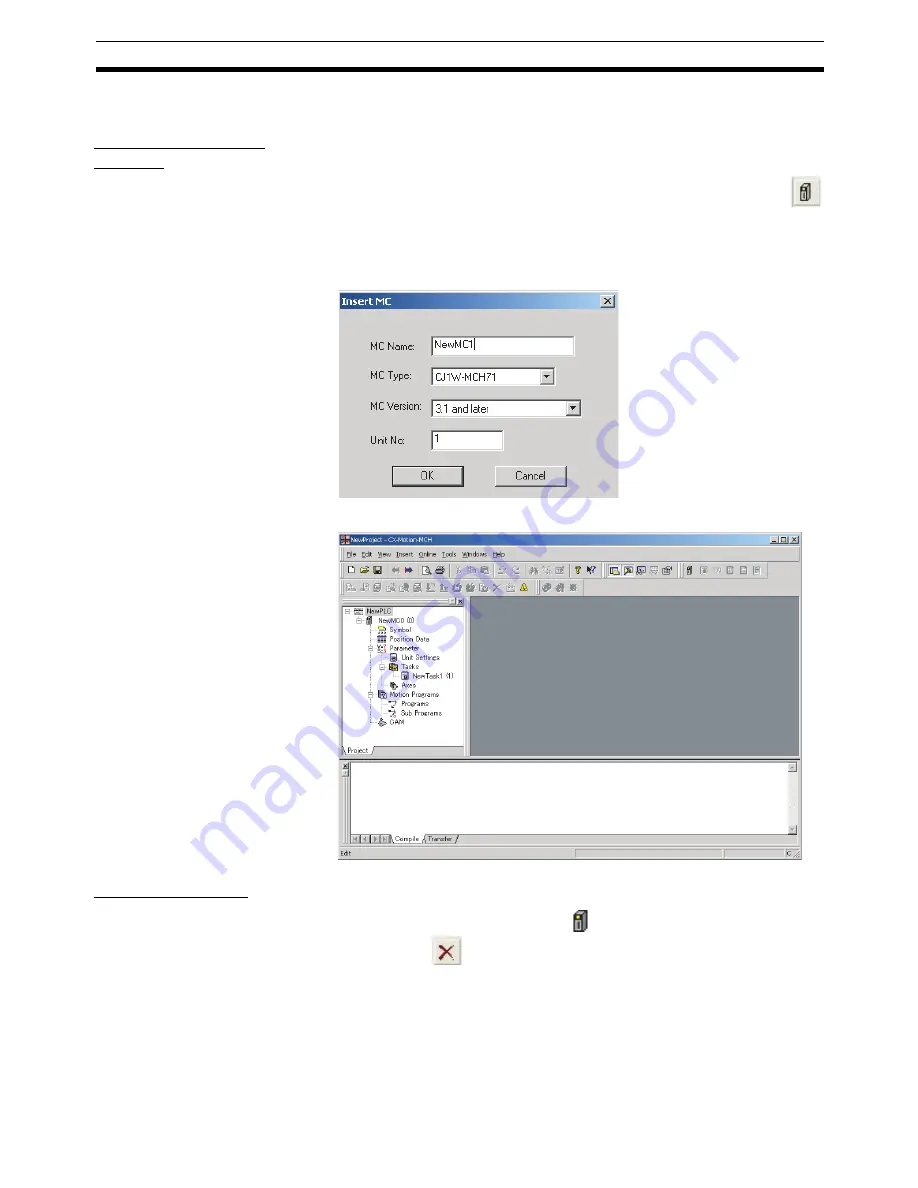
Follow the procedure below to add a Motion Control Unit to the project.
1,2,3...
1.
Select the PLC icon in the project tree and select
Insert - MC
or click
in the toolbar. It is also possible to right-click the PLC icon in the project
tree and select
Insert MC
from the pop-up menu.
2.
Set the MC Unit’s name, model number, and unit number (unit number as
a CPU Bus Unit) in the Insert MC Dialog Box.
3.
Click the
OK
Button. The MC Unit will be added to the project.
Deleting MC Units
1,2,3...
1.
Select the unwanted MC Unit icon (
) in the project tree and select
Edit
- Delete
, click
in the toolbar, or press the
Delete
Key. It is also possi-
ble to right-click the unwanted MC Unit icon in the project tree and select
Delete
from the pop-up menu.
2.
A dialog box will be displayed to confirm the deletion. Click the
Yes
Button
to delete the MC Unit. The selected MC Unit will be deleted from the
project tree.
Summary of Contents for CX-MOTION - 06-2008
Page 1: ...CX Motion MCH Cat No W448 E1 04 OPERATION MANUAL...
Page 2: ...CXONE AL C V3 CXONE AL D V3 CX Motion MCH Operation Manual Revised June 2008...
Page 3: ...iv...
Page 5: ...vi...
Page 9: ...x TABLE OF CONTENTS...
Page 15: ...xvi Note All new functions can be used in Motion Control Units with unit version 3 0 or later...
Page 31: ...12 Connecting to a PLC Section 2 2...
Page 47: ...28 Operations Listed by Purpose Section 3 2...
Page 71: ...52 Exporting File Section 6 4...
Page 91: ...72 Debugging the Program Section 9 3...
Page 95: ...76 Data Traces Section 10 1...
Page 99: ...80 Verifying Backup File with MC Unit Section 11 3...
Page 109: ...90 Printing Section 13 1...
Page 133: ...114 Error Codes Section 15 2...


