82
Media Handling
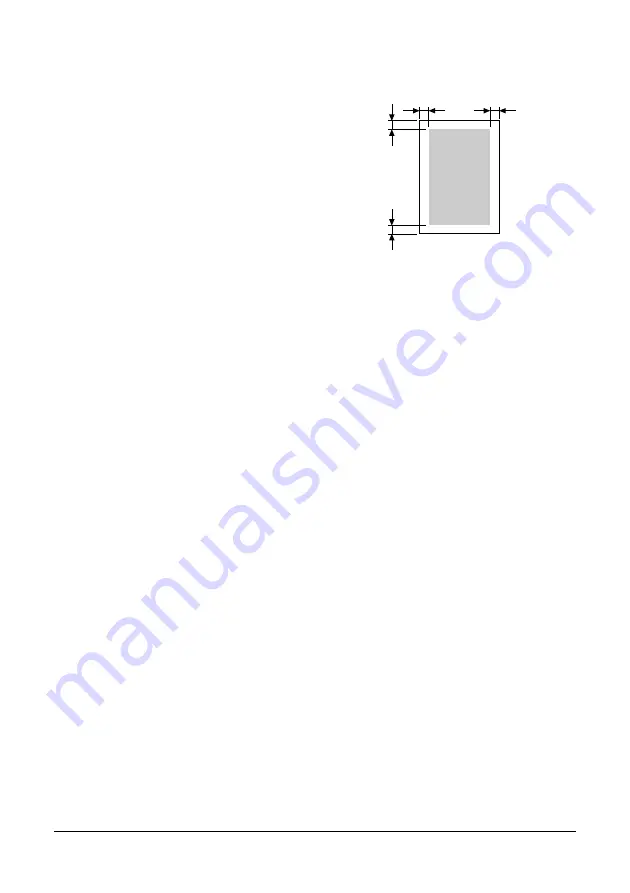
Printable Area
The printable area on all media sizes is up
to 4.0 mm (0.157") from the edges of the
media.
Each media size has a specific printable
area (the maximum area on which the
machine can print clearly and without dis-
tortion).
This area is subject to both hardware limits
(the physical media size and the margins
required by the machine) and software
constraints (the amount of memory avail-
able for the full-page frame buffer). The
printable area for all media sizes is the page size minus 4.0 mm (0.157") from all
edges of the media.
"
When printing in color on legal-size media, the following limitations apply.
z
The printable area is 339.6 (13.4") mm from the leading edge of the
paper. (However, there is a non-printable area up to 4.0 mm (0.157")
from the leading edge.)
z
The bottom margin is 16.0 mm (0.63").
Page Margins
Margins are set through your application. Some applications allow you to set
custom page sizes and margins while others have only standard page sizes and
margins from which to choose. If you choose a standard format, you may lose
part of your image (due to printable area constraints). If you can custom-size
your page in your application, use those sizes given for the printable area for
optimum results.
a
a
a
a
Printable
Area
a=4.0 mm (0.157")
Summary of Contents for MC160N
Page 1: ...User Guide Print Copy Scan Modes 59320401 my okidata com MC160n MFP...
Page 9: ...1Introduction...
Page 21: ...1Control Panel and Configuration Menu...
Page 40: ...40 Control Panel and Configuration Menu FAX RX OPERATION REPORTING SCAN SETTING...
Page 76: ...2Media Handling...
Page 91: ...91 Media Handling 6 Reattach the lid to Tray 2 7 Reinsert Tray 2 into the machine...
Page 101: ...2Using the Printer Driver...
Page 108: ...3Using the Copier...
Page 121: ...4Using the Scanner...
Page 150: ...150 Using the Scanner...
Page 151: ...5Replacing Consumables...
Page 174: ...174 Replacing Consumables...
Page 175: ...6Maintenance...
Page 199: ...7Troubleshooting...
Page 213: ...213 Troubleshooting Note Do not touch the wires and flat cable shown in the illustration...
Page 217: ...217 Troubleshooting 7 Load the media in Tray 2 and attach the lid 8 Reinsert Tray 2...
Page 218: ...218 Troubleshooting 9 Open and close the scanner unit to clear the missfeed message...
Page 222: ...222 Troubleshooting 3 Close the duplex cover...
Page 247: ...3Installing Accessories...
Page 260: ...Appendix...


