79
Media Handling
Dusty
Wet (or damp)
"
Keep media between 15% and 85% relative humidity. Toner does not
adhere well to moist or wet media.
Layered
Adhesive
Folded, creased, curled, embossed, warped, or wrinkled
Perforated, three-hole punched, or torn
Too slick, too coarse, or too textured
Different in texture (roughness) on the front and back
Too thin or too thick
Stuck together with static electricity
Composed of foil or gilt; too luminous
Heat sensitive or cannot withstand the fusing temperature (180°C [356°F])
Irregularly shaped (not rectangular or not cut at right angles)
Attached with glue, tape, paper clips, staples, ribbons, hooks, or buttons
Acidic
Thick Stock
Paper thicker than 90 g/m
2
(24 lb bond) is referred to as thick stock. Test all thick
stock to ensure acceptable performance and to ensure that the image does not
shift.
You can print continuously with thick stock. However, this could affect the media
feed, depending on the media quality and printing environment. If problems
occur, stop the continuous printing and print one sheet at a time.
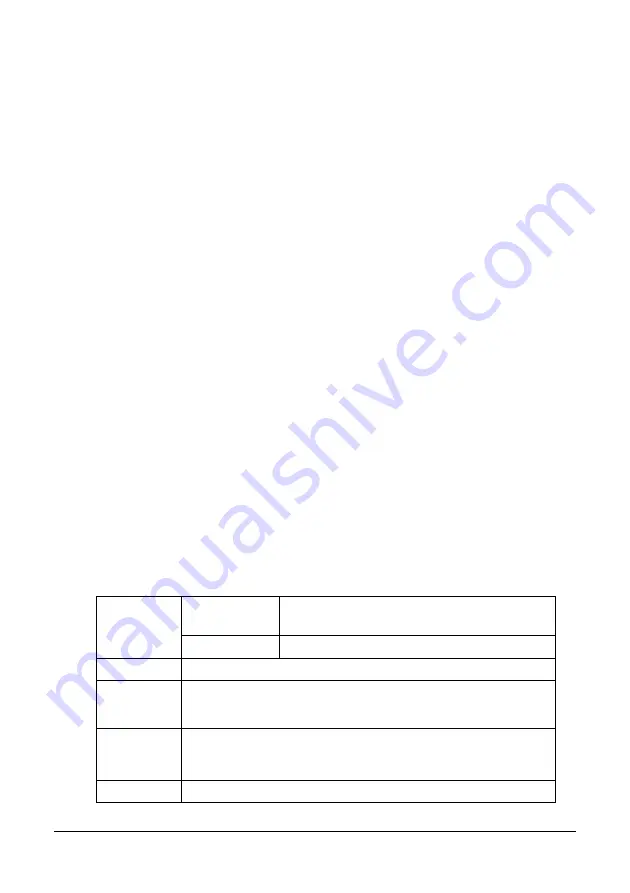
Capacity
Tray 1
Up to 50 sheets, depending on their thick-
ness
Tray 2
Not supported
Orientation
Face up
Driver
Media Type
Thick Stock 1
Thick Stock 2
Weight
Thick Stock 1: 91 to 163 g/m
2
(25 to 43.5 lb bond)
Thick Stock 2: 164 to 209 g/m
2
(43.6 to 55.6 lb bond)
Duplexing
Not supported
Summary of Contents for MC160N
Page 1: ...User Guide Print Copy Scan Modes 59320401 my okidata com MC160n MFP...
Page 9: ...1Introduction...
Page 21: ...1Control Panel and Configuration Menu...
Page 40: ...40 Control Panel and Configuration Menu FAX RX OPERATION REPORTING SCAN SETTING...
Page 76: ...2Media Handling...
Page 91: ...91 Media Handling 6 Reattach the lid to Tray 2 7 Reinsert Tray 2 into the machine...
Page 101: ...2Using the Printer Driver...
Page 108: ...3Using the Copier...
Page 121: ...4Using the Scanner...
Page 150: ...150 Using the Scanner...
Page 151: ...5Replacing Consumables...
Page 174: ...174 Replacing Consumables...
Page 175: ...6Maintenance...
Page 199: ...7Troubleshooting...
Page 213: ...213 Troubleshooting Note Do not touch the wires and flat cable shown in the illustration...
Page 217: ...217 Troubleshooting 7 Load the media in Tray 2 and attach the lid 8 Reinsert Tray 2...
Page 218: ...218 Troubleshooting 9 Open and close the scanner unit to clear the missfeed message...
Page 222: ...222 Troubleshooting 3 Close the duplex cover...
Page 247: ...3Installing Accessories...
Page 260: ...Appendix...


