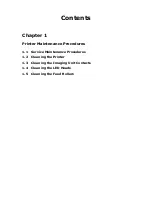
Chapter 1
Printer Maintenance Procedures
1.1 Service Maintenance Procedures
Perform the following procedures whenever you check, service, or repair the printer. Cleaning the
printer, as outlined in the following steps, assures proper operation of the printer and reduces the
probability of having to service the printer in the future. The frequency of use, Average Monthly
Print Volume (AMPV), type of media used, and operating environment are factors in determining
the frequency of this maintenance procedure. Be sure to record the number of sheets printed
between each service visit and attach the PS test page, Demo Page, and configuration sheets to
your service log for future reference.
Recommended Tools
•
Toner vacuum cleaner
•
Laptop computer with:
(Windows XP)
(Current Model Print Drivers)
(Current Command Workstation loaded)
(Kodak Calibration Pack)
•
Clean, dry, lint-free cloth
•
Black, light protective bag
Perform these routine maintenance procedures during the course of servicing the printer.
•
Clean the feed rollers, exit rollers, and guides; replace as necessary.
•
Remove and clean all paper trays.
•
Clean the Color Registration and Automatic Density Control Sensors.
•
Check cleanliness of interior and exterior, including fans; clean as necessary.
•
Check the print engine and Fiery Controller firmware version located on the first page of the
configuration sheet. Update as necessary.
•
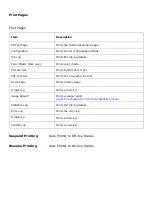
Print a PS test page and Demo page, diagnose, and repair any problems as indicated.
•
Perform the Printer calibrations in
Chapter 2.
•
Review proper printer operation using a customer file, if possible. Check with the customer
regarding any special applications they may be running.
•
Review with the customer all work that was performed; and discuss proper printer care and
the importance of properly using the shut down sequence to prevent Hard Drive
issues.
Summary of Contents for C9800 Series
Page 30: ...Step 3 Setting up the ES 1000 Spectrophotometer...
Page 31: ...Once installation is complete re launch Command Workstation...
Page 32: ......
Page 33: ......
Page 34: ......
Page 35: ......
Page 36: ......
Page 37: ......
Page 38: ......
Page 39: ......
Page 40: ......
Page 41: ......
Page 42: ......
Page 43: ......
Page 44: ......
Page 45: ......
Page 77: ...Close the side cover Carefully remove the jammed paper 4 3...
Page 83: ...Close the top cover and ensure that it is latched 12...
Page 87: ...Raise the front cover of the duplex unit Replace the two top covers 8 7...


