background image

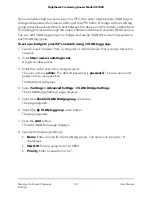
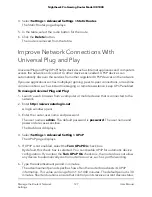
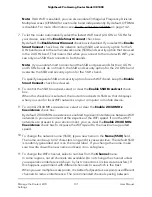
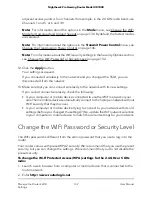
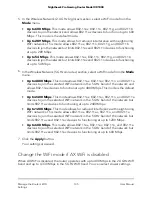
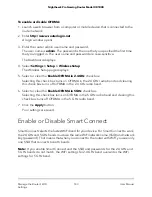
5. In the Wireless Network (2.4 GHz b/g/n/ax) section, select a WiFi mode from the

Mode menu.

Up to 600 Mbps. This mode allows 802.11ax, 802.11n, 802.11g, and 802.11b
devices to join the network and allows 802.11ax devices to function at up to 600
Mbps. This mode is the default mode.

Up to 289 Mbps. This mode allows for reduced interference with neighboring
WiFi networks. This mode allows 802.11ax, 802.11n, 802.11g, and 802.11b
devices to join the network but limits 802.11ax and 802.11n devices to functioning
at up to 289 Mbps.

Up to 54 Mbps. This mode allows 802.11ax, 802.11n, 802.11g, and 802.11b
devices to join the network but limits 802.11ax and 802.11n devices to functioning
at up to 54 Mbps.

6. In the Wireless Network (5 GHz a/n/ac/ax) section, select a WiFi mode from the Mode

menu.

Up to 4800 Mbps. This mode allows 802.11ax, 802.11ac, 802.11n, and 802.11a
devices to join the selected WiFi network in the 5 GHz band of the network and
allows 802.11ax devices to function at up to 4800 Mbps. This mode is the default
mode.

Up to 2400 Mbps. This mode allows 802.11ax, 802.11ac, 802.11n, and 802.11a
devices to join the selected WiFi network in the 5 GHz band of the network but
limits 802.11ax devices to functioning at up to 2400 Mbps.

Up to 1200 Mbps. This mode allows for reduced interference with neighboring
WiFi networks. This mode allows 802.11ax, 802.11ac, 802.11n, and 802.11a
devices to join the selected WiFi network in the 5 GHz band of the network but
limits 802.11ax and 802.11ac devices to functioning at up to 1200 Mbps.

Up to 600 Mbps. This mode allows 802.11ax, 802.11ac, 802.11n, and 802.11a
devices to join the selected WiFi network in the 5 GHz band of the network but
limits 802.11ax and 802.11ac devices to functioning at up to 600 Mbps.

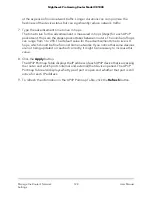
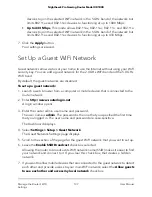
7. Click the Apply button.

Your settings are saved.

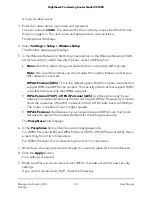
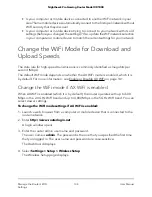
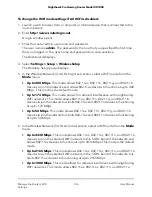
Change the WiFi mode if AX WiFi is disabled

When AX WiFi is disabled, the router operates with up to 400 Mbps in the 2.4 GHz WiFi
band and up to 4,330 Mbps in the 5 GHz WiFi band. You can select slower settings.

User Manual

135

Manage the Router’s WiFi
Settings

Nighthawk Pro Gaming Router Model XR1000

Summary of Contents for Nighthawk Pro XR1000

Page 1: ...User Manual Nighthawk Pro Gaming Router Model XR1000 NETGEAR Inc 350 E Plumeria Drive September 2020 San Jose CA 95134 USA 202 12095 01...
Page 2: ...egulatory compliance information including the EU Declaration of Conformity visit https www netgear com about regulatory See the regulatory compliance document before connecting the power supply For N...

Page 3: ...NETGEAR Nighthawk App 25 Chapter 3 Specify Your Internet Settings Use the Internet Setup Wizard 27 Manually Set Up the Internet Connection 27 Specify an Internet Connection Without a Login 27 Specify...

Page 4: ...ntrol 61 Disable Congestion Control 63 Allocate Bandwidth to Devices 63 Allocate Bandwidth to Types of Applications 66 Reset the Bandwidth Distribution 69 Manage Traffic Prioritization 69 Prioritize T...

Page 5: ...s 101 Add Keywords and Block Access to Specific Internet Sites 101 Delete Keywords From the Blocked List 102 Avoid Blocking on a Trusted Computer 102 Block Services and Applications With Simple Outbou...

Page 6: ...X WiFi is enabled 134 Change the WiFi mode if AX WiFi is disabled 135 Set Up a Guest WiFi Network 137 Use the WPS Wizard for WiFi Connections 139 Control the WiFi Radios 139 Use the WiFi On Off Button...

Page 7: ...69 Disable the Media Server 169 Turn Off the Router LEDs 170 Access Your Router Using the Nighthawk App 171 Chapter 10 Share USB Storage Devices Attached to the Router USB device requirements 173 Acce...

Page 8: ...uter s USB Storage Device and Media 203 Use VPN to Access Your Internet Service at Home 203 Allow VPN Client Internet Access in the Router 203 Block VPN Client Internet Access in the Router 204 Use a...

Page 9: ...urn off 221 Internet or Ethernet Port LEDs Are Off 222 WiFi LEDs Are Off 222 You Cannot Log In to the Router 222 You Cannot Access the Internet 223 Troubleshoot Internet Browsing 225 Changes are not s...

Page 10: ...b interface to monitor your network and configure the router features This chapter contains the following sections Unpack Your Router LEDs and Buttons on the Top Panel Back Panel Attach the Antennas R...

Page 11: ...Pro Gaming router four antennas a power adapter and a flat Ethernet cable The package also contains the installation guide not shown in the following figure Figure 1 Package contents User Manual 11 H...

Page 12: ...Solid white The router is ready Blinking amber The firmware is upgrading or the Reset button was pressed and then released Off Power is not supplied to the router Power LED Solid white The Internet co...

Page 13: ...r 100 Mbps or 10 Mbps Ethernet connections Solid white The router detected a 1 Gbps link with a powered on device Blinking white The port is sending or receiving traffic at 1 Gbps Solid amber The rout...

Page 14: ...y Settings on page 230 USB 3 0 port You can connect a USB storage device to the USB 3 0 port Ethernet ports You can connect a LAN device to each of the four Gigabit Ethernet RJ 45 LAN ports numbered 1...

Page 15: ...ed Ant 2 for the two antenna posts marked Ant 2 on the back panel One antenna marked Ant 3 for the antenna post marked Ant 3 on the right side panel Figure 4 Ant 1 to post 1 and Ant 3 to post 3 Figure...

Page 16: ...n Your Router The router lets you access your network anywhere within the operating range of your WiFi network However the operating distance or range of your WiFi connection can vary significantly de...

Page 17: ...rs Brick Concrete surfaces The following factors might limit the range of your WiFi The thickness and number of walls the WiFi signal passes through Other WiFi access points in and around your home mi...

Page 18: ...em to the yellow Internet port on the router Note If your Internet connection does not require a modem connect your main Ethernet cable to the yellow Internet port on the router 3 Connect the power ad...

Page 19: ...use a wired Ethernet connection This chapter describes the ways you can connect and how to access the router and log in The chapter contains the following sections Connect to the Network Types of Log...

Page 20: ...r computer connects to the local area network LAN WiFi Connection To find and select the WiFi network 1 Make sure that the router is receiving power its Power LED is lit 2 On your computer or mobile d...

Page 21: ...er to Access the Router When you connect to the network either with WiFi or with an Ethernet cable you can use a web browser to access the router to view or change its settings When you access the rou...

Page 22: ...ion to avoid being disconnected when the new WiFi settings take effect 3 Launch a web browser The page that displays depends on whether you accessed the router before The first time you set up the Int...

Page 23: ...lation and registration you are prompted to download the free Nighthawk app which you can install on your mobile device Log In to the Router After you automatically set up your router see Automatic In...

Page 24: ...language is set to Auto To change the language 1 Launch a web browser from a computer or mobile device that is connected to the network 2 Enter http www routerlogin net A login window opens 3 Enter t...

Page 25: ...ng the Nighthawk app 1 To download the app visit https www netgear com home apps services nighthawk app default aspx 2 On your mobile device tap Settings Wi Fi and find and connect to your router s Wi...

Page 26: ...detect the Internet connection when you first access the router with a web browser see Automatic Internet Setup on page 21 You can also customize or specify your Internet settings This chapter contai...

Page 27: ...4 Select Settings Setup Setup Wizard The Setup Wizard page displays 5 Select the Yes radio button If you select the No radio button after you click the Next button you are taken to the Internet Setup...

Page 28: ...ISP automatically assigns these addresses Use Static IP Address Enter the IP address IP subnet mask and the gateway IP address that your ISP assigned The gateway is the ISP router to which your route...

Page 29: ...a login section select the Yes radio button 6 From the Internet Service Provider menu select the encapsulation method PPPoE L2TP or PPTP 7 In the Login field enter the login name that your ISP gave y...

Page 30: ...nd uses the MAC address of the computer that you are now using You must use the one computer that the ISP allows Use This MAC Address Enter the MAC address that you want to use 15 Click the Apply butt...

Page 31: ...ternet Connection on page 34 Set Up an IPv6 Pass Through Internet Connection on page 36 Set Up an IPv6 Fixed Internet Connection on page 36 Set Up an IPv6 DHCP Internet Connection on page 37 Set Up an...

Page 32: ...the slash is the length of the prefix which is also indicated by the underline _ under the IPv6 address If no address is acquired the field displays Not Available Router s IPv6 Address on LAN This fie...

Page 33: ...interface The number after the slash is the length of the prefix which is also indicated by the underline _ under the IPv6 address If no address is acquired the field displays Not Available Router s...

Page 34: ...rk the LAN 10 Optional Select the Use This Interface ID check box and specify the interface ID to be used for the IPv6 address of the router s LAN interface If you do not specify an ID here the router...

Page 35: ...Get Automatically from ISP This is the default setting Your ISP uses DHCP to assign your DNS servers Your ISP automatically assigns this address Use These DNS Servers If you know that your ISP require...

Page 36: ...displays 4 Select Settings Advanced Settings IPv6 The IPv6 page displays 5 From the Internet Connection Type menu select Pass Through The page adjusts but no additional fields display 6 Click the Appl...

Page 37: ...n page 27 7 In the LAN Setup section select an IP Address Assignment radio button Use DHCP Server This method passes more information to LAN devices but some IPv6 systems might not support the DHCPv6...

Page 38: ...ddress is acquired the field displays Not Available 6 Optional In the User Class If Required field enter a host name Most people can leave this field blank but if your ISP gave you a specific host nam...

Page 39: ...window opens 3 Enter the router admin user name and password The user name is admin The password is the one that you specified the first time that you logged in The user name and password are case se...

Page 40: ...es the connection If the connection is terminated for example when the modem is turned off the router attempts to reestablish the connection immediately after the PPPoE connection becomes available ag...

Page 41: ...indow opens 3 Enter the router admin user name and password The user name is admin The password is the one that you specified the first time that you logged in The user name and password are case sens...

Page 42: ...LAN devices but some IPv6 systems might not support the DHCPv6 client function Auto Config This is the default setting This setting specifies how the router assigns IPv6 addresses to the devices on y...

Page 43: ...able to access certain websites frames within websites secure login pages or FTP or POP servers To change the MTU size 1 Launch a web browser from a computer or mobile device that is connected to the...

Page 44: ...value for NETGEAR routers adapters and switches 1500 Used in PPPoE environments 1492 Maximum size to use for pinging Larger packets are fragmented 1472 Used in some DHCP environments 1468 Used in PPTP...

Page 45: ...evices Note By default traffic prioritization for automatically classified games is enabled The classified games are a preset list of games that cover all console games and most PC games Your router a...

Page 46: ...r home area and the distance radius Set your home areas and the distance radius which is the distance to the servers or hosts that you play on and if applicable other players see Use the Geo Filter by...

Page 47: ...force your device to use a host or server inside your radius We recommend this setting for console games If your device is a not console filtering mode is disabled for the device which means that the...

Page 48: ...us but a server in Germany tries to connect to you the Ping Assist option allows that connection if the ping value of the server is below the value that you set for Ping Assist We recommend you set yo...

Page 49: ...ad the ping graph for that connection or enable the Auto Ping Host option by doing the following a In the Geo Filter Map pane click the Geo Filter Map menu icon The Options pane displays b Select the...

Page 50: ...k NEXT If your device is a console filtering mode is enabled for the device which means that the router blocks connections outside your distance radius to force your device to use a host or server ins...

Page 51: ...could set up 3 areas each consisting of 6 points which counts as 18 points e When you are finished drawing exit Drawing Mode by clicking the X Note To remove an area that you drew so you can redefine...

Page 52: ...your area or radius Allowed server a server that you added to the Allowlist Ping assist server a server outside your area or radius that is still allowed Note For information about allowing or blocki...

Page 53: ...u logged in The user name and password are case sensitive The Dashboard displays 4 Select Geo Filter The page that displays shows a map 5 In the Geo Filter Map pane click the connection on the Geo Fil...

Page 54: ...y generated ping graph for a connection 1 Launch a web browser from a computer or mobile device that is connected to the router network 2 Enter http www routerlogin net A login window opens 3 Enter th...

Page 55: ...o add a device to the Geo Filter 1 Launch a web browser from a computer or mobile device that is connected to the router network 2 Enter http www routerlogin net A login window opens 3 Enter the route...

Page 56: ...r by Setting Your Home Area and the Distance Radius on page 46 or Use the Geo Filter by Drawing Areas on page 49 Remove a Device From the Geo Filter You can remove a device from the Geo Filter To remo...

Page 57: ...displays shows a map 5 In the Geo Filter Map pane click the Geo Filter Map menu icon The Options pane displays 6 Configure the following settings Unit of length By default the Kilometers radio button...

Page 58: ...ion benchmark test to determine your Internet upload and download speed for traffic and pings You can then use the test results to configure congestion control see Prevent Network Congestion With Cong...

Page 59: ...terlogin net A login window opens 3 Enter the router admin user name and password The user name is admin The password is the one that you specified the first time that you logged in The user name and...

Page 60: ...a computer or mobile device that is connected to the router network 2 Enter http www routerlogin net A login window opens 3 Enter the router admin user name and password The user name is admin The pas...

Page 61: ...evices Prevent Network Congestion With Congestion Control If you enable congestion control the router can prevent network congestion and queuing delays caused by applications or devices that consume a...

Page 62: ...ct this check box but keep QoS enabled 8 Click the X to close the Options pane 9 Select how you want to apply congestion control Always Select this radio button to always apply congestion control With...

Page 63: ...t A login window opens 3 Enter the router admin user name and password The user name is admin The password is the one that you specified the first time that you logged in The user name and password ar...

Page 64: ...the X to close the Options pane The Bandwidth Allocation pane displays a graph that shows the devices on the router network By default each device is allocated an equal share of the router bandwidth e...

Page 65: ...ther in Mbps or in percentage to a device do the following in the Bandwidth Allocation pane a Above the graph select either the Download radio button or Upload radio button b From the list of devices...

Page 66: ...le applications that you use for gaming or media streaming require more bandwidth than applications that are mostly used for browsing or messaging and chatting You can allocate a percentage of the tot...

Page 67: ...u want to allocate download bandwidth move the associated white circle to the bandwidth percentage that you want to allocate As you move the white circle the download percentages in the white circles...

Page 68: ...andwidth field use the up or down arrows to set the bandwidth In the circle graph move the red band to the desired bandwidth percentage In the field that shows the percentage enter the desired bandwid...

Page 69: ...that you specified the first time that you logged in The user name and password are case sensitive The Dashboard displays 4 Select QoS The Bandwidth Allocation pane displays a graph that shows the dev...

Page 70: ...wser from a computer or mobile device that is connected to the router network 2 Enter http www routerlogin net A login window opens 3 Enter the router admin user name and password The user name is adm...

Page 71: ...ane displays the total number of downloaded packets and the total number of uploaded packets If high priority traffic is automatically being prioritized a colored circle displays in the Download Packe...

Page 72: ...and enter the start and end numbers for the source port enter the start and end numbers for the destination port and select the protocol 11 Click DONE The device is added to the Traffic Prioritization...

Page 73: ...b browser from a computer or mobile device that is connected to the router network 2 Enter http www routerlogin net A login window opens 3 Enter the router admin user name and password The user name i...

Page 74: ...router system information For information about viewing the router logs network statistics and network connections see Maintain the Router on page 150 The chapter includes the following sections Ping...

Page 75: ...u can assemble your own custom lists of servers so that the router can ping them as a group separately from the game based lists they came from You can also track a server separately from other game s...

Page 76: ...y pane for that server do one of the following Use the map On the map click the server At the bottom of the page the ping history pane opens displaying information about the server Use the menu Do the...

Page 77: ...P ADDRESS button is not relevant in this task For more information about this button see Add a Custom Ping List on page 78 d To allow the router to schedule pings click the clock icon In the Tracking...

Page 78: ...nnected to the router network 2 Enter http www routerlogin net A login window opens 3 Enter the router admin user name and password The user name is admin The password is the one that you specified th...

Page 79: ...example 127 0 0 1 local press Enter and repeat the process for each IP address and name that you want to add After you add all your IP addresses to the list click the SAVE button and then click the SA...

Page 80: ...name is admin The password is the one that you specified the first time that you logged in The user name and password are case sensitive The Dashboard displays 4 Select Ping Heatmap The page that disp...

Page 81: ...use If you schedule ping tracking see Ping Game Servers for a Specific Game on page 75 you can select a time span from the Slider Timespan menu to the right below the map and move the slider below the...

Page 82: ...ttp www routerlogin net A login window opens 3 Enter the router admin user name and password The user name is admin The password is the one that you specified the first time that you logged in The use...

Page 83: ...iew and manage devices on the network 1 Launch a web browser from a computer or mobile device that is connected to the router network 2 Enter http www routerlogin net A login window opens 3 Enter the...

Page 84: ...icated by a red icon in the device tree View Network Usage Information The router integrates deep packet inspection DPI so that you can view the devices traffic categories and applications that are us...

Page 85: ...d out and the graph displays the download bandwidth only Click Upload again to redisplay the upload bandwidth To exclude download bandwidth from the pane above the graph in a pane click Download The D...

Page 86: ...nformation 1 Launch a web browser from a computer or mobile device that is connected to the router network 2 Enter http www routerlogin net A login window opens 3 Enter the router admin user name and...

Page 87: ...the flash memory category Click the name of the flash memory category again to redisplay information about the flash memory category To view usage details about a flash memory point to the graph A sma...

Page 88: ...r the Network Overview pane see View Router System Information on page 86 For information about the Network Overview pane see View Network Usage Information on page 84 You can customize the panes that...

Page 89: ...e Dashboard click the pin icon that is associated with the pane The pane is removed from the Dashboard but not from its home page 6 To move a pane to another location on the Dashboard do the following...

Page 90: ...of traffic specific games or port ranges This chapter includes the following sections Manage NETGEAR Armor Allow Block or Reject Traffic Categories Specific Games or Port Ranges With Traffic Rules Blo...

Page 91: ...GEAR Armor visit netgear com landings armor default aspx You can manage NETGEAR Armor from the Nighthawk app You can also view or change your Armor settings from the NETGEAR Armor portal Activate Armo...

Page 92: ...following filtering actions Block This action blocks traffic that conforms to the rule but allows all other traffic When traffic is blocked it is dropped without notification to the traffic source All...

Page 93: ...will be the priority of the rule in relation to other rules For information about reordering your rules see Reorder the Priority of a Traffic Rule on page 96 To add a rule to allow block or reject tr...

Page 94: ...evices because your connection to the router web interface might be terminated and you might need to reset the router to factory default settings to regain access Reject Rejects traffic that conforms...

Page 95: ...ied the first time that you logged in The user name and password are case sensitive The Dashboard displays 4 Select Traffic Controller 5 In the Traffic Rules pane to the right of the rule click the pe...

Page 96: ...dropped with a notification to the traffic source This action is available only for a rule that applies to all traffic or to a port range It is not available for a rule that applies to particular cate...

Page 97: ...the priority of the rule The rule and all rules below the rule are renumbered The new priority takes effect immediately Enable or Disable a Traffic Rule When you add a traffic rule the rule is enabled...

Page 98: ...Dashboard displays 4 Select Traffic Controller 5 In the Traffic Rules pane above the table at the upper right enable or disable all rules by clicking the Disable All Rules button When all rules are d...

Page 99: ...ve a traffic rule that you no longer need After you remove the rule traffic to which the rule applied is no longer affected To remove a traffic rule 1 Launch a web browser from a computer or mobile de...

Page 100: ...ion displays Traffic Analytics pane The information in this pane shows how effective your traffic rules are The status indicator lights when traffic is being detected for the rule For example if a rul...

Page 101: ...e password is the one that you specified the first time that you logged in The user name and password are case sensitive The Dashboard displays 4 Select Settings Content Filtering Block Sites The Bloc...

Page 102: ...specified the first time that you logged in The user name and password are case sensitive The Dashboard displays 4 Select Settings Content Filtering Block Sites The Block Sites page displays 5 Do one...

Page 103: ...he trusted network such as your LAN from another the untrusted network such as the Internet while allowing communication between the two The router provides one default outbound firewall rule It allow...

Page 104: ...r Schedule radio button For information about how to specify the schedule see Set Up a Schedule for Keyword Blocking and Simple Outbound Firewall Rules on page 106 6 Click the Add button The Block Ser...

Page 105: ...aunch a web browser from a computer or mobile device that is connected to the router network 2 Enter http www routerlogin net A login window opens 3 Enter the router user name and password The user na...

Page 106: ...ltering Block Services The Block Services page displays 5 In the Service Table select the radio button for the rule 6 Click the Delete button The rule is removed from the Service Table Set Up a Schedu...

Page 107: ...heck box By default the Every Day check box is selected Time of Day to Block Select a start and end time for blocking in 24 hour format or select the All Day check box for 24 hour blocking By default...

Page 108: ...9 If your outgoing email server requires authentication select the My mail server requires authentication check box and do the following a In the User Name field type the user name for the outgoing e...

Page 109: ...o the schedule that you set If the log fills before the specified time the router sends all log messages After the router sends the log messages they are cleared from the router memory If the router c...

Page 110: ...ter includes the following sections View or Change WAN Settings Set Up a Default DMZ Server Change the Router s Device Name Change the Router s LAN IP Address and RIP Settings Specify the IP Addresses...

Page 111: ...mstances Default DMZ Server This feature is sometimes helpful when you are playing online games or videoconferencing but it makes the firewall security less effective For more information see Set Up a...

Page 112: ...e application correctly if the IP address for that computer is entered as the default DMZ server WARNING DMZ servers pose a security risk A computer designated as the default DMZ server loses much of...

Page 113: ...t the new device name To change the router s device name 1 Launch a web browser from a computer or mobile device that is connected to the router network 2 Enter http www routerlogin net A login window...

Page 114: ...the same IP scheme To change the LAN IP address and RIP settings 1 Launch a web browser from a computer or mobile device that is connected to the router network 2 Enter http www routerlogin net A logi...

Page 115: ...gs are saved If you changed the LAN IP address of the router you are disconnected when this change takes effect 9 To reconnect close your browser relaunch it and log in to the router Specify the IP Ad...

Page 116: ...check box is selected 6 Specify the range of IP addresses that the router assigns a In the Starting IP Address field type the lowest number in the range This IP address must be in the same subnet as...

Page 117: ...password is the one that you specified the first time that you logged in The user name and password are case sensitive The Dashboard displays 4 Select Settings Setup LAN Setup The LAN Setup page disp...

Page 118: ...om device To add a device that the router detected and that is in the Address Reservation Table select the radio button for the device The IP Address field MAC Address field and Device Name field are...

Page 119: ...The user name and password are case sensitive The Dashboard displays 4 Select Settings Setup LAN Setup The LAN Setup page displays 5 Select the radio button next to the reserved address 6 Click the Ed...

Page 120: ...to the ISP s network directly you can enable the bridge between the device and the router s Internet port or add new VLAN tag groups to the bridge Note If your ISP provides instructions for how to se...

Page 121: ...ox If your device is connected to an Ethernet port on the router select the Wired Ports check box that corresponds to the Ethernet port on the router to which the device is connected If your device is...

Page 122: ...the network 2 Enter http www routerlogin net A login window opens 3 Enter the router user name and password The user name is admin The default password is password The user name and password are case...

Page 123: ...an IPTV service and your IPTV service requires an intranet address Some IPTV ports cannot work behind NAT because the IPTV port requires an IP address within the Internet service provider s network in...

Page 124: ...se Your main Internet access is through a cable modem to an ISP Your home network includes an ISDN router for connecting to the company where you are employed This router s address on your LAN is 192...

Page 125: ...Add button The page adjusts 6 In the Route Name field type a name for this static route for identification purposes only 7 To limit access to the LAN only select the Private check box If the Private c...

Page 126: ...s The Static Routes page displays 5 In the table select the radio button for the route 6 Click the Edit button The Static Routes page adjusts 7 Edit the route information 8 Click the Apply button Your...

Page 127: ...ed to the network 2 Enter http www routerlogin net A login window opens 3 Enter the router user name and password The user name is admin The default password is password The user name and password are...

Page 128: ...ops which should be fine for most home networks If you notice that some devices are not being updated or reached correctly it might be necessary to increase this value 8 Click the Apply button The UPn...

Page 129: ...r Security Level Change the WiFi Mode for Download and Upload Speeds Set Up a Guest WiFi Network Use the WPS Wizard for WiFi Connections Control the WiFi Radios Set Up a WiFi Schedule Enable or Disabl...

Page 130: ...ct the 2 4 GHz and 5 GHz bands must use the same WiFi network name SSID and network key password To specify basic WiFi settings 1 Launch a web browser from a computer or mobile device that is connecte...

Page 131: ...router broadcasts its SSID so that it displays when you scan for local WiFi networks on your computer or mobile device 9 To control 20 40 MHz coexistence select or clear the Enable 20 40 MHz Coexisten...

Page 132: ...your computer or mobile device connected to another WiFi network in your area Some mobile devices automatically connect to the first open network without WiFi security that they discover Is your compu...

Page 133: ...ersonal TKIP WPA2 Personal AES Use this option only if your network includes older devices that do not support WPA2 However this modes limits the operation of the WiFi network in the 2 4 GHz radio ban...

Page 134: ...more information see Enable or Disable AX WiFi on page 141 Change the WiFi mode if AX WiFi is enabled When AX WiFi is enabled which it is by default the router operates with up to 600 Mbps in the 2 4...

Page 135: ...devices to function at up to 4800 Mbps This mode is the default mode Up to 2400 Mbps This mode allows 802 11ax 802 11ac 802 11n and 802 11a devices to join the selected WiFi network in the 5 GHz band...

Page 136: ...802 11ax 802 11n 802 11g and 802 11b devices to join the network but limits 802 11ax and 802 11n devices to functioning at up to 173 Mbps Up to 54 Mbps This mode allows 802 11ax 802 11n 802 11g and 8...

Page 137: ...etwork 2 Enter http www routerlogin net A login window opens 3 Enter the router admin user name and password The user name is admin The password is the one that you specified the first time that you l...

Page 138: ...ices that support WPA3 can connect too but their security is are limited to the security that WPA2 supports WPA Personal TKIP WPA2 Personal AES Use this option only if your guest network includes olde...

Page 139: ...ck the WPS button on this page PIN Number The page adjusts again Enter the client security PIN and click the Next button 7 Within two minutes go to the WPS enabled device and use its WPS software to c...

Page 140: ...ack on To enable or disable the WiFi radios 1 Launch a web browser from a computer or mobile device that is connected to the router network 2 Enter http www routerlogin net A login window opens 3 Ente...

Page 141: ...page displays You can specify the settings for the 2 4 GHz band and 5 GHz band 5 Click the Add a new period button The page adjusts 6 Use the menus radio buttons and check boxes to set up a period dur...

Page 142: ...enable Orthogonal Frequency Division Multiple Access OFDMA for each radio band independently By default OFDMA is disabled in both radio bands even when AX WiFi is enabled OFDMA allows data transmissio...

Page 143: ...GHz radio band 6 Select or clear the Enable OFDMA in 5GHz check box Selecting this check box turns on OFDMA in the 5 GHz radio band and clearing this check box turns off OFDMA in the 5 GHz radio band...

Page 144: ...ing contrasts with explicit beamforming which means the router actively tracks clients and directs power to the router antenna closest to the client Explicit beamforming works whether or not the clien...

Page 145: ...ou can enable it To enable or disable MU MIMO 1 Launch a web browser from a computer or mobile device that is connected to the router network 2 Enter http www routerlogin net A login window opens 3 En...

Page 146: ...case sensitive The Dashboard displays 4 Select Settings Setup Wireless Setup The Wireless Setup page displays You can specify the settings for the 2 4 GHz band and 5 GHz band 5 In the Wireless Network...

Page 147: ...hat you specified the first time that you logged in The user name and password are case sensitive The Dashboard displays 4 Select Settings Advanced Settings Advanced Wireless The Advanced Wireless Set...

Page 148: ...in net A login window opens 4 Enter the router user name and password The user name is admin The password is the one that you specified the first time that you logged in The user name and password are...

Page 149: ...e WiFi radio on the other router access point or gateway and use this router only for WiFi client access 8 Click the Apply button The IP address of the router changes and you are disconnected 9 To rec...

Page 150: ...min Password Enable admin Password Recovery Recover the admin Password Manage the Router Configuration File Return the Router to its Factory Default Settings Set Your Time Zone Change the NTP Server M...

Page 151: ...the router Note We recommend that you connect a computer to the router using an Ethernet connection to update the firmware To check for new firmware and update your router 1 Launch a web browser from...

Page 152: ...time that you logged in The user name and password are case sensitive The Dashboard displays c Select System Information The page that displays shows multiple panes The firmware version is listed in t...

Page 153: ...pdate The Firmware Update page displays 7 Click the Browse button 8 Find and select the saved firmware file on your computer 9 Click the Upload button The router begins the update WARNING To avoid the...

Page 154: ...in password 1 Launch a web browser from a computer or mobile device that is connected to the router network 2 Enter http www routerlogin net A login window opens 3 Enter the router admin user name and...

Page 155: ...ou specified the first time that you logged in The user name and password are case sensitive The Dashboard displays 4 Select Settings Administration Set Password The Set Password page displays 5 Selec...

Page 156: ...set it to the factory default settings Back Up the Configuration Settings To back up the router s configuration settings 1 Launch a web browser from a computer or mobile device that is connected to th...

Page 157: ...s uploaded to the router and the router restarts WARNING Do not interrupt the restoration process Return the Router to its Factory Default Settings Under some circumstances for example if you lost tra...

Page 158: ...is complete the user name is admin the password is password and the LAN IP address is 192 168 1 1 DHCP is enabled Erase the Current Configuration Settings You can erase the current configuration and...

Page 159: ...itive The Dashboard displays 4 Select Settings Administration NTP The NTP Settings page displays 5 Select your time zone from the menu 6 If you live in a region that observes daylight saving time sele...

Page 160: ...thly limit and get a live update of traffic usage Start the Traffic Meter Without Traffic Volume Restrictions You can monitor the traffic volume without setting a limit To start or restart the traffic...

Page 161: ...er admin user name and password The user name is admin The password is the one that you specified the first time that you logged in The user name and password are case sensitive The Dashboard displays...

Page 162: ...onitor the data traffic For more information see View the Internet Traffic Volume and Statistics on page 163 Restrict Internet Traffic by Connection Time You can record and restrict the traffic by con...

Page 163: ...t connection This setting is optional When the traffic limit is reached the Internet connection is disconnected and disabled 11 Click the Apply button Your settings are saved and the router restarts T...

Page 164: ...ernet connection after the traffic limit is reached you cannot access the Internet until you unblock the traffic meter CAUTION If your ISP set a traffic limit your ISP might charge you for the overage...

Page 165: ...hether Internet access was blocked or allowed Source IP The IP address of the initiating device for the log entry Target address The name or IP address of the website or news group visited or to which...

Page 166: ...atistics information System Up Time The time elapsed since the router was last restarted Port The statistics for the WAN Internet port LAN Ethernet ports and WLANs WiFi networks For each port the page...

Page 167: ...pecified the first time that you logged in The user name and password are case sensitive The Dashboard displays 4 Click Settings Monitoring Connection Status The Connection Status page displays The in...

Page 168: ...he ISP s DHCP server assigns the same IP address to the router but it is possible that the ISP s DHCP server assigns a different IP address to the router Restart the Router From Its Web Interface You...

Page 169: ...ne click the X Disable the Media Server By default the router functions as a DLNA media server which lets you view movies and photos on DLNA UPnP AV compliant media players such as Xbox360 Playstation...

Page 170: ...ff the LEDs 1 Launch a web browser from a computer or mobile device that is connected to the router network 2 Enter http www routerlogin net A login window opens 3 Enter the router admin user name and...

Page 171: ...ur router s firmware and download the latest Nighthawk app for your mobile device For more information about how to update your router s firmware see Update the Router Firmware on page 151 To download...

Page 172: ...onnect computers USB modems CD drives or DVD drives to the router USB port This chapter contains the following sections USB device requirements Access a storage device connected to the router Access a...

Page 173: ...ter supports the following file system types for full read write access FAT16 FAT32 NTFS NTFS with compression format enabled Ext2 Ext3 Ext4 HFS HFS Access a storage device connected to the router Fro...

Page 174: ...torage device uses a power supply connect it You must use the power supply when you connect the USB storage device to the router When you connect the USB storage device to the router s port it might t...

Page 175: ...torage device to the router When you connect the USB storage device to the router s port it might take up to two minutes before it is ready for sharing By default the USB storage device is available t...

Page 176: ...the USB storage device within your network type readyshare HTTP Access is enabled by default and no password is required To access the USB storage device within your network type http readyshare rout...

Page 177: ...ox To prevent access clear the associated Enable check box 7 For any access method to require access with the same password that you specified the first time that you logged in to the router select th...

Page 178: ...Storage Device You can view the network folders on a storage device connected to the router To view network folders 1 Launch a web browser from a computer or mobile device that is connected to the ro...

Page 179: ...router USB port To add a network folder 1 Launch a web browser from a computer or mobile device that is connected to the router network 2 Enter http www routerlogin net A login window opens 3 Enter t...

Page 180: ...me and password The user name is admin The password is the one that you specified the first time that you logged in The user name and password are case sensitive The Dashboard displays 4 Select Settin...

Page 181: ...first time that you logged in The user name and password are case sensitive The Dashboard displays 4 Select Settings USB Functions ReadySHARE Storage The USB Storage Advanced Settings page displays 5...

Page 182: ...DNS you can use the Internet to access USB storage devices that are attached to the router s USB ports when you are not home This chapter includes the following sections Set Up and Manage Dynamic DNS...

Page 183: ...IP address such as 192 168 x x or 10 x x x the Dynamic DNS service does not work because private addresses are not routed on the Internet Set Up a New Dynamic DNS Account To set up Dynamic DNS and re...

Page 184: ...om a computer or mobile device that is connected to the router network 2 Enter http www routerlogin net A login window opens 3 Enter the router admin user name and password The user name is admin The...

Page 185: ...t A login window opens 3 Enter the router admin user name and password The user name is admin The password is the one that you specified the first time that you logged in The user name and password ar...

Page 186: ...the Internet 3 Connect a storage device to the router 4 If your USB storage device uses a power supply connect it You must use the power supply when you connect the USB storage device to the router Wh...

Page 187: ...er s Internet port IP address You can view the router s Internet IP address on the router s System Information page Set Up FTP Access Through the Internet To set up FTP access over the Internet 1 Laun...

Page 188: ...a storage device connected to the router launch a web browser To upload a file to a storage device connected to the router launch an FTP client such as Filezilla 2 Type ftp and the Internet port IP ad...

Page 189: ...5 Download or upload the file User Manual 189 Use Dynamic DNS to Access USB Storage Devices Through the Internet Nighthawk Pro Gaming Router Model XR1000...

Page 190: ...ur network For more information about the features available in the NETGEAR USB Control Center see the ReadySHARE Printer User Manual which is available at http downloadcenter netgear com This chapter...

Page 191: ...et started link to download the ReadySHARE Printer utility setup file to your Windows based computer 4 Follow the instructions on the page to download the ReadySHARE Printer utility Install the ReadyS...

Page 192: ...es the printing queue By default the utility starts automatically whenever you log on to Windows and runs in the background To print a document using the NETGEAR USB Control Center 1 Click the NETGEAR...

Page 193: ...he status changes to Available Now any computers on the network can use the printer 6 To exit the utility select System Exit User Manual 193 Share a USB Printer Nighthawk Pro Gaming Router Model XR100...

Page 194: ...ribes how to set up VPN service in the router and use VPN access The chapter includes the following sections Set Up a VPN Connection Specify VPN Service in the Router Install OpenVPN Software Use a VP...

Page 195: ...x x or 10 x x x that never changes to your Internet account the VPN can use that IP address to connect to your home network Specify VPN Service in the Router You must specify the VPN service settings...

Page 196: ...our computer before you can use a VPN connection Install OpenVPN Software You must install this software on each Windows based computer Mac computer iOS device or Android device that you plan to use f...

Page 197: ...es Step 17 provides information about what to do with the downloaded OpenVPN configuration files 7 To download the OpenVPN client utility visit openvpn net index php download community downloads html...

Page 198: ...folder and click the Next button 15 Click the Install button The window displays the progress of the installation and then displays the final installation window 16 Click the Finish button 17 Unzip th...

Page 199: ...ware on Your Mac Computer You must install this software on each Mac computer that you plan to use for VPN connections to your router To install VPN client software on your Mac computer 1 Launch a web...

Page 200: ...device that is connected to the router network 2 Enter http www routerlogin net A login window opens 3 Enter the router admin user name and password The user name is admin The password is the one tha...

Page 201: ...are case sensitive The Dashboard displays 4 Select Settings Advanced Settings VPN Service The VPN Service page displays 5 If you did not yet enable VPN service select the Enable VPN Service check box...

Page 202: ...ge the IP scheme either for your home network or for the network with the client VPN computer For information about changing these settings see Change the Router s LAN IP Address and RIP Settings on p...

Page 203: ...Your Internet Service at Home When you are away from home and you access the Internet you usually use a local Internet service provider For example at a coffee shop you might be given a code that let...

Page 204: ...ation options on this page see Specify VPN Service in the Router on page 195 6 Scroll down to the Clients will use this VPN connection to access section and select the All sites on the Internet Home N...

Page 205: ...cify VPN Service in the Router on page 195 6 Scroll down to the Clients will use this VPN connection to access section and select the Home Network only radio button The VPN connection is to your home...

Page 206: ...4 When the VPN connection is established launch your Internet browser User Manual 206 Use VPN to Access Your Network Nighthawk Pro Gaming Router Model XR1000...

Page 207: ...and port triggering to set up rules for Internet traffic You need networking knowledge to set up these features This chapter includes the following sections Manage Port Forwarding to a Local Server fo...

Page 208: ...ice or application 1 Decide which type of service application or game you want to provide 2 Find the local IP address of the computer on your network that will provide the service You can usually find...

Page 209: ...range of numbers the application uses You can usually find this information by contacting the publisher of the application or user groups or news groups 2 Launch a web browser from a computer or mobi...

Page 210: ...select the radio button for an attached device listed in the table 13 Click the Apply button Your settings are saved The service or application is added to the table on the Port Forwarding page Change...

Page 211: ...orwarding The Port Forwarding page displays 5 In the table select the radio button next to the name of the service or application 6 Click the Delete Service button The service or application is remove...

Page 212: ...80 which is the standard port number for a web server process Your router receives the message and finds your port forwarding rule for incoming port 80 traffic 2 The router changes the destination in...

Page 213: ...or Application Unlike port forwarding the router does not come with default port triggering services or applications You must add them To add a port triggering service or application 1 Launch a web br...

Page 214: ...ations see Add a Port Triggering Service or Application on page 213 you can enable port triggering To enable port triggering and specify the time out value 1 Launch a web browser from a computer or mo...

Page 215: ...t you logged in The user name and password are case sensitive The Dashboard displays 4 Select Settings Advanced Settings Port Triggering The Port Triggering page displays 5 In the Port Triggering Port...

Page 216: ...the Port Triggering Portmap Table Disable Port Triggering By default port triggering is enabled You can disable port triggering temporarily without removing any port triggering services or application...

Page 217: ...your router 3 Your router creates an entry in its internal session table describing this communication session between your computer and the IRC server Your router stores the original information per...

Page 218: ...tivity in the communications The router then removes the session information from its session table and incoming traffic is no longer accepted on port numbers 33333 or 113 User Manual 218 Manage and C...

Page 219: ...eck the NETGEAR support site at netgear com support for product and contact information The chapter contains the following sections Quick tips Troubleshoot With the LEDs You Cannot Log In to the Route...

Page 220: ...re powered on computers are connected to the router by an Ethernet cable the corresponding numbered router LAN port LEDs light Check the Network Settings Be sure that the network settings of your devi...

Page 221: ...is securely connected to your router and securely connected to a working power outlet Make sure that you are using the power adapter that NETGEAR supplied for this product If the Power LED blinks slow...

Page 222: ...LEDs Are Off If the WiFi LED 2 4 GHZ LED and 5 GHz LED stay off check to see if someone pressed the WiFi On Off button on the router or if the standard LED settings were changed see Turn Off the Route...

Page 223: ...rk the router cannot perform many gateway services For example the router cannot convert ADSL or cable data into Ethernet networking information NETGEAR does not support such a configuration You Canno...

Page 224: ...to use the router s MAC address Configure your router to clone your computer s MAC address If your router obtained an IP address but your computer does not load any web pages from the Internet it migh...

Page 225: ...address as explained in the documentation for your computer The router might not be configured as the default gateway on your computer Reboot the computer and verify that the router address www router...

Page 226: ...page 130 By default SSID broadcast is enabled Does your computer or mobile device support the security that you are using for your WiFi network WPA or WPA2 If you want to view the WiFi settings for th...

Page 227: ...ecified by the subnet mask is different from the network address of the remote device Check to see that your cable or DSL modem is connected and functioning If your ISP assigned a host name to your co...

Page 228: ...LAN port LED is lit for the port to which you are connected Check to see that the appropriate LEDs are lit for your network devices If your router and computer are connected to a separate Ethernet sw...

Page 229: ...16 Supplemental Information This appendix includes technical information about your router The appendix contains the following sections Factory Settings Technical Specifications 229...

Page 230: ...rd Login password case sensitive Use default hardware address WAN MAC address Internet connection 1500 WAN MTU size Autosensing Port speed 192 168 1 1 LAN IP address Local network LAN 255 255 255 0 Su...

Page 231: ...600 Mbps 5 GHz Up to 4800 Mbps Operating mode 2346 Fragmentation Length 2347 CTS RTS threshold Long Preamble Preamble mode 100 Transmit power control Disabled WiFi communication Guest WiFi network En...

Page 232: ...Note Maximum wireless signal rate derived from IEEE Standard 802 11 specifications Actual throughput can vary Network conditions and environmental factors including volume of network traffic building...

Page 233: ...5 35 5 50 5 70 Japan 5 18 5 24 GHz and DFS 5 25 5 35 5 50 5 70 5 GHz band operating frequency range WPA2 Personal AES WPA Personal TKIP WPA2 Personal AES mixed mode WPA3 Personal Note Legacy WEP is s...

Reviews: