NETAVIS Observer 4.6 User Manual (October 2015)
Page 52 of 204
6 Using the Online Monitor
In the
Online Monitor
you can view live streams from cameras that are set up at the Observer server.
The prerequisite is that you must have authorization to access the Online Monitor (see
5.2 Setting
general user privileges
on page 45). Furthermore, you can access only those cameras for which you
have access rights (see
5.3 Setting camera access rights
on page 48).
When a new user logs in the first time he will encounter an empty Online Monitor waiting for new
camera views to be defined. Once you have defined your views they will reappear next time you log in.
You can also have several Online Monitors in multiple windows (see
2.4 Client multi-window and multi-
screen operation
on page 20).
Important:
If you are using a low-bandwidth connection between client and server (e.g. via wide area
networks) it can happen easily that the video streams cannot pass through the connection fast
enough, which results in bad frame rates and slow responsiveness of the client. In such a case you
should use the Transcoding™ feature of Observer. See
2.7 Observer Transcoding™ for low-bandwidth
client-server connections (ABS)
on page 27 for further details.
6.1 Creating a new view
Observer lets you create an unlimited number of named views. Each of these views can contain up to
100 camera view ports.
1.
Choose
Create new view
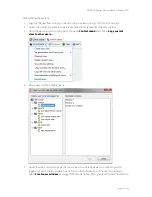
(either from the empty Online monitor or from the
Control menu
) to
open the
Create new view
dialog.
2.
You can now choose the layout for your view from predefined templates and you also can define
an arbitrary matrix of up to 10 x 10 views. A new dialog is opened asking for the name of the view
and the aspect ratio for the view ports.
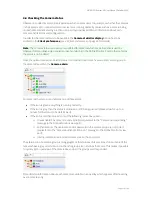
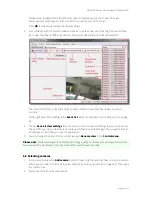
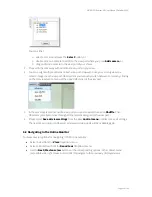
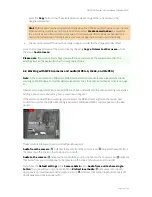
The
Name of view
is shown in the view selector at the top of the screen. Please note that you
can also create a view hierarchy by using a colon between the names. In the example below we
created a view in the group called “First floor” with a name “Entrance hall”. There might also be a
view called “Office 1” or “Kitchen”.
The
Aspect ratio
pop-up defines the aspect ratio of the view ports in the view:
o
Fixed aspect ratios: PAL, NTSC, VGA, double VGA, or HDTV 16:9.
o
Fill available space
: This is the default setting and will adapt the view port size (and
hence the aspect ratio) to fill the available space.
o
Custom aspect ratio
: here you can freely define an N:M aspect ratio.
The setting
Stretch image to fit into view port
(selected by default) defines whether a
camera image can be stretched to fit into the view port. This may cause distorted images for
aspect ratios that do not fit the current view port aspect ratios.
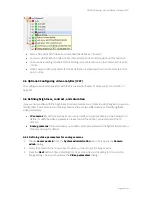
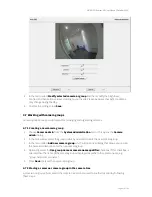
The setting
Crop image to fit into view port
defines whether a camera image can be cropped
to fit into the view port. This may cause that some parts of the image are not visible in the view
port. In the section
6.4 Modifying view port settings
on page 55 you can define what part of the
cropped camera image is to be shown in the view port.

