8-26 System Upgrade
Installing CPU
Follow the steps below to install a CPU (model with air-cooling kit).
1.
Shut down the OS.
The server is automatically powered off.
2.
Unplug the power cords.
3.
Remove the CPU/IO module referring to page 8-12.
4.
Remove the cable connected to the air duct cover.
5.
Verify the location of the CPU socket.
6.
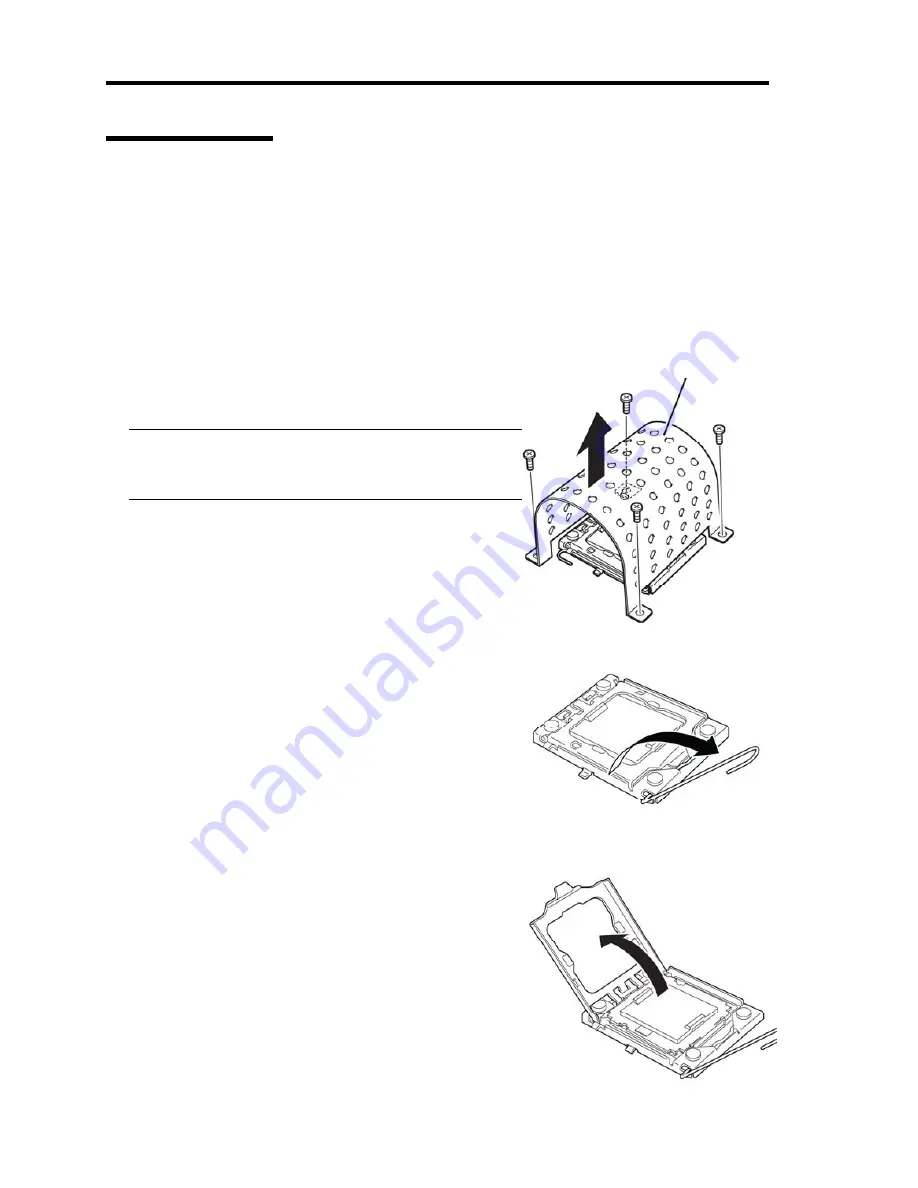
Remove four screws that secure the dummy heat sink.
Remove the dummy heat sink.
IMPORTANT:
Keep and store the removed dummy heat sink and
four screws with care.
7.
Lift the socket lever.
8.
Lift the CPU socket holder.
Dummy heat sink
Summary of Contents for N8800-162F
Page 10: ...this page is intentionally left blank...
Page 43: ...General Description 2 7 Front View With front bezel attached With front bezel removed...
Page 46: ...2 10 General Description Rear View R320a E4 R320b M4...
Page 90: ...3 22 Linux Setup and Operation This page is intentionally left blank...
Page 107: ...System Configuration 4 17 Security Move the cursor onto Security to display the Security menu...
Page 124: ...4 34 System Configuration Exit Move the cursor onto Exit to display the Exit menu...
Page 136: ...4 46 System Configuration This page is intentionally left blank...
Page 212: ...6 16 Maintenance This page is intentionally left blank...
Page 236: ...7 24 Troubleshooting This page is intentionally left blank...
Page 267: ...System Upgrade 8 31 PCI 2 PCI 1 R320a E4 R320b M4 PCI 2 PCI 1 PCI 4 PCI 3 Riser Card...


