Chapter 6 – RouteFinder Software
Multi-Tech Systems, Inc. RouteFinderVPN RF760/660/600VPN User Guide (PN S000323D)
49
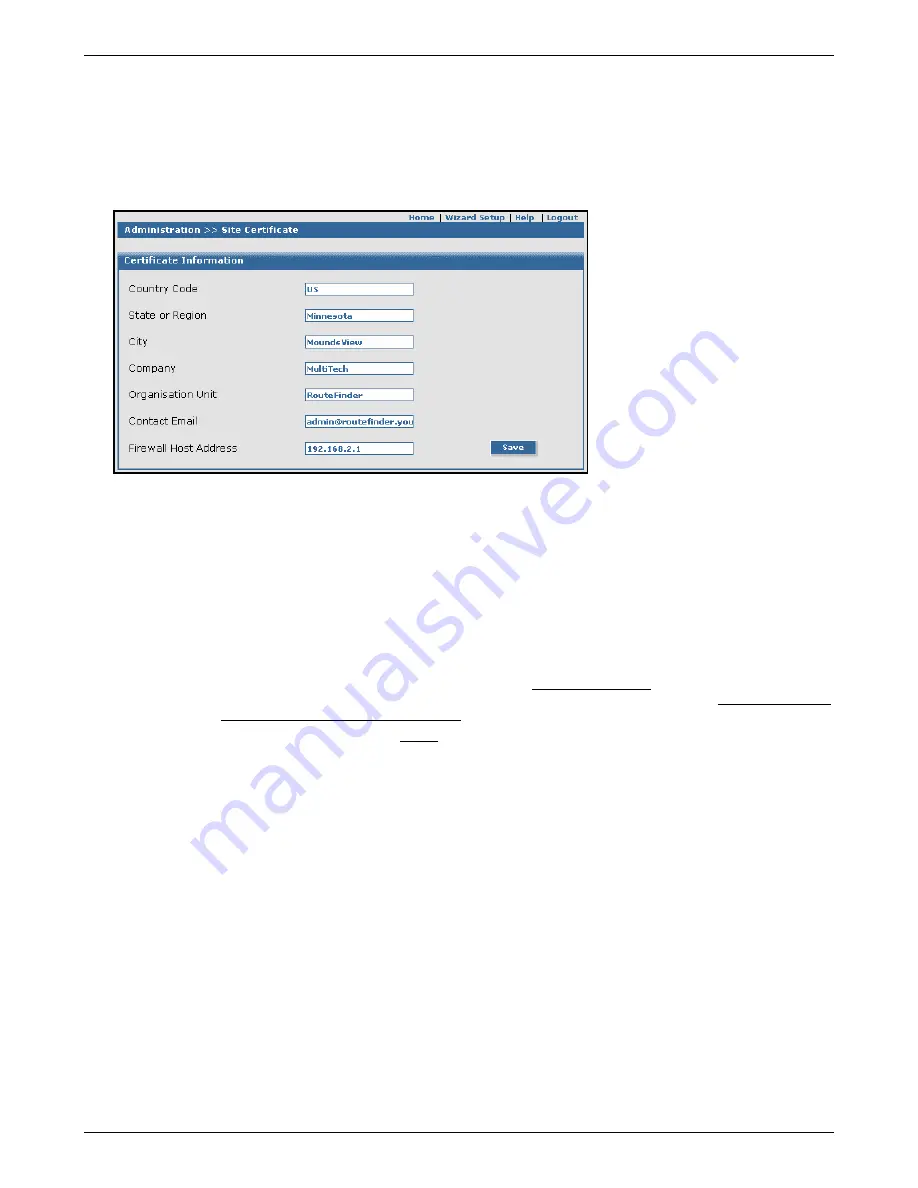
Administration > Site Certificate
Administration > Site Certificate
Public keys are used as the encryption algorithm for security systems. For the validity of public keys, certificates are issued
by a Certificate Authority. The Certificate Authority certifies that the person or the entity is authenticated and that the present
public key belongs to that same person or entity. As the certificate contains values such as the name of the owner, the
validity period, the issuing authority, and a stamp with a signature of the authority, it is seen as a digital pass. On this screen,
you enter server certificate information, which the firewall needs to authenticate itself to your browser. After saving the
settings, the browser’s security information settings have to be cleared.
Enter the Certificate Information
Country Code –
Use the default (United States) or change to the country of operation.
State or Region –
Type the state, province, region, etc. of operation.
City –
Type the city name.
Company –
Type the company name.
Organization Unit –
Type the organizational unit (e.g., Sales & Marketing).
Contact Email –
Type the email address of the contact for RouteFinder certificate data (e.g., the RouteFinder
administrator) over the default ([email protected]).
Firewall Host Address –
Enter the RouteFinder‘s host address. Use the same address that you will use to
open the Administration Access interface. It can be one of the RouteFinder IP addresses.
•
Example:
If you access Administration Access with https://192.168.10.1, the Host Address must also
be
192.168.10.1
. If you access Administration Access with a DNS host name (e.g., https://MultiAccess
Communications Server.mydomain.com), then use this name instead.
•
Note:
The Host Address field MUST match the host Address or IP Address that you use in your
browser to open Administration Access.
Click Save
The browser will reconnect to the VPN. At the security Alert screen, click
View Certificate.
Then click
Install
Certificate
if you have not previously installed it:
Install the Certificate into the Trusted Root Certification Authorities Store
1.
When the first screen displays, click the
Install Certificate
button.
2.
On the Welcome to Certificate Import Wizard screen, click the
Next
button.
3.
On the Certificate Manager Import Wizard screen, click
Next
. You can elect to have the certificate
automatically placed into a directory or you can Browse and choose your own directory. If you elect to
place all certificates into a selected location, follow the on-screen prompts for Select Certificate Store,
Physical Stores, and Root Stores.
4.
When the certificate has been added to the Root Store, the Completing the Certificate Manager Import
Wizard displays. Click
Finish
.


