4-12
Cleaning the Ink Head
and the Area around It
Because the ink head employs a very precise
mechanism, due care needs to be taken when it is
cleaned.
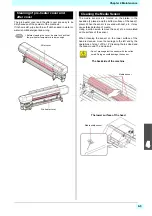
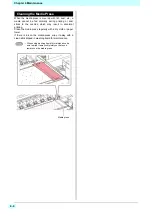
Using a clean stick, etc., rub off gelatinous ink or dust that
may stick to the lower part of the slider and the area
around the ink head.In doing so, never rub the nozzles of
the head.
1
Press the
(TEST PRINT/CLEANING)
,
and press the
key in Local.
2
Press
to select “Station”, and
press the
key.
• The Station MENU appears.
3
Press
to select “CARRIAGE
OUT”, and press the
key.
4
Press
to select “HEAD
MAINTENANCE”, and press the
key.
• Press the [ENTER] key in the Execution Check
screen, and the carriage moves to the left end of
this machine.
5
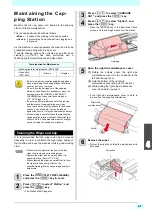
Remove the left side maintenance cover.
(1)
Rotate the screws under the left side
maintenance cover (for three positions) to
the left and remove them.
(2)
Hold the bottom of the left maintenance
cover, and pull the cover toward you from
below to remove the cover.
• If the left side maintenance cover is hard to
remove, use the supplied screwdriver.
6
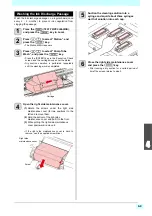
Wipe ink sticking to the side of the head off
with a clean stick.
• Never rub the nozzles.
7
Clean the bottom surface of the UV lamp.
• If there is any ink stuck on the rear side of the
bottom surface of the UV lamp, apply the cleaning
solution for maintenance to a clean stick and wipe
the ink away.
Wipe off so that cleaning solution for maintenance
will not remain.
8
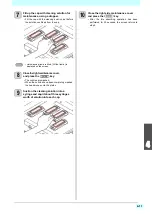
After the cleaning, close the left side
maintenance cover then press the
key.
• After its initial operation, the machine returns to
Local.
Tools required for cleaning
• Clean stick (SPC-0527)
• Gloves
• Goggles
• Be sure to wear the attached goggles and gloves
when cleaning the area around the ink
head.Otherwise, you may get ink in your eyes.
• The ink contains organic solvent.If you get the ink
on your skin or in your eyes, wash it away with
plenty of water immediately.
Screw
Left side
Rotate it left.
• When cleaning, do not rub forcefully. Doing so can
damage UV lamps.
The nozzle part (Never touch it.)
Clean the side surface of the head (shown in
deep gray) with a clean stick.
Clean with a clean stick or
a waste cloth.
Summary of Contents for SIJ-320UV
Page 1: ...MIMAKI ENGINEERING CO LTD URL http mimaki com D202809 13 Original instructions ...
Page 14: ...xiii Warning labels ...
Page 28: ...1 14 Chapter 1 Before Use ...
Page 98: ...4 26 ...
Page 116: ...5 18 Chapter 5 Troubleshooting ...
Page 122: ...Chapter 6 Appendix 6 6 ...

