


Assembly
1-7
11817 Rev. A
1. Installation
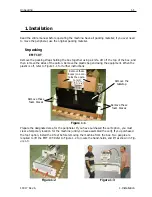
Mounting the EMT 10T on the cart
1. Remove the main tabletop.
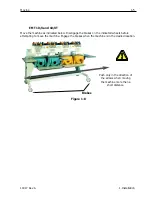
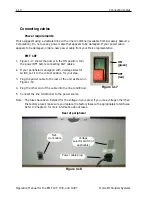
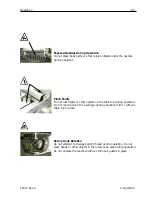
2. Remove the side covers; there are 5 screws holding each
side cover in place (see Figure 1-12). Use the #2 Phillips
head driver included in the operator kit to remove the
screws.
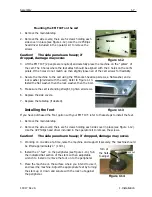
Caution!
The side panels are heavy; if
dropped, damage may occur.
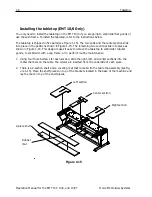
3. Lift the EMT 10T (2 people are required) and carefully place the machine on the “pillars” of
the cart. The 4 holes where the feet attach should be aligned with the 4 holes on the cart’s
pillars. If the holes do not match up then slightly loosen all of the cart screws for flexibility.
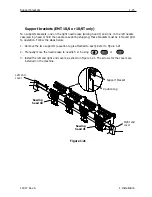
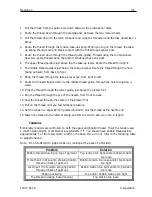
4. Secure the machine to the cart using the M6 socket-head cap screws, a flat washer, and a
lock washer (provided with the cart). Refer to Figure 1-13.
Install the flat washer, then the lock washer, then the bolt.
5. Make sure the cart is standing straight, tighten all screws.
6. Replace the side covers.
7. Replace the tabletop (if desired).
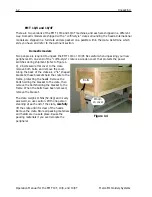
Installing the feet
If you have purchased the Foot option with your EMT 10T, refer to these steps to install the feet.
1. Remove the main tabletop.
2. Remove the side covers; there are 5 screws holding each side cover in place (see Figure 1-12).
Use the #2 Phillips head driver included in the operator kit to remove the screws.
Caution!
The side panels are heavy; if dropped, damage may occur.
3. Working on one side at a time, raise the machine and support it securely. The machine should
be lifted approximately 4" (10cm).
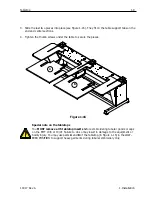
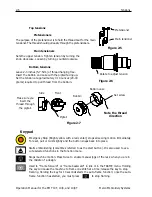
4. Install the 4 “feet” on the peripheral (see Figure 1-14). Turn
the indicated flat section of the stem with an adjustable
wrench to install or remove the foot on to the peripheral.
5. Place the machine on the surface where you intend to use it,
and level the machine. Adjust the appropriate feet by turning
the stem up or down and sequre with the lock nut against
the peripheral.
Figure 1-12
Screws
Figure 1-14
Turn at
the flats
to adjust
Figure 1-13
lock nut
Summary of Contents for EMT 10/4
Page 52: ...2 28 Quick Start Operation Manual for the EMT 10T 10 4 and 10 4T Melco Embroidery Systems ...
Page 108: ...6 10 Error Messages Operation Manual for the EMT 10T 10 4 and 10 4T Melco Embroidery Systems ...
Page 126: ...INDEX Operation Manual for the EMT 10T 10 4 and 10 4T ...
Page 127: ...Quick Ref erence Guide for the EMT 10T 10 4 and 10 4T 11817 Revision A ...


