4-2
Maintenance
Operation Manual for the EMT 10T, 10/4, and 10/4T
Melco Embroidery Systems
Thread Break Indicator LED
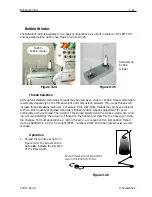
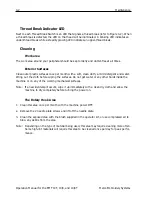
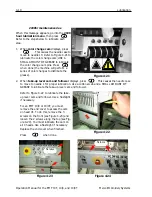
Next to each Thread Break Switch is an LED that signals a thread break (refer to Figure 4-2). When
a thread break is detected, the LED on that head will be illuminated. A blinking LED indicates an
under-thread break while a steadily glowing LED indicates an upper-thread break.
Cleaning
Work area
The work area around your peripheral should be kept orderly and clutter-free at all times.
Exterior Surfaces
Clean outer plastic surfaces once per month with a soft, clean cloth, a mild detergent and water.
Wring out the cloth before wiping the surfaces. Do not get water or any other fluids inside the
machine or on any of the working mechanical surfaces.
Note: If an accidental spill occurs, wipe it up immediately with a clean dry cloth and allow the
machine to dry completely before turning the power on.
The Rotary Hook Area
1. Clean this area once per month with the machine power OFF.
2. Remove the 2 needle plate screws and lift off the needle plate.
3. Clean the exposed area with the brush supplied in the operator kit, or use compressed air to
blow any debris from the area.
Note: Depending on the type of material being used, this area may require cleaning more often.
Some high-lint materials will require this area to be cleaned once per day for peak perfor-
mance.
Summary of Contents for EMT 10/4
Page 52: ...2 28 Quick Start Operation Manual for the EMT 10T 10 4 and 10 4T Melco Embroidery Systems ...
Page 108: ...6 10 Error Messages Operation Manual for the EMT 10T 10 4 and 10 4T Melco Embroidery Systems ...
Page 126: ...INDEX Operation Manual for the EMT 10T 10 4 and 10 4T ...
Page 127: ...Quick Ref erence Guide for the EMT 10T 10 4 and 10 4T 11817 Revision A ...

