

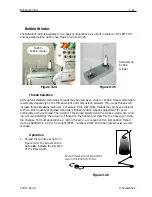
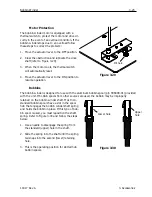


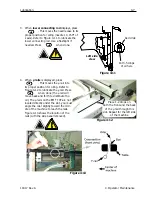
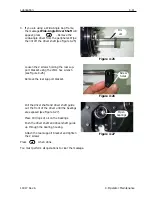


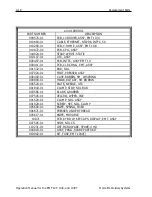


3. When
lower connecting rod
displays, press
. This moves the needle case to its
proper position for oiling (needle 10, 150° of
z axis). Refer to Figure 4-11 to lubricate the
lower connecting rod. Use a flashlight if
needed. Press
when done.
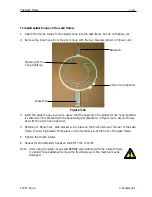
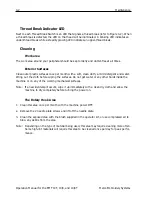
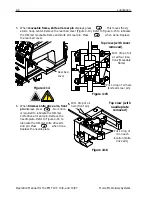
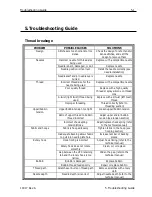
4. When
y-rails
is displayed, press
. This moves the y-rail into
its proper position for oiling. Refer to
Figure 4-12 to lubricate the y-rail. Press
when done (the y-rail will
move back and forth to distribute the
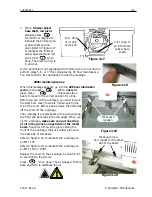
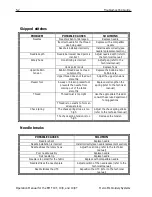
oil). The y-rails on the EMT 10T are not
located directly under the slot. you must
angle the oiler slightly toward the mid-
dle of the machine to reach the rails.
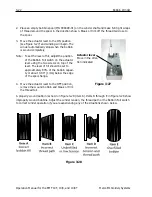
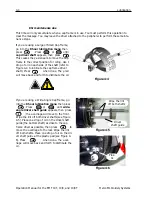
Figure 4-13 shows the location of the
rails (with the side panel removed).
11817 Rev. A
4. Operator Maintenance
Lubrication
4-7
Figure 4-12
Place 1-2 drops on
both the front and the back
of the y-rail through this
slot. Repeat for the left side
of the machine
▲
▲
▲
Figure 4-11
Put 3-5 drops
of oil here
▲
Figure 4-13
Red circle
Left side
view
Summary of Contents for EMT 10/4
Page 52: ...2 28 Quick Start Operation Manual for the EMT 10T 10 4 and 10 4T Melco Embroidery Systems ...
Page 108: ...6 10 Error Messages Operation Manual for the EMT 10T 10 4 and 10 4T Melco Embroidery Systems ...
Page 126: ...INDEX Operation Manual for the EMT 10T 10 4 and 10 4T ...
Page 127: ...Quick Ref erence Guide for the EMT 10T 10 4 and 10 4T 11817 Revision A ...


