


3-18
The Sash Frame
Operation Manual for the EMT 10T, 10/4, and 10/4T
Melco Embroidery Systems
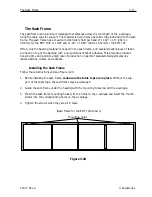
Storing the Sash Frame
The sash frame will not operate properly if it is bent. Suspend the frame lengthwise when not in
use.
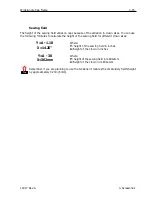
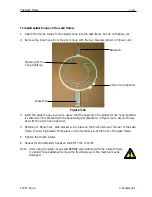
Hoop Selection
Before embroidering with the sash frame,
Select Hoop
in the Options Menu to either the sash
frame or a spider hoop (if appropriate). Failure to do so may damage the peripheral.
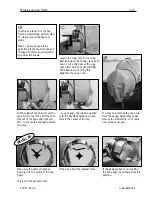
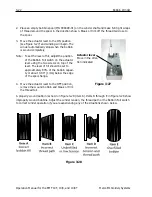
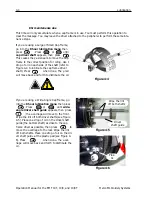
Hooping on the Sash Frame
The same hooping guidelines apply to the sash frame as to regular hooping.
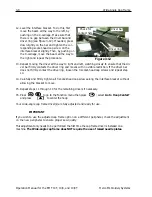
1. Lay the fabric over the sash frame as flat as possible.
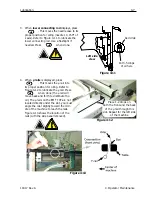
2. Attach the first clip on the x-carriage side of the frame near a corner. The thumb rail should
be facing away from the embroidery field.
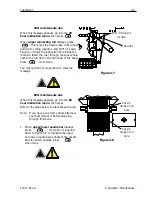
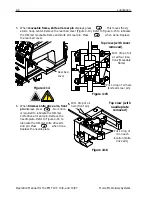
3. Attach 6 of the 300cm clips along the
back
of the frame on the EMT 10/4 or 10/4T; use 1-
220cm clip and 1-300cm clip along the
back
of the frame on the EMT 10T.
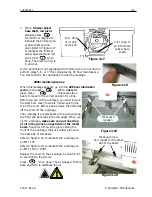
4. Pull the fabric taut and attach the same number of clips at the
front
of the frame.
5. Attach one 220cm clip to
each end
of the frame on the EMT 10/4 or 10/4T and one 220cm
clip to
each end
of the frame on the EMT 10T.
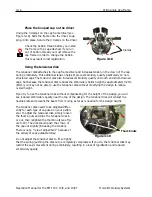
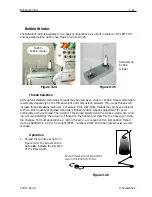
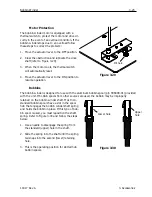
Spider Hoops
A spider is a hoop that holds another hoop. Spider hoops attach to the peripheral and allow gar-
ments to be hooped individually without removing the frame. The outermost hoop has brackets
that attach to the beam
There are two spider hoop options available. One option attaches to the sash frame, and one
option attaches to the peripheral the same way a flat hoop does.
Summary of Contents for EMT 10/4
Page 52: ...2 28 Quick Start Operation Manual for the EMT 10T 10 4 and 10 4T Melco Embroidery Systems ...
Page 108: ...6 10 Error Messages Operation Manual for the EMT 10T 10 4 and 10 4T Melco Embroidery Systems ...
Page 126: ...INDEX Operation Manual for the EMT 10T 10 4 and 10 4T ...
Page 127: ...Quick Ref erence Guide for the EMT 10T 10 4 and 10 4T 11817 Revision A ...


