Procedures for Testing with the DX Host
megger.com
73
Compensating Temperature and Recording Humidity
5.
To compensate temperature and/or record humidity, touch the
Temperature/humidity
icon; otherwise, skip to Step 7.
6.
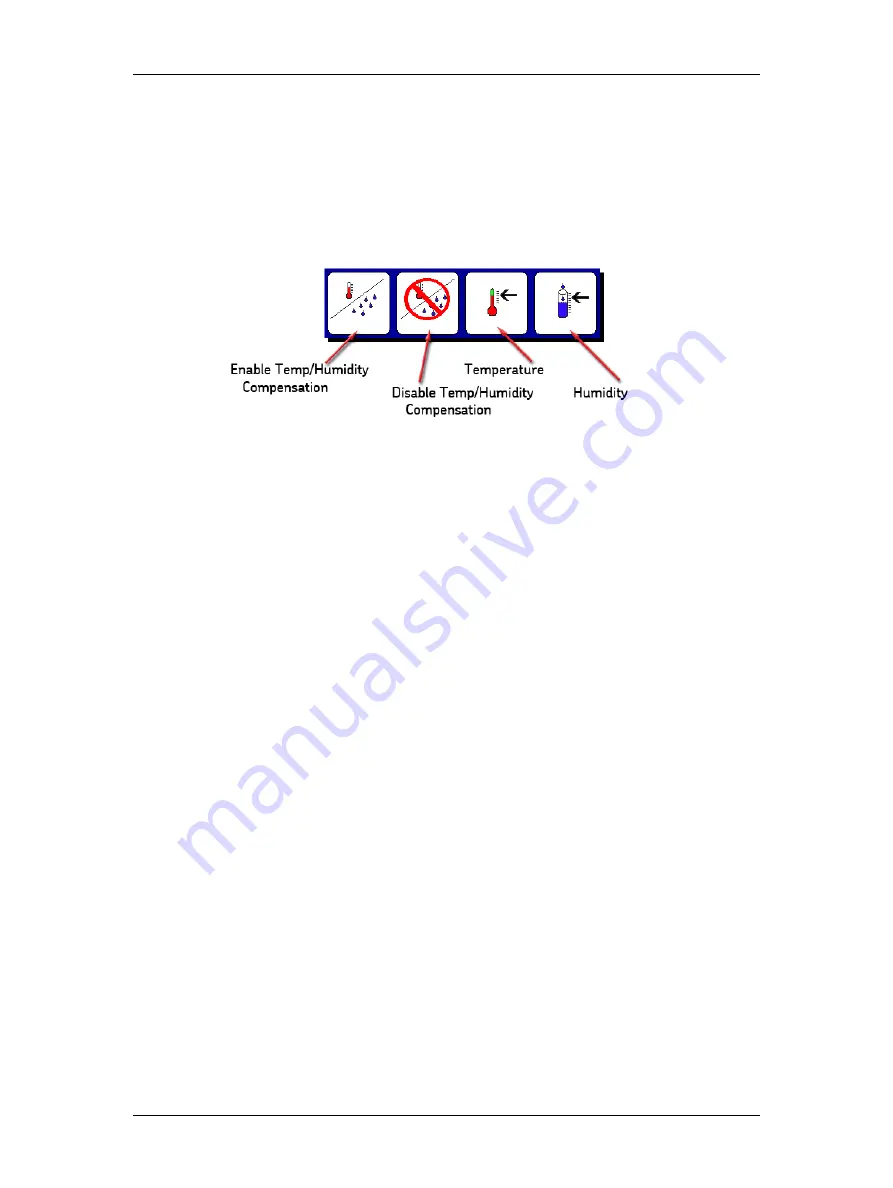
The following popup menu is used to enable/disable temperature and humidity
compensation and to select the compensation needed for these test elements when
compensation is enabled.
Figure 76. Temperature and humidity compensation popup menu.
a.
Touch the
Enable Compensation
icon then the
Temperature
icon.
b.
The default temperature is 40° C; use the keypad to enter the actual
temperature then touch
Done
.
c.
For reference purposes, specify the humidity by touching the
Humidity
icon
then use the keypad to enter the percentage of relative humidity.
d.
Touch
Done
after making your entry.
Selecting Insulation Type
You can also select the type of insulation used in your motor by touching the
Thermo Plastic
button in the start screen. The buttons toggles between two options:
Thermo Plastic
and
Thermo Setting
.
The software uses different temperature compensation methods depending on the insulation
type selected. The selected insulation type/method is also reflected in the reports.
Temperature settings are defined in the
User Settings
screen.
Because this is a comprehensive test, you must predetermine the necessary values to input during
the test before the test start (refer to the “Recommended Test Voltages” section in “9 —
Appendix C — DC and Surge Tests Voltages.”
The value for the IR, DA, and PI tests would be operating or line voltage V
LL.
For
this example, we use 480 volts.
The value for the DC HiPot would be 2 x (V
LL
) + 1,000 = 1960 volts for this
example.
The increments for the DC step voltage are derived from
1,960 – 480 = 1,480. Using three increments for this example, (1,500 / 3 = 500
v), each increment for the step DC HiPot would be 500 volts (500 v, 1000 v, and
1500 v).
To run a final DC-HiPot, set the voltage at 2000 v.
Summary of Contents for Baker DX
Page 1: ......
Page 2: ......
Page 10: ...Table of Contents viii Baker DX 71 030 User Guide EN V10 www megger com...
Page 28: ...Baker DX Instrument Overview 18 Baker DX 71 030 User Guide EN V10 www megger com...
Page 38: ...Baker DX User Interface Overview 28 Baker DX 71 030 User Guide EN V10 www megger com...
Page 58: ...Setting up the Baker DX Tester 48 Baker DX 71 030 User Guide EN V10 www megger com...
Page 149: ...megger com 139 RIC Templates Figure 141 RIC template 1...
Page 150: ...RIC templates 140 Baker DX 71 030 User Guide EN V10 www megger com Figure 142 RIC template 2...
Page 155: ...Index megger com 145...
Page 156: ...megger com 146...


