Using Baker DX Non-Test Functions
megger.com
33
4.
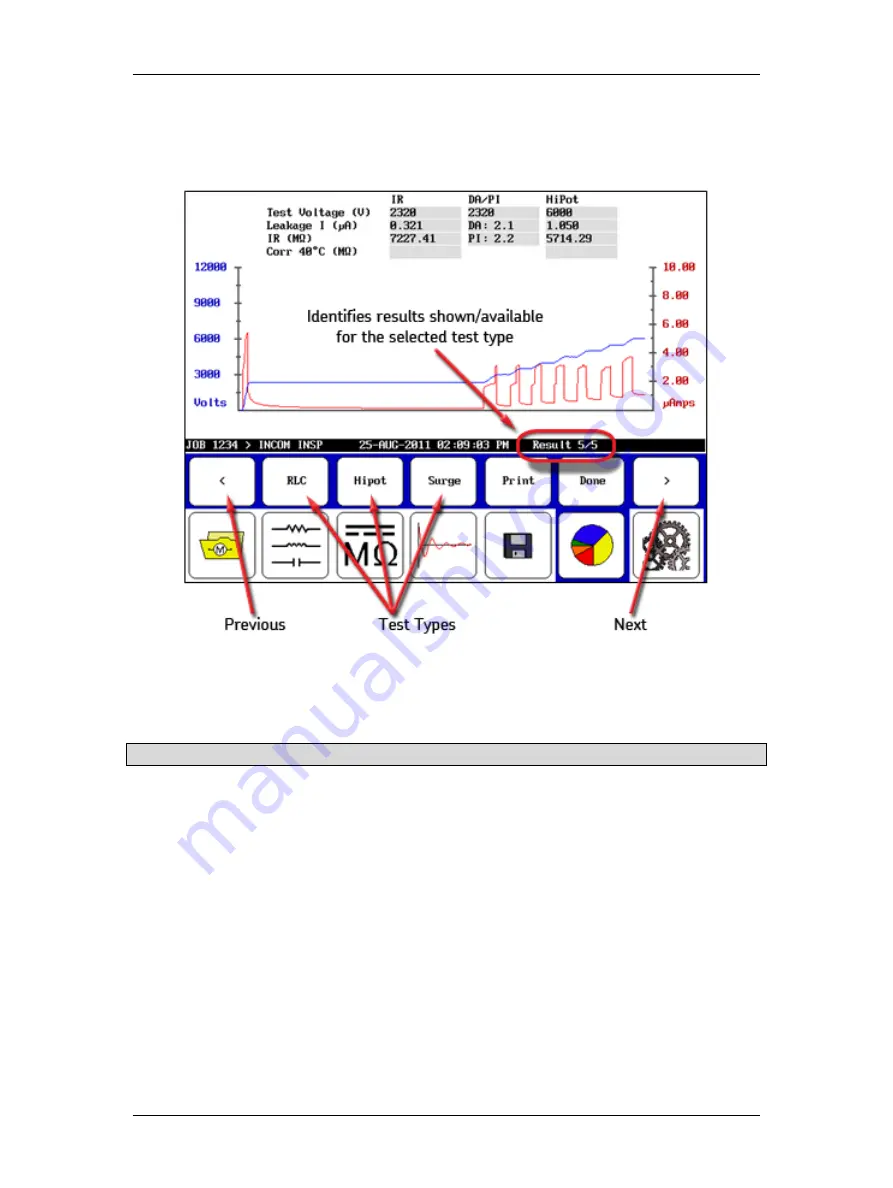
When you touch the
Display
icon (functions like a print preview), submenu items
appear that allow results shown in the
Display Area
to be viewed according to test
type, or to be printed.
Figure 35. Display submenu icons.
5.
The
Previous
and
Next
arrows allow you to go through the results that are available for
the selected test type.
NOTE: The test type selection icons are located just above their corresponding icons in the
Mode Menu
.
6.
An entry on the right side of the
Status Bar
shows you which result is displayed out of
the total number of available results.
7.
Touch the
button to print your report to a printer attached to the USB port.
8.
Touch the
Done
button to return the
Display Area
to the report panel.
Summary of Contents for Baker DX
Page 1: ......
Page 2: ......
Page 10: ...Table of Contents viii Baker DX 71 030 User Guide EN V10 www megger com...
Page 28: ...Baker DX Instrument Overview 18 Baker DX 71 030 User Guide EN V10 www megger com...
Page 38: ...Baker DX User Interface Overview 28 Baker DX 71 030 User Guide EN V10 www megger com...
Page 58: ...Setting up the Baker DX Tester 48 Baker DX 71 030 User Guide EN V10 www megger com...
Page 149: ...megger com 139 RIC Templates Figure 141 RIC template 1...
Page 150: ...RIC templates 140 Baker DX 71 030 User Guide EN V10 www megger com Figure 142 RIC template 2...
Page 155: ...Index megger com 145...
Page 156: ...megger com 146...


