


Instruction for use URYXXON
®
500
18
Instruction for use URYXXON
®
500 V 2.1 / 01.23
The list on the right shows the different gradations for the respective
parameter. Choose your desired value by pressing the respective
button. The value is displayed on the right side of the screen.
Edit filter
Select
Clear
BLD
UBG
BIL
PRO
NIT
KET
GLU
pH
Filter:
PRO 100 mg/dl
If you want to delete a filter criterion you have already entered,
select the criterion in the list on the left side of the screen and press
the activity‑button
Clear
. The parameter is removed from the filter
criteria on the right side. If you want to enter a new criterion for the
parameter, select the parameter again on the left side of the screen
and make a new selection.
After you have defined your filter criteria, all results that are equal to,
or exceed one of the criteria will be selected for sediment findings.
The activity‑button
Enter
sediment
in the main menu gets you to all the
results that match your filter criteria.
Press
to confirm and save your changes. If you leave the
menu by pressing
, none of your changes will be adopted.
NOTICE
The “Enter sediment” function and the sediment filter only list
results that were measured after the function has been set /
enabled. If you activate or change the sediment function after
measurements have been performed, those measurements will
not be captured by the new filter criteria. Therefore, the previous
measurements cannot be accessed via the “Enter sediment”
menu. If the filter is not activated, all results will be selected for
sediment findings. However, the memory function enables you
to enter sediment findings for all results as well
8.4.3 Print after
The option‑field
Print after
enables you to determine at
which point results should be printed. By default, the choice‑
button
Measurement
is activated. This means all results will be
printed immediately after the measurement has been performed,
irrespective of the need for additional sediment information.
If you want results to be printed after possible sediment findings
have been entered, press the choice‑button
Sediment
. A result that
is listed for additional sediment findings is now only printed once
the sediment findings have been entered. Press
to confirm
and save your changes. If you leave the menu by pressing
, none of your changes will be adopted.
8.4.4 Print sediment settings
The printer icon
in the middle of the screen allows you to
print all sediment settings. The basic settings for sediment entry,
sediment filter, as well as all defined sediment parameters will be
printed.
8.5 Language
You can choose from 8 different languages in the language menu.
Press the choice‑button for the respective language.
Language
English Deutsch Español
Français Italiano Portugues
Polski Magyar
Press
to confirm and save your changes. If you leave the
menu by pressing
, none of your changes will be adopted.
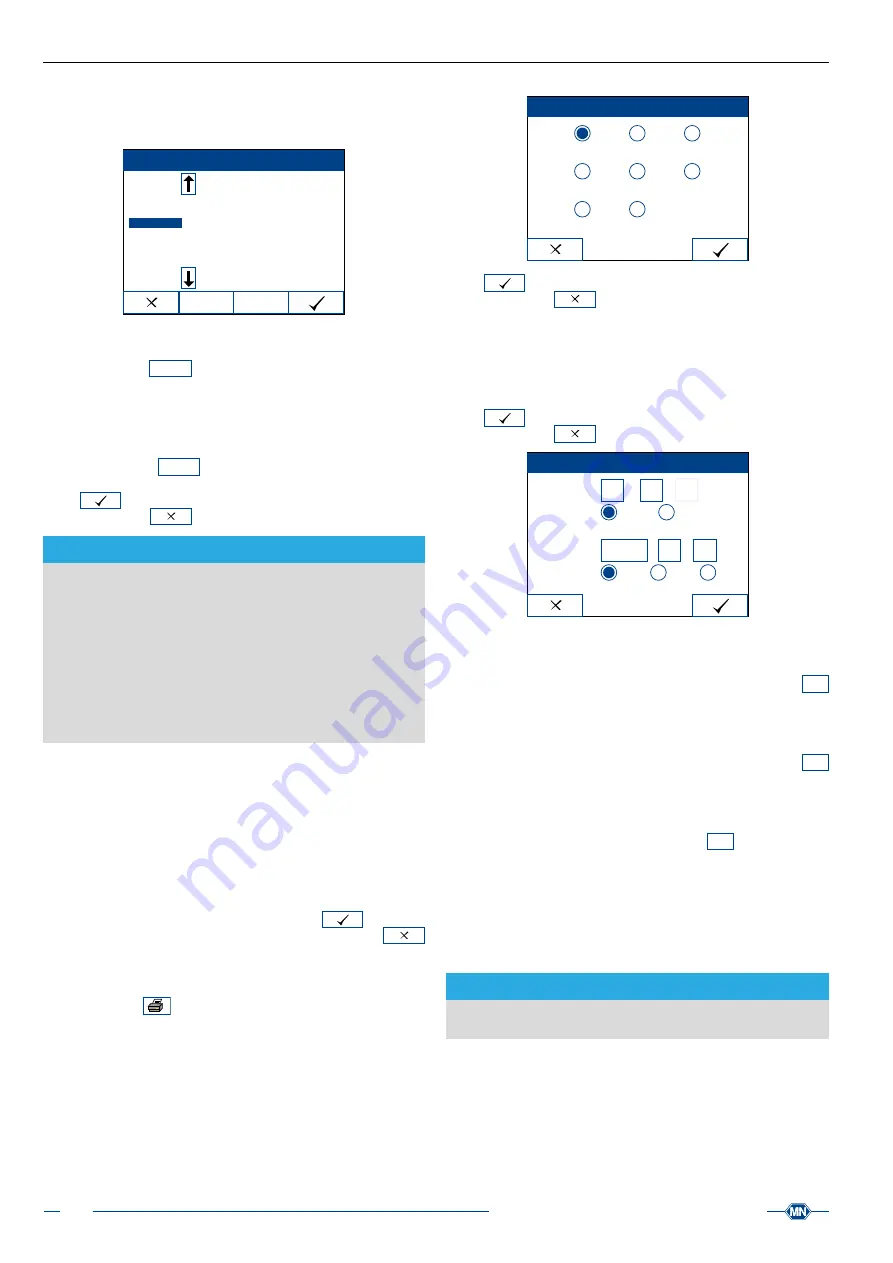
8.6 Date / Time
You can adjust the date and time format and change the date and
time in the
Date / Time
menu.
Press
to confirm and save your changes. If you leave the
menu by pressing
, none of your changes will be adopted.
Date/Time
Time format
24h
12h
Time
15
17
pm
:
Date format
yyyy.mm.dd mm.dd.yyyy dd.mm.yyyy
Date
2009
10
21
·
·
Time
You can set the hours and minutes separately. Press the edit‑
buttons to change the hours and minutes. The input‑menu
abc
appears so that you can make changes.
Time format
The time format can be set to 12 h or 24 h. Press the respective
choice‑button. Depending on the format, you can adjust the
am/pm
activity‑button as well.
Date
The date is arranged by year, month and day. Press the edit‑
buttons to change the date. The input‑menu
abc
appears so that
you can make changes.
Date format
You have three different date format options: (
yyyy.mm.dd
,
mm.dd.
yyyy
,
dd.mm.yyyy
)
.
Press the respective choice‑button and the date will be displayed
accordingly.
NOTICE
Verify the date and time after starting the instrument for the first
time.
8.7 User mode
The
User mode
menu allows you to adjust the settings for access
rights and user administration. You have three different modes to
choose from, enabling you to define passwords and create a group
for multiple users.


