®
GRAFIK Eye
®
QS Control Unit Installation and Operation Guide 27
Occupancy Sensor Setup (continued)
When the GRAFIK Eye
®
QS system is first powered up, occupancy sensors connected
to the contact closure input (and the first three associated wireless Radio Powr Savr
TM
occupancy sensors) will automatically operate in “Scene Mode.” Their defaults will
be “No Action” for the occupied state and “Scene Off” for the unoccupied state.
For additional sensors and/or alternate functionality, please complete all required
programming actions.
Selecting the Mode
Scene Mode
(default) is useful when the GRAFIK Eye
®
QS control unit is controlling
lights in a single room or area. Up to 16* sensors can be assigned to the GRAFIK
Eye
®
QS control unit to activate a scene when the space is occupied, and another
scene when unoccupied.
Zone Mode
is useful when the GRAFIK Eye
®
QS control unit is controlling lights in
multiple areas within a room. Up to four sensors can be assigned to each zone
(a sensor can be assigned to more than one zone) to send the zones to configurable
occupied and unoccupied levels.
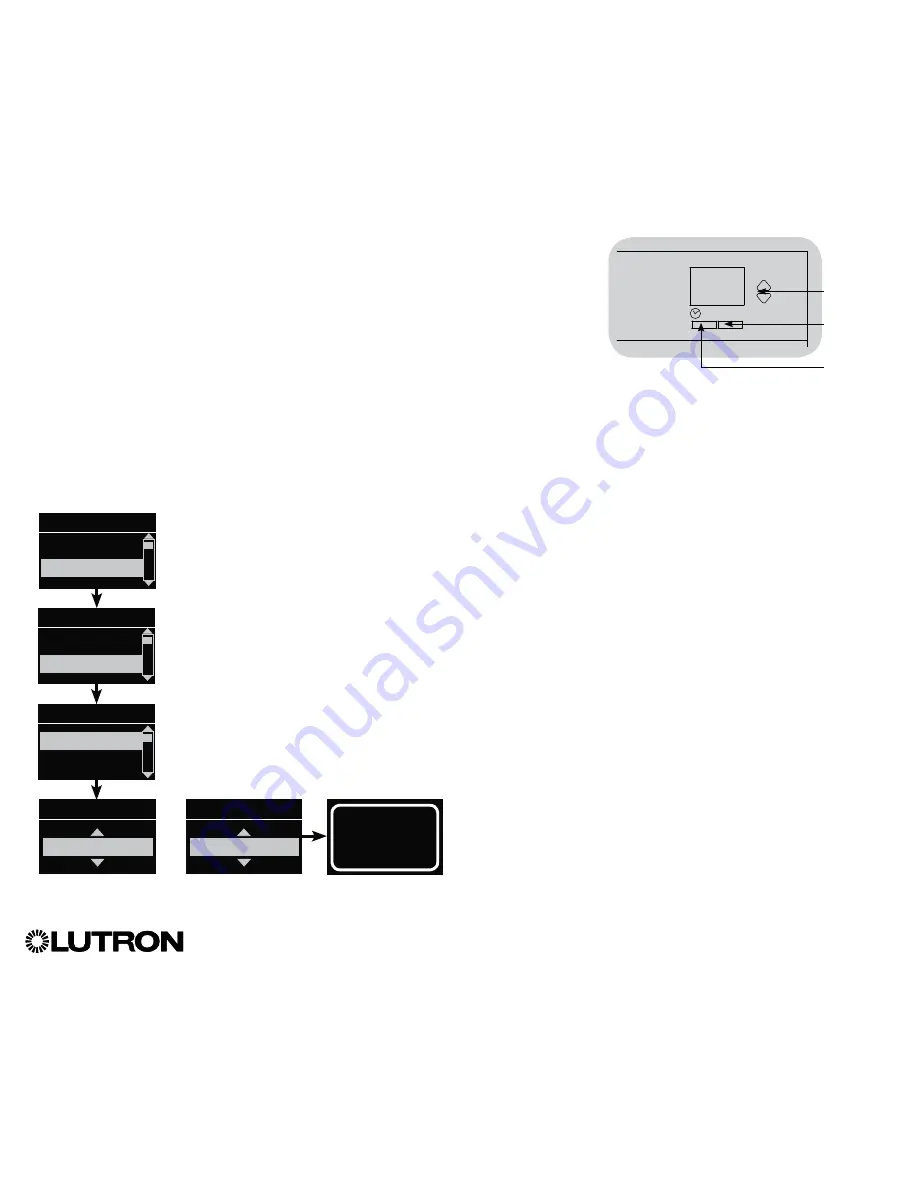
1. Enter programming mode.
2. Use the Master buttons to highlight “Sensor Setup” and press
the “OK” button to accept.
3. Use the Master buttons to highlight “Occupancy” and press the
“OK” button to accept.
4. Use the Master buttons to highlight “Mode” and press the
“OK” button to accept.
5. Use the Master buttons to highlight “Zone Mode” to assign
sensors to zones, or “Scene Mode” (default). Press the
“OK” button to accept. A screen will confirm your selected
mode has been saved and you will return to the Daylight Sensor
screen.
Note:
Changing modes will remove all previous occupancy
assignments.
Main menu
Zone Setup
Sensor Setup
Occ Sensor
Scene Mode
Occ Sensor
Actions
Mode
Saved
Saved
Occ Sensor
Zone Mode
OR
OK
Master
buttons
“OK”
button
Timeclock
(back) button
Sensor Setup
Daylight
Occupancy
* Applicable only to units that ship with firmware version 9.003 and higher. Previous versions support up to 4 sensors.


