•
Flex, fan, and align the paper edges before loading.
•
Do not use paper that has been cut or trimmed by hand.
•
Do not mix paper sizes, weights, or types in the same tray.
•
Make sure that the paper size and type are set correctly on the computer or printer control panel.
•
Store paper according to manufacturer recommendations.
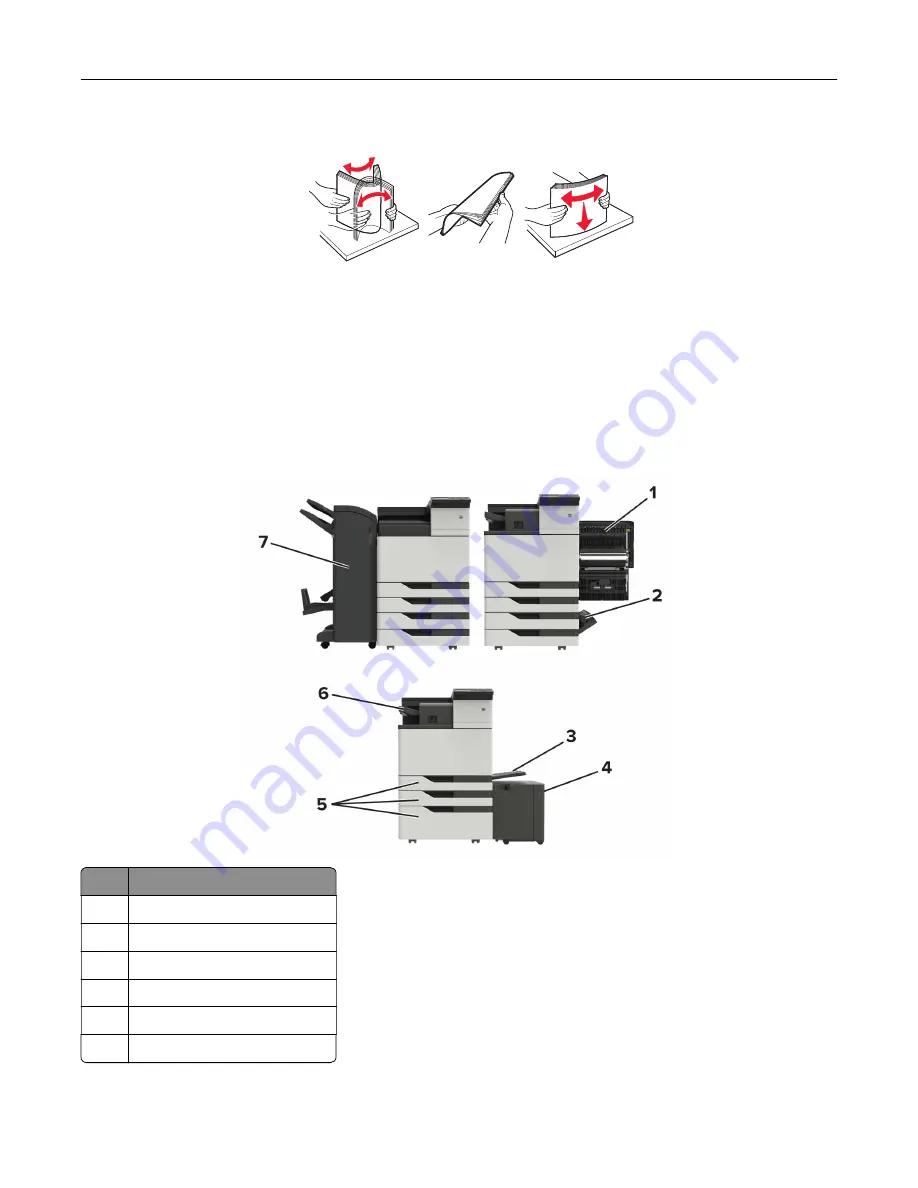
Identifying jam locations
Note:
When Jam Recovery is set to On or Auto, the printer reprints jammed pages.
Jam locations
1
Door C
2
Door D
3
Multipurpose feeder
4
3000
‑
sheet tray
5
2 x 500
‑
or 2500
‑
sheet tray
6
Staple finisher
Clearing jams
132
Summary of Contents for C9235
Page 1: ...C9235 Printer User s Guide May 2020 www lexmark com Machine type s 5059 Model s 190...
Page 108: ...9 Insert the waste toner bottle and then close the door Maintaining the printer 108...
Page 112: ...8 Insert the waste toner bottle and then close the door Maintaining the printer 112...
Page 135: ...Below the fuser area Duplex area Clearing jams 135...
Page 140: ...2 Open door J 3 Open door H Clearing jams 140...
Page 188: ...6 Remove the controller board shield Upgrading and migrating 188...
Page 197: ...4 Remove the controller board shield Upgrading and migrating 197...
Page 203: ...7 Connect the tray connector to the printer 8 Open trays 2 and 3 Upgrading and migrating 203...
Page 208: ...9 Remove the stabilizing feet from the tray Upgrading and migrating 208...
Page 212: ...17 Secure the tray cable with the clamp Upgrading and migrating 212...
Page 219: ...7 Remove the paper guides 8 Attach the sensor cover Upgrading and migrating 219...
Page 225: ...8 Attach the nisher to the printer Upgrading and migrating 225...


