d. Connect the heat-sink-and-fan assembly cable to the microprocessor fan connector on the system
board.
What to do next:
• To work with another piece of hardware, go to the appropriate section.
• To complete the installation or replacement, go to “Completing the parts replacement” on page 89.
Completing the parts replacement
CAUTION:
After replacing a CRU, reinstall all protective covers, including the computer cover, before connecting
power and operating the computer. This action is important to help prevent unexpected electrical
shock and help ensure the containment of an unexpected fire that could happen under extremely rare
conditions.
After completing the installation or replacement for all parts, pivot the drive bay assembly inward, reinstall the
front bezel, reinstall the computer cover, and reconnect cables.
To complete the parts replacement, do the following:
1. Ensure that all components have been reassembled correctly and that no tools or loose screws are left
inside your computer.
2. Ensure that the cables are routed correctly before reinstalling the computer cover. Keep cables clear of
the hinges and sides of the computer chassis to avoid interference with reinstalling the computer cover.
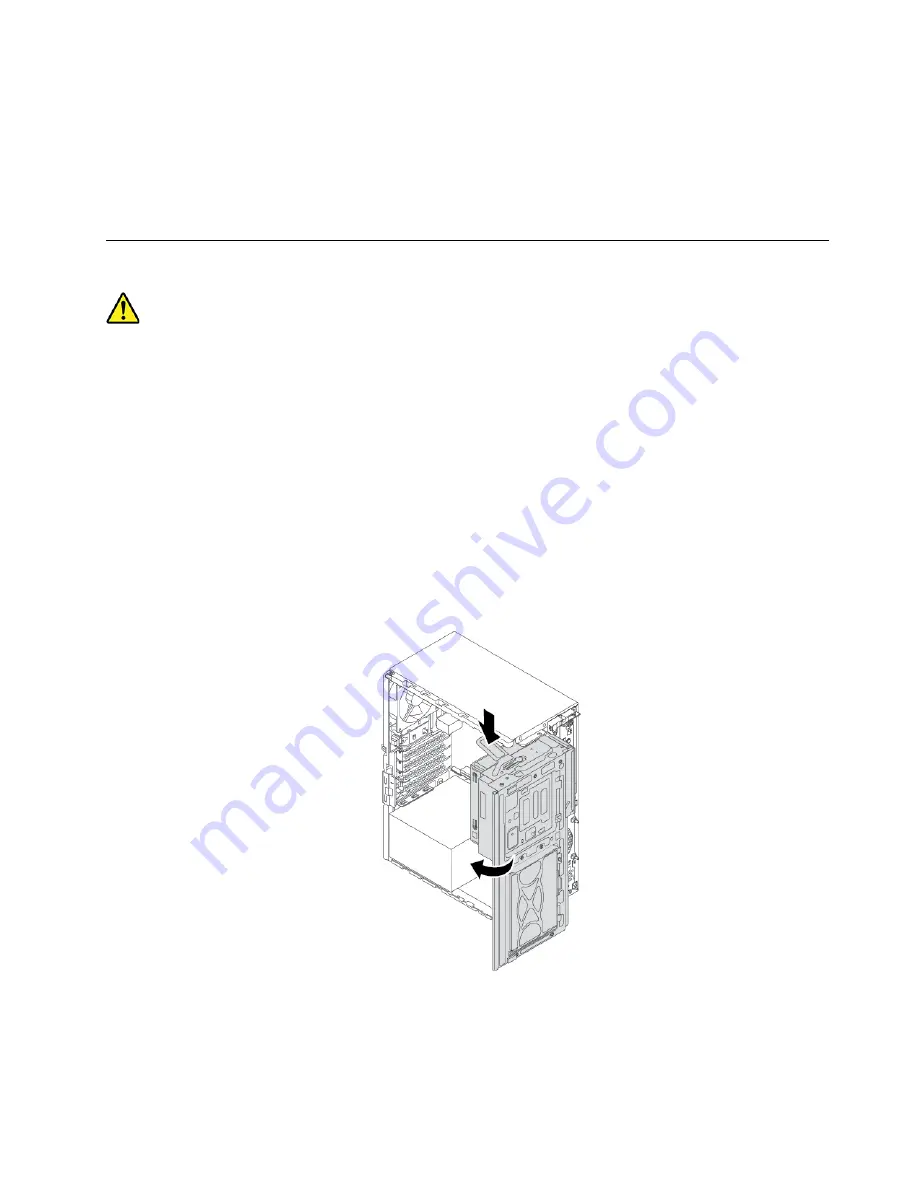
3. Press the release tab as shown and pivot the drive bay assembly inward until it snaps into position.
Figure 106. Pivoting the drive bay assembly downward
Hardware removal and installation
89
Summary of Contents for ThinkStation P330
Page 1: ...P330 User Guide ...
Page 6: ...iv P330 User Guide ...
Page 14: ...8 P330 User Guide ...
Page 18: ...12 P330 User Guide ...
Page 24: ...18 P330 User Guide ...
Page 28: ...22 P330 User Guide ...
Page 98: ...92 P330 User Guide ...
Page 133: ......
Page 134: ......


