DO NOT disassemble components that have the above label attached. There are no serviceable parts inside
these components.
Your product is designed for safe use. However, hazardous voltage, current, and energy levels are present
inside any component that has this label attached. Disassembling of these components might cause fire or
might even result in death. If you suspect a problem with one of these parts, contact a service technician.
To remove and install the power supply assembly, do the following:
1. Prepare your computer. See “Preparing your computer” on page 24.
2. To remove the power supply assembly, do the following:
a. Disconnect the power supply assembly cables from the system board and all drives.
b. Release the power supply assembly cables from the cable clips and ties.
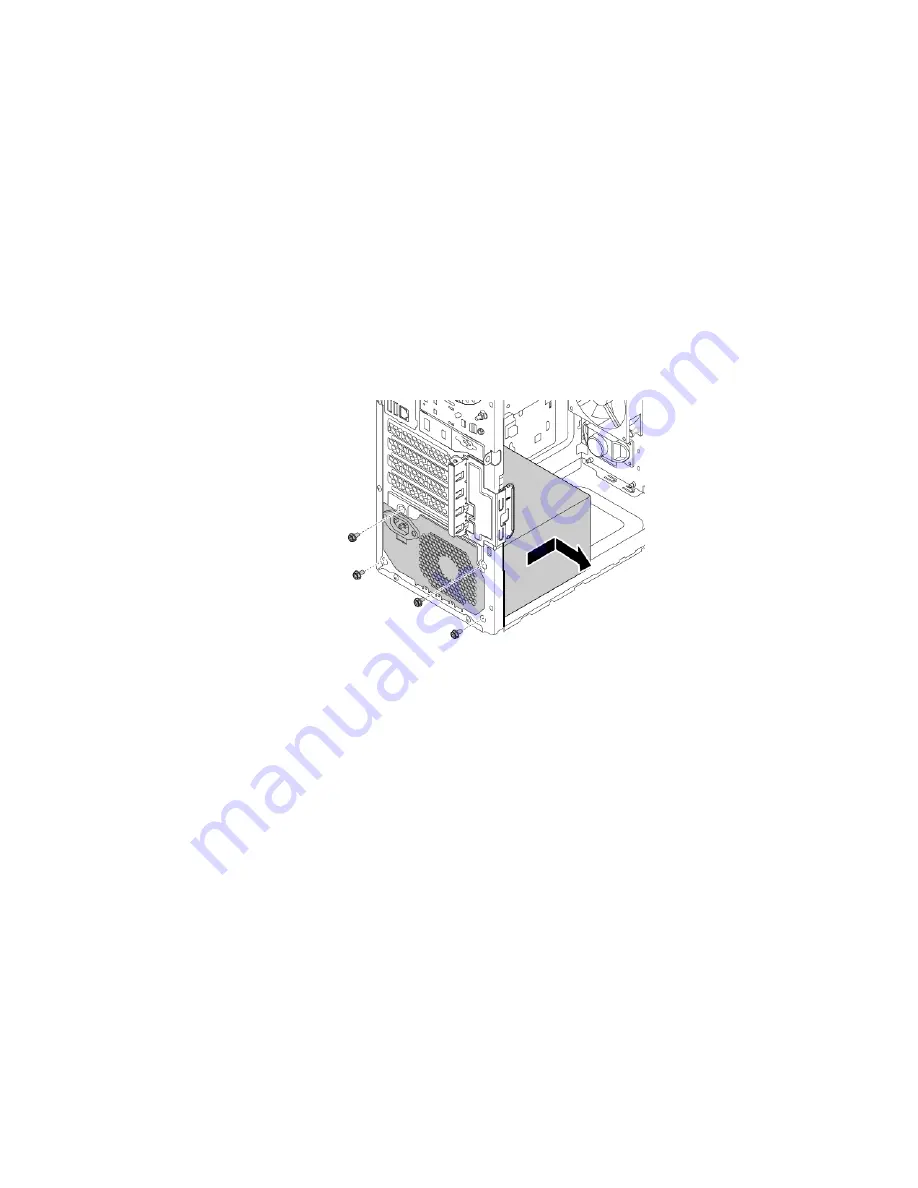
c. Remove the four screws at the rear of the chassis that secure the power supply assembly. Then slide
the power supply assembly to the front of the computer and then lift it out of the chassis.
Figure 77. Removing the power supply assembly
3. To install the power supply assembly, do the following:
a. Ensure that the new power supply assembly is the correct replacement.
b. Install the new power supply assembly into the chassis so that the screw holes in the power supply
assembly align with those in the chassis.
c. Install and tighten the four screws to secure the power supply assembly.
Note:
Use only screws provided by Lenovo.
d. Connect the power supply assembly cables to the system board and each of the drives.
e. Secure the power supply assembly cables with the cable clips and ties in the chassis.
What to do next:
• To work with another piece of hardware, go to the appropriate section.
• To complete the installation or replacement, go to “Completing the parts replacement” on page 89.
Storage drive in the storage-drive bay
Attention:
Do not open your computer or attempt any repair before reading and understanding the
Appendix A “Important safety information” on page 97.
Hardware removal and installation
67
Summary of Contents for ThinkStation P330
Page 1: ...P330 User Guide ...
Page 6: ...iv P330 User Guide ...
Page 14: ...8 P330 User Guide ...
Page 18: ...12 P330 User Guide ...
Page 24: ...18 P330 User Guide ...
Page 28: ...22 P330 User Guide ...
Page 98: ...92 P330 User Guide ...
Page 133: ......
Page 134: ......


