Group 8
Job Editor
Page 305
JET3 Series
Release 2.02
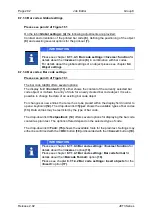
Description of the date/time settings
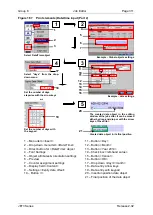
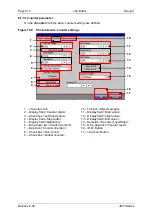
The display field
(1)
shows the content. The content is created with the buttons 2-7 and
12-13. Additionally there are a check box for adjusting the left-hand zeros
(8)
and control
buttons for deleting
(11)
and the cursor control
(14)
within the display field
(1)
. All Settings
can either be confirmed with the
<OK>
button or discarded with the
<Cancel>
button.
How to set a date/time
Basically there are two options to set a date or a time:
The date/ time is set using the current date/time
The date/time is set using an offset for an expiry date
With the first option the current date or time will be displayed and printed.
With the second option the current date or time plus the defined offset will be displayed
and printed.
The navigation within the display field
(1)
is carried out with the arrow keys
(14)
. With
these buttons you can move the cursor to any position within the display field. Inputs will
happen at the cursor position. So it is possible to insert fields or special characters within
an already existing set of fields and special characters.
With the
<Space>
button
(13)
you can create spaces between fields or special characters.
Using the
<Backspace>
button
(11)
will delete the field or special character left to the
cursor position.
Time
A time is set by using the buttons for time settings
(3)
. The single fields (hour, minute,
second) may be separated using the special characters but that’s not stringently required.
There are no restrictions regarding the order and the number of the fields and special
characters.
E.g. it is possible to create the following time settings:
HH:MM/SS
HH_SS
SS/SS/HH/HH
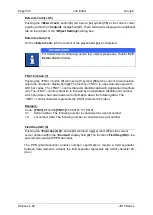
ATTENTION
There is one thing to regard: it is not possible to place two fields of the
same kind directly in row. In that case a special character has to be set in
between the two fields.
Summary of Contents for JET3
Page 1: ...Operating Manual V2 02 Please keep for future reference ...
Page 2: ......


