Vortex86DX-MSJK Windows Embedded CE 6.0 R3 Jump Start Rev 2.2
Page 88 of 144
Part 13 – Debug and Remote Tools
While it’s not within the scope of this guide to cover in depth development and debug issues, it’s good
to know about the debug and remote tools available for the CE 6.0 development environment.
Using the same OS design project, MyWinCE, work through the following steps to enable the KITL
(Kernel Independent Transport Layer) build option and generate an OS runtime image with KITL enabled
for the exercises in this section.
•
If the project is not already active, launch the MyWinCE OS design project created earlier.
•
From the VS2005 IDE, select
Project | MyWinCE Properties…
to bring up the OS design Property
screen.
•
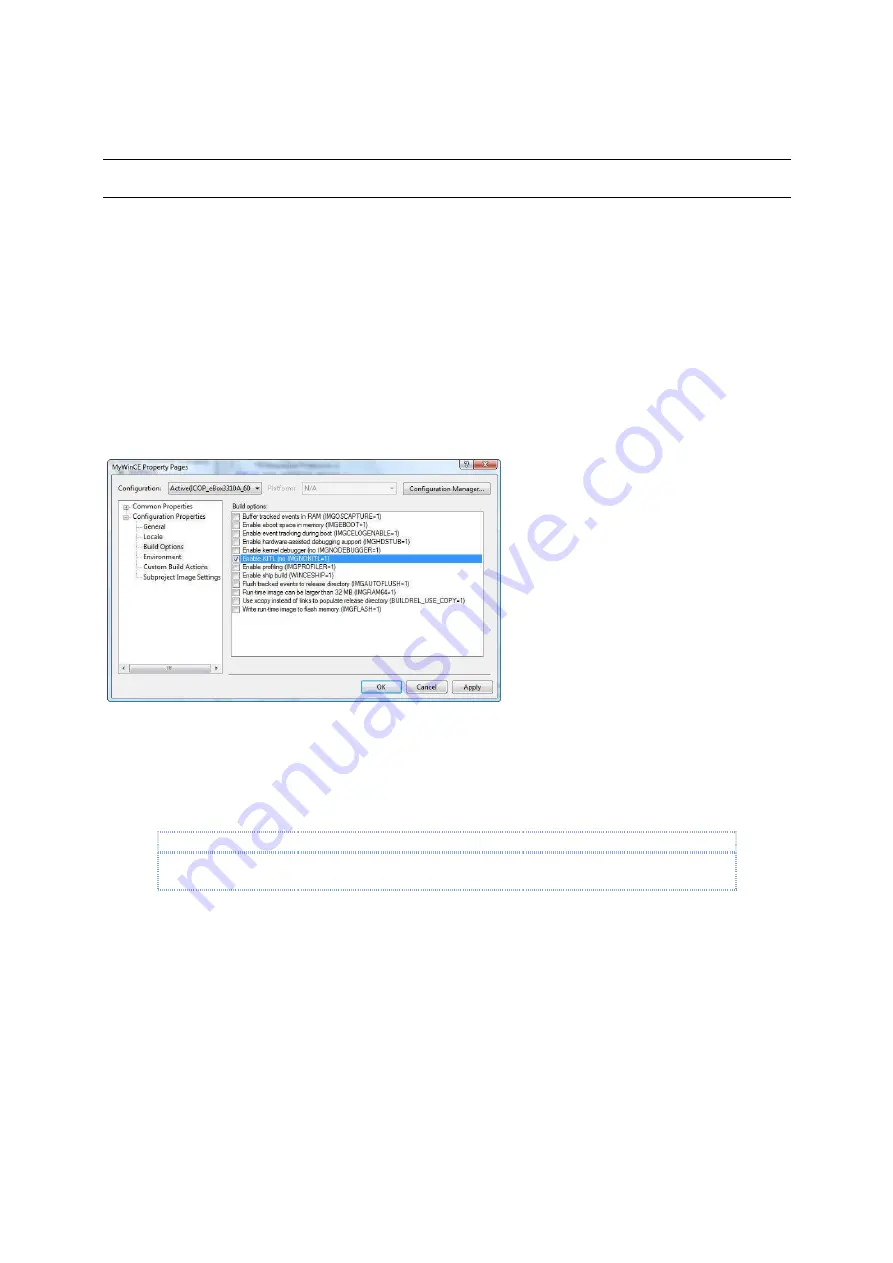
From the
MyWinCE Property Pages
screen’s left pane, expand the
Configuration Properties
node and click on
Build Options
node to bring up the Build options selection window, as shown
in Figure 93.
Fig. 93 -
MyWinCE Property Pages - Build options
•
On the right pane, select the
Enable KITL (no IMGNOKITL=1)
option.
•
Click on the
Apply
button following by the
OK
button to save the setting and close the screen.
•
From the VS2005 IDE, select
Build | Advanced Build Commands | Build Current BSP and
Subprojects
to generate the OS runtime image with KITL enabled.
Note:
Since the OS design has been SYSGEN (built) in the earlier steps, and the build option configuration
change does not require SYSGEN again, we can use the advanced build command to save time.
Download KITL Enabled CE 6.0 OS Image to Target Device
After the build process in the previous step is completed and successfully generated an OS runtime
image with KITL enabled. Follow the procedure in the earlier section (Part-7) to download the
Image to the target device.
After the image is downloaded to the target device, the VS2005 IDE should look similar to the
following screen, as shown in Figure 94.


