Vortex86DX-MSJK CE 6.0 Jump Start - Getting Started Guide
Vortex86DX-MSJK Windows Embedded CE 6.0 R3 Jump Start Rev 2.0
Page 121
•
With the Compact Flash storage card inserted, attached the USB to Compact Flash storage card
adapter to one of the available USB port on the development workstation.
•
After the development station detected and recognized the Compact Flash storage card, launch
the
DiskPrep.exe
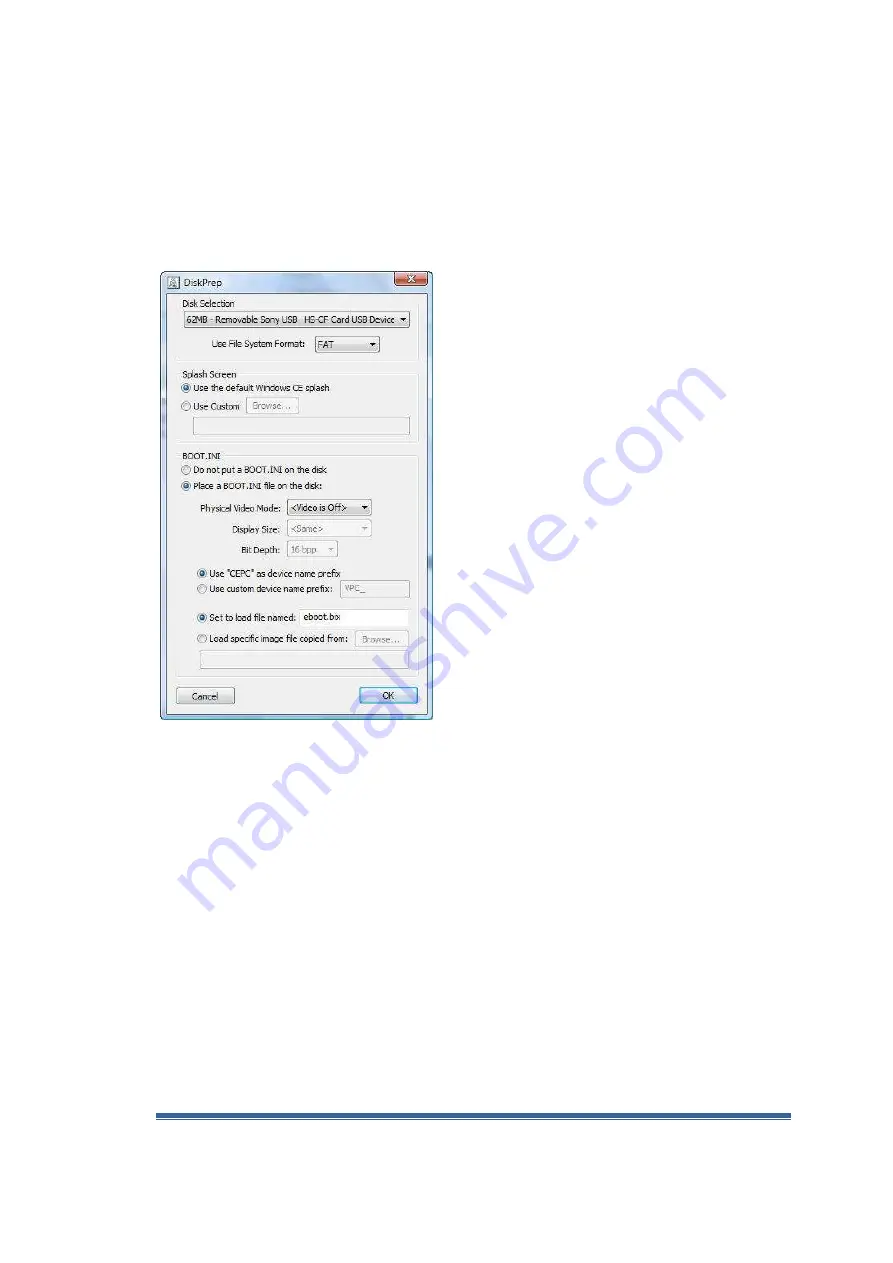
executable from the “C:\MyOSImage” directory, and bring up the DiskPrep
program screen, as shown in Figure H1.
Fig. H1 -
DiskPrep utility
•
The DiskPrep utility detected the Compact Flash storage card’s present and listed the card in the
“
Disk Selection
” drop down list box.
•
The DiskPrep utility can prepare the Compact Flash storage with FAT, FAT32 or exFAT file
system.
•
For this exercise, select
FAT
or
FAT32
.
•
We can create a custom splash screen for display when the CE 6.0 OS runtime boot up. The
default Windows Embedded CE splash screen is used for this exercise.
•
The Boot.ini configuration file is not required for the BIOSLoader to launch the NK.bin CE 6.0 OS
runtime image. With the Boot.ini configuration file, the BIOSLoader can be configured with
additional options. In the “
BOOT.INI
” section, select “
Place a BOOT.INI file on the disk
”.
•
Select “800 x600” for the “
Physical Video Mode
” and 16bpp for “Bit Depth”.
•
We can use the default “
CEPC
” as the device prefix or select “
Use custom device name prefix
”
and enter a customized device prefix. The device prefix along with the last portion of the MAC
address is used as the device ID to identify the device by the development station. Let’s use the
default “
CEPC
” selection.


