Chapter 3. Installation and Configuration
3-31
•
Date
— Enter the date using the MM/DD/YYYY format.
•
Time
— Enter the time using the HH:MM:SS format.
c.
Press Cancel to backtrack through the menu hierarchy.
7.
Auto Cleaning
(Default: Disabled)
a.
Select
Configuration
→
Configure Auto Cleaning
.
b.
Select
Enable Auto Cleaning
or
Disable Auto Cleaning
, and press Enter. The
Auto Cleaning function can only be enabled if there is at least 1 inactive
position in the magazine in the library.
c.
Press Enter again to apply the setting, or Cancel to reject the setting.
d.
Press Cancel to backtrack through the menu hierarchy
Populating the Library with Cartridges
The magazine is opened using the Operator Panel.
To populate the library with data and cleaning cartridges, complete the following
procedure:
1.
From the top menu screen on the Operator Panel, press the Minus key to select
Unlock Magazine
, and press Enter.
2.
Insert cartridges in the magazine.
Note:
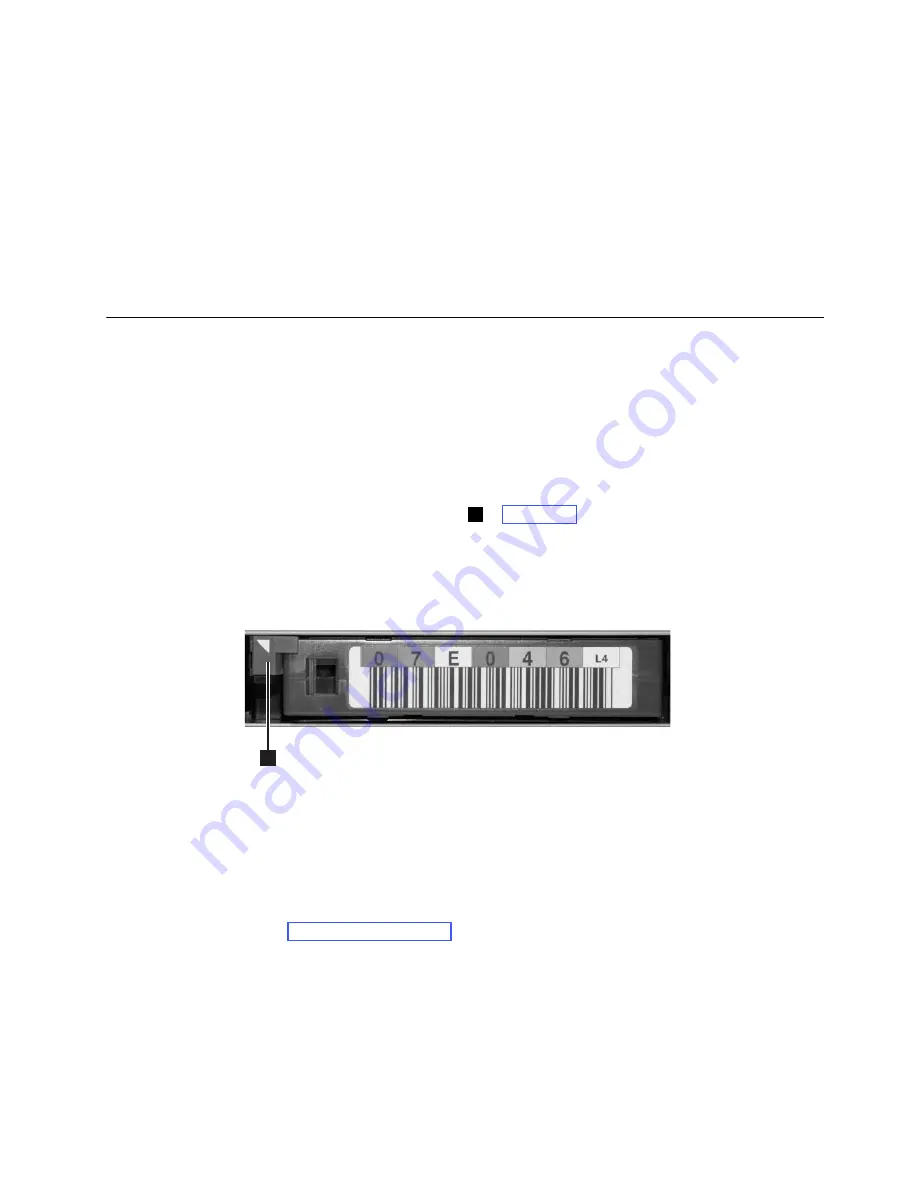
A blue release gate ( in Figure 3-32) in the top left corner of each column
in the cartridge magazine prevents each cartridge from falling out of the
front of the magazine. When manually releasing the gate with one hand,
position your other hand in front of the column opening to prevent
cartridges being ejected by the internal column spring.
Figure 3-32. Cartridge release gate
Note:
Column 5 Tier 2 is reserved as the exchange position. This position is
accessible by the library only. A locking mechanism prevents insertion of
a cartridge into the reserved slot.
Each cartridge must be inserted with the indicator arrow on the leading edge of
the upper surface of the cartridge pointing towards the cartridge magazine (see
Figure 3-33 on page 3-32).
Note:
Do not rely on the bar code label orientation, if attached, to provide an
indication of the correct cartridge orientation. The bar code label should
be right side up if attached correctly.
1
a29z0101
1
Summary of Contents for System Storage TS2900
Page 2: ......
Page 10: ...viii TS2900 Tape Autoloader Setup Operator and Service Guide...
Page 14: ...xii TS2900 Tape Autoloader Setup Operator and Service Guide...
Page 22: ...xx TS2900 Tape Autoloader Setup Operator and Service Guide...
Page 24: ...xxii TS2900 Tape Autoloader Setup Operator and Service Guide...
Page 36: ...1 12 TS2900 Tape Autoloader Setup Operator and Service Guide...
Page 78: ...3 34 TS2900 Tape Autoloader Setup Operator and Service Guide...
Page 114: ...4 36 TS2900 Tape Autoloader Setup Operator and Service Guide...
Page 136: ...5 22 TS2900 Tape Autoloader Setup Operator and Service Guide...
Page 192: ...A 22 TS2900 Tape Autoloader Setup Operator and Service Guide...
Page 220: ...D 10 TS2900 Tape Autoloader Setup Operator and Service Guide...
Page 230: ...F 4 TS2900 Tape Autoloader Setup Operator and Service Guide...
Page 232: ...G 2 TS2900 Tape Autoloader Setup Operator and Service Guide...
Page 238: ...H 6 TS2900 Tape Autoloader Setup Operator and Service Guide...
Page 255: ......
Page 256: ...Part Number 45E3877 Printed in USA GC27 2212 00 1P P N 45E3877...


